The WordPress List block is one of the most heavily used Gutenberg blocks that allows you to create various types of lists in bullet, numbered, and nested indent styles. It provides an easy way to structure your content in organized ways.
Using the List block, you can create step-by-step guides, outline key points, and present a collection of key resources you have. Although this one is a default Gutenberg block, you can apply enough customizations to it to beautify your content presentation.
But most WordPress users don’t know how to utilize this block fully. This is why we are going to cover a detailed step-by-step tutorial in this post, explaining how to use the WordPress List block. Keep reading to the end!
Supercharge Your WordPress Block Editor!

How to Use the WordPress List Block
Although the WordPress List block looks very simple, it has many options you can use in different ways. We will present them to you in the following steps.
Step 01: Add the List Block to Your Post/Page
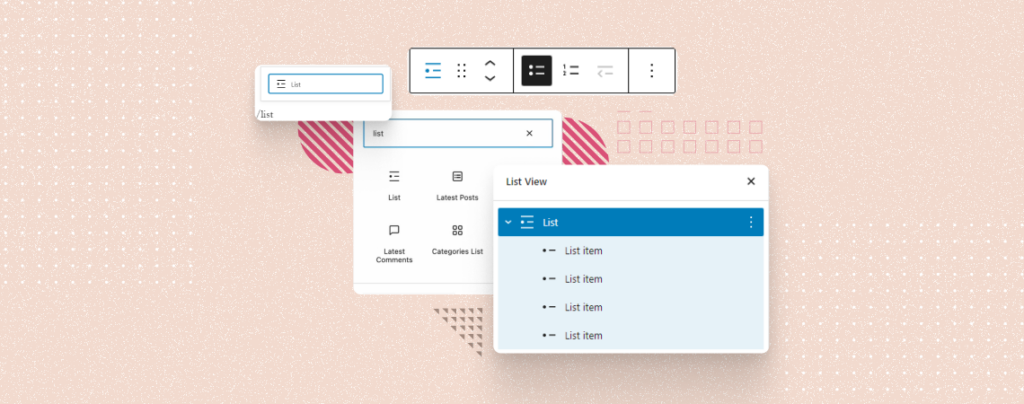
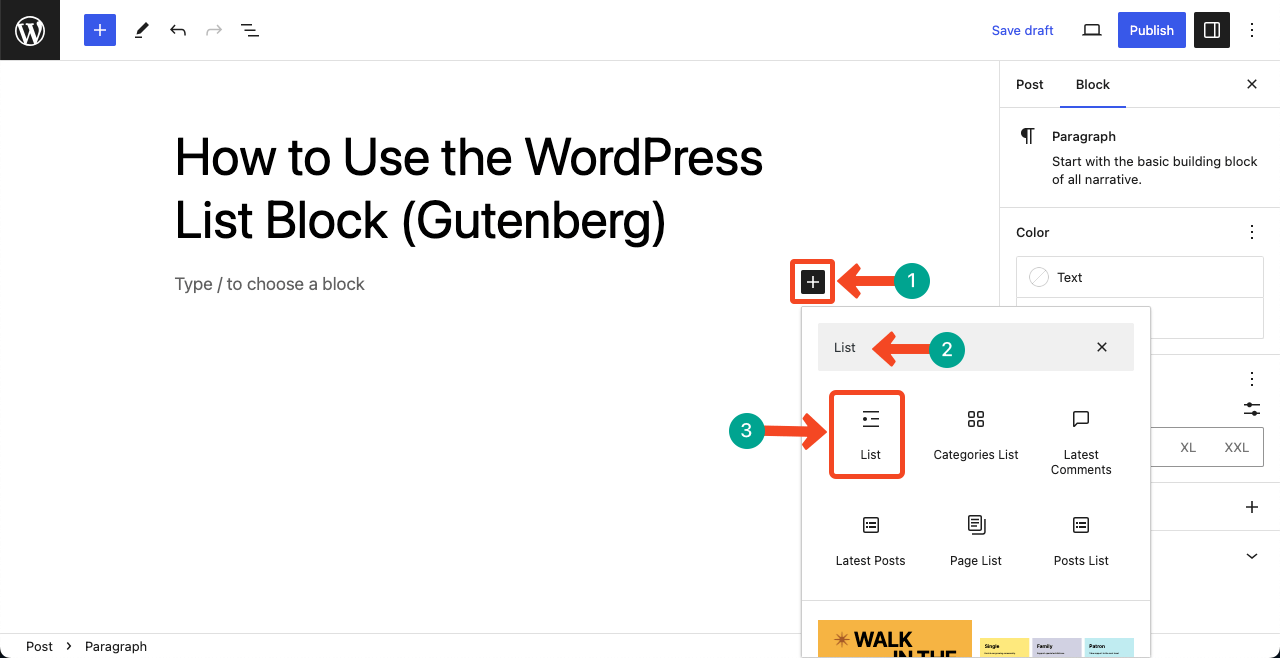
Open your desired WordPress post/page. Press the Plus (+) icon on it. This will open the Gutenberg editor. Type List in the search box. You’ll see the List block appearing immediately below.
Click on the block to add it to your post/page.
Step 02: Select the List Format (Bullet or Numerical Point)
Once the block is added to your post/page, you can add content to it. Below, you can see that we have added some demo content. You may display the list in bullet or numerical ordered format.
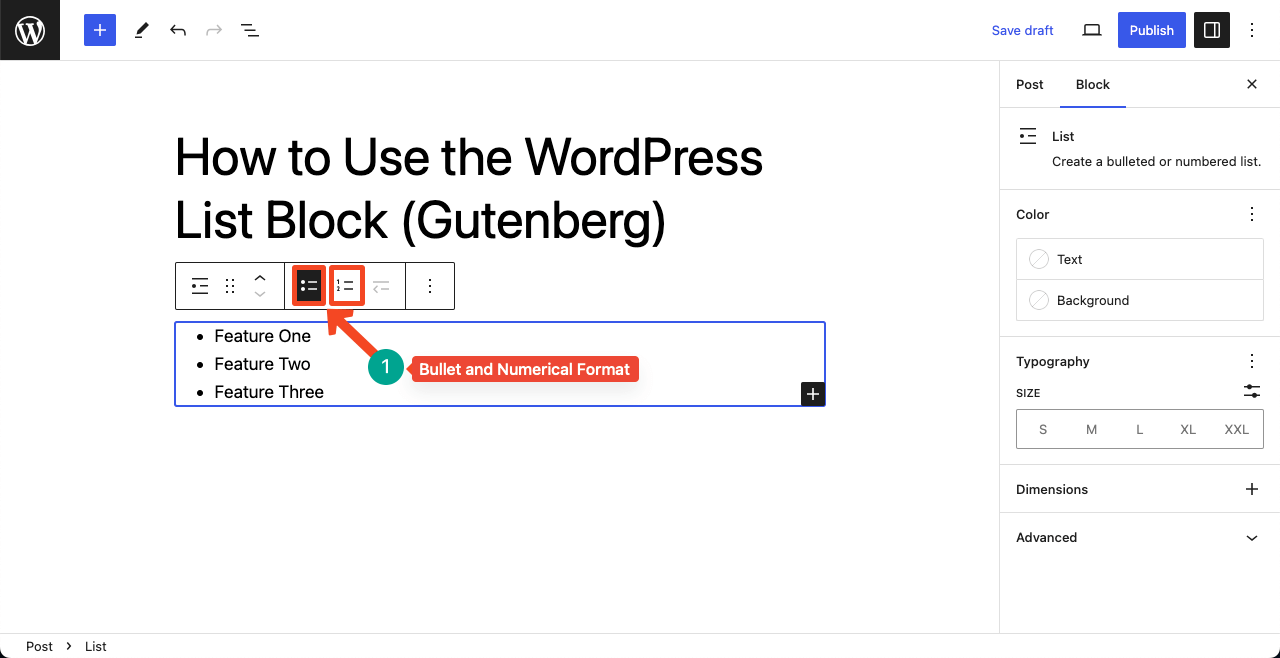
Press the Select List icon as pointed below to change the list format.
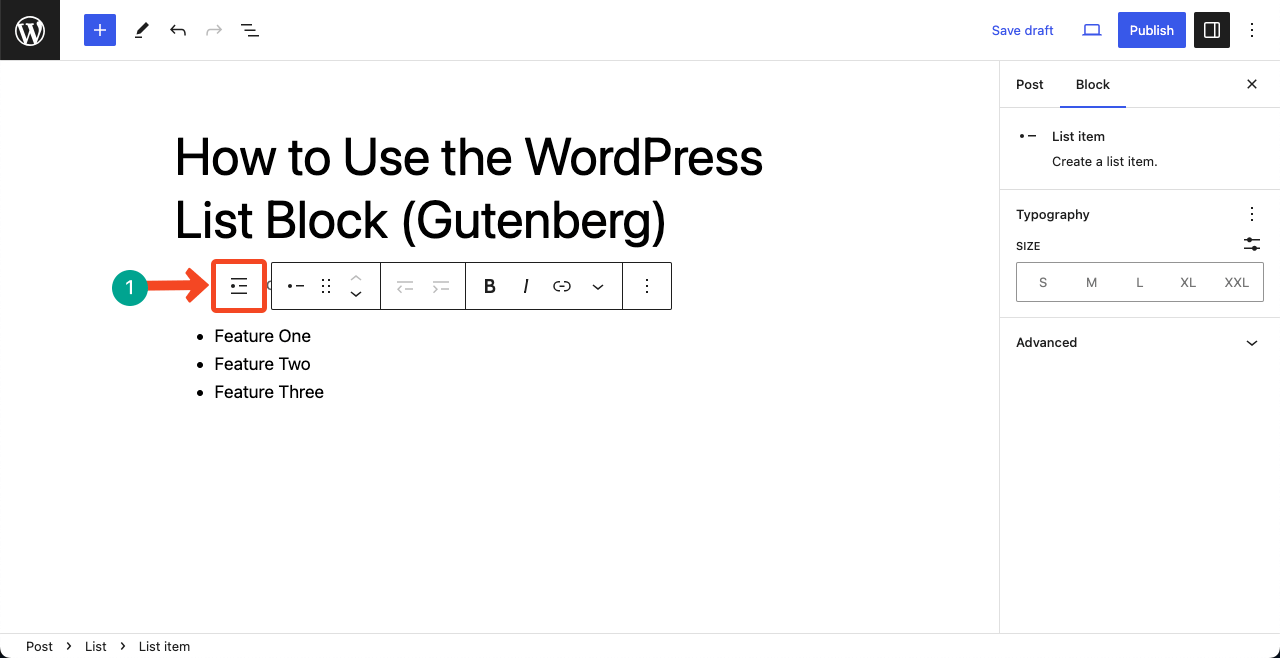
You’ll get the Bullet and Numerical Ordered options appearing on the toolbar. We are selecting the Numerical Ordered format for the tutorial.
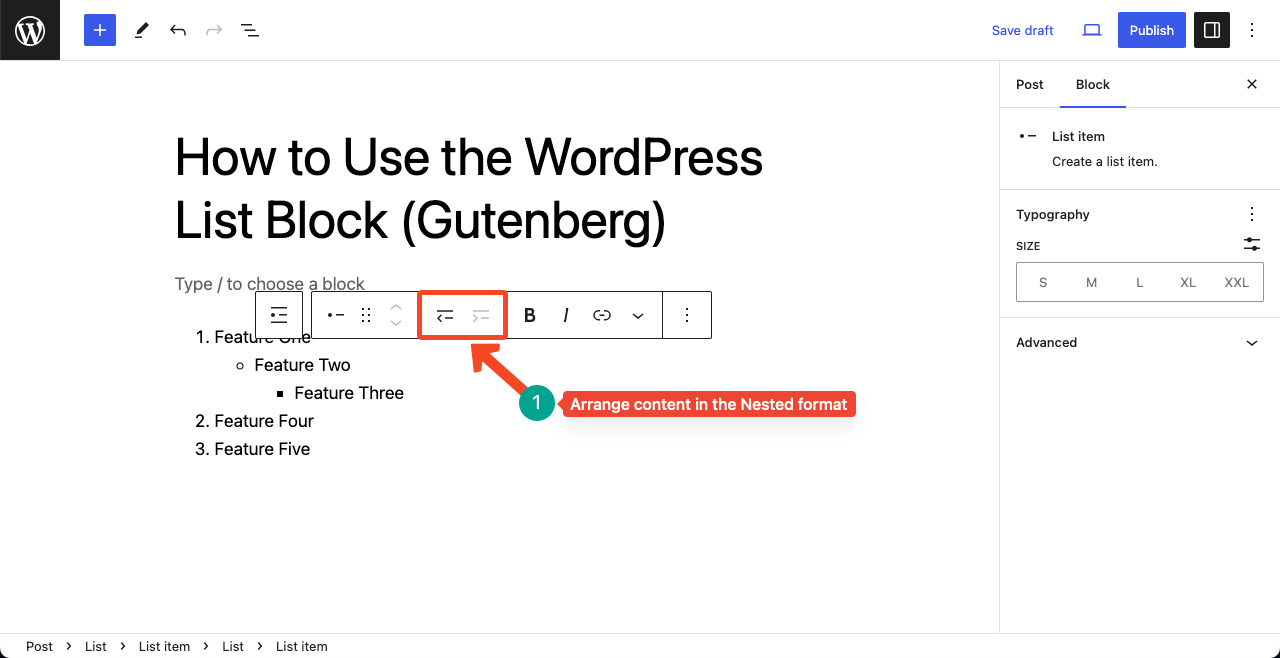
Step 03: Arrange Content on the List in the Nested Format
You will get two options, named Outdent and Indent, on the toolbar. Using these two options, you can move content on the list to the right and left. But this option will not work only for the very first content of the list.
Step 04: Stylize the List
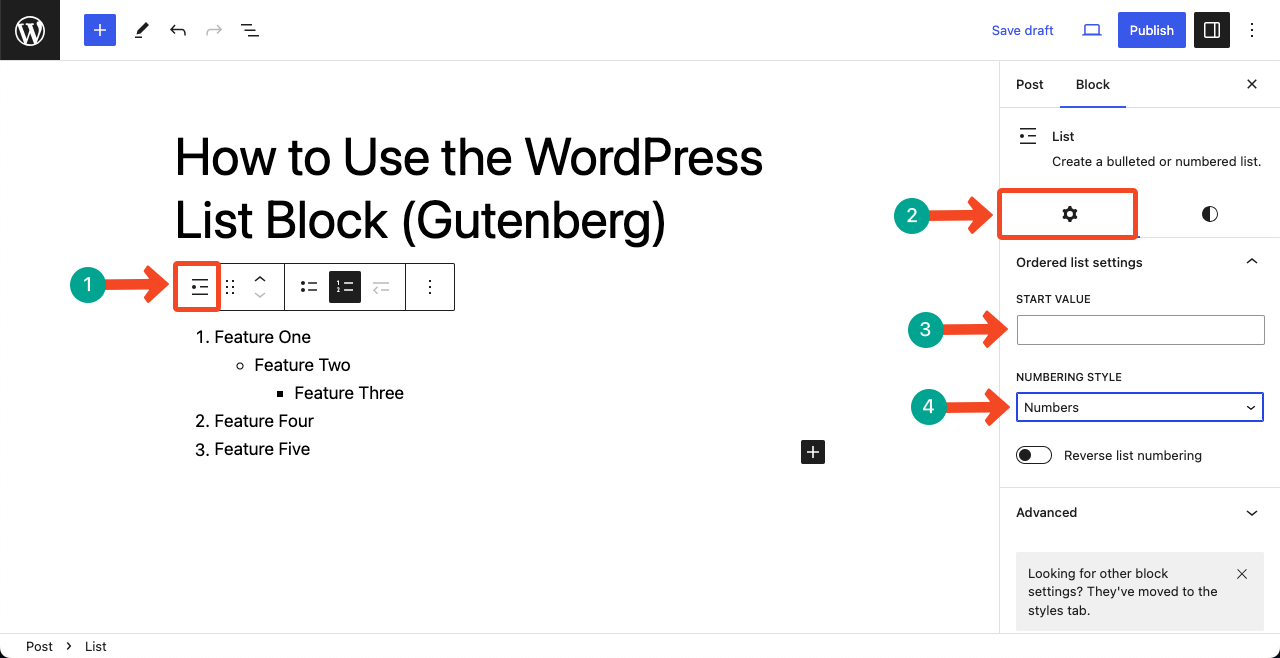
Select the entire List block by clicking the List icon on the toolbar. This will open several additional options on the right sidebar. Jump into the settings tab first. You can do the following things using the options under the tab.
Start Value – You can see our list is starting from the numerical value 1. You can set any different starting value in the box to apply to the list.
Numbering Style – From here, you can change the number format on the list to Alphabetical or Roman format.
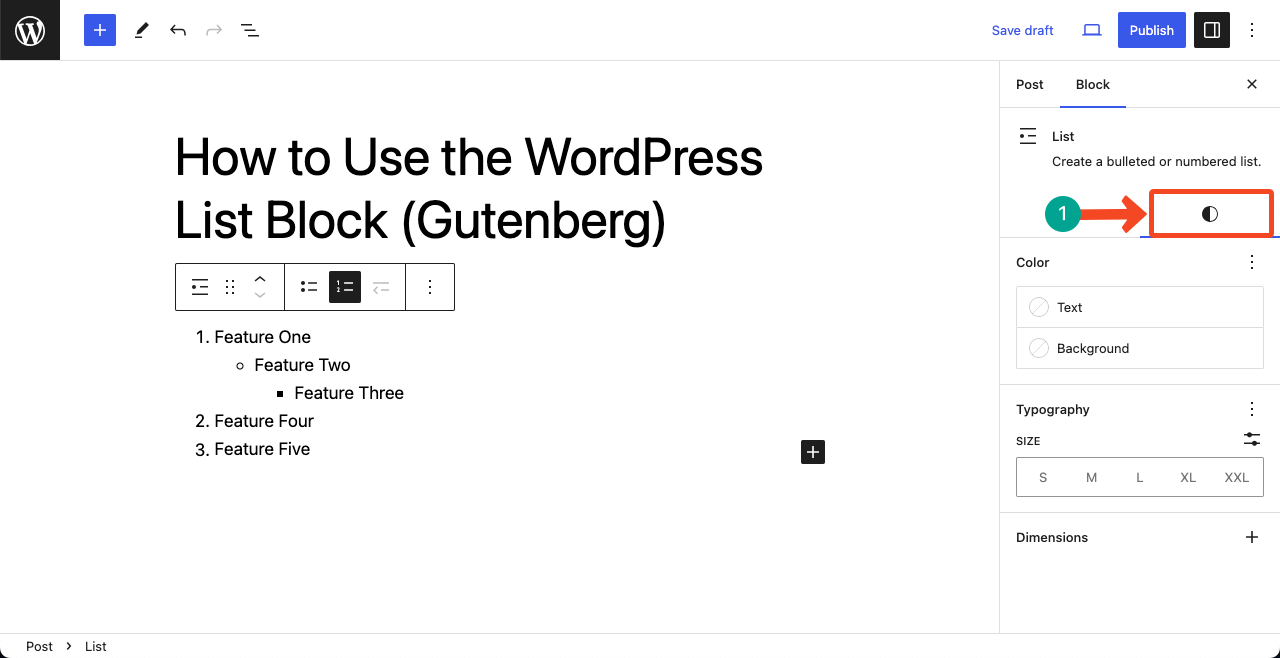
Next, come to the Styles tab. You’ll get options to change the Text and Background color. You can also change the typography and text size from here.
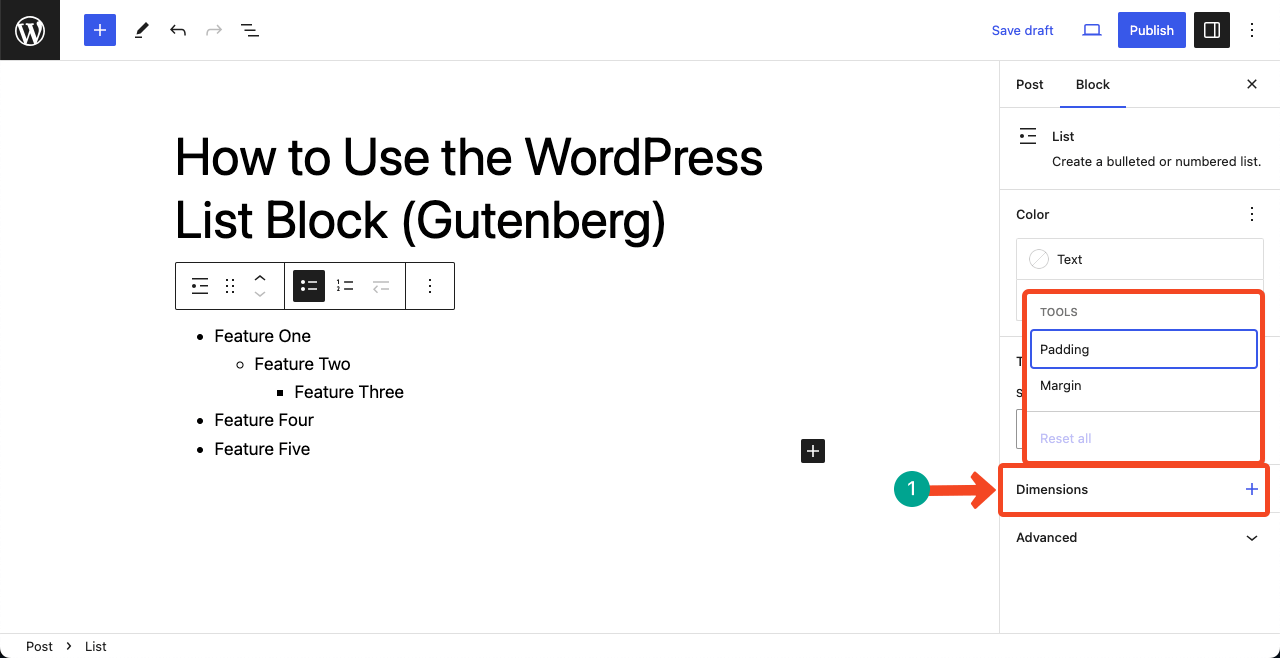
Step 05: Add Padding and Margin
Suppose you have selected the Bullet list format. You’ll then get a different option, named Dimension, on the right sidebar. Clicking on it will allow you to add Padding and Margin between the elements on the List block.
Thus, you can make the full utilization of the WordPress List block.
Conclusion
The WordPress List block is highly useful in showcasing the product or service’s key features, FAQs, and step-by-step guides. You can also use it in comparison tables, product reviews, and testimonial sections.
However, indiscriminate use of this block can negatively impact your SEO score. So, before using the block, make sure the block perfectly suits the objectives and presentation of the content.


Leave a Reply