
Well-designed popups are always a great medium for attracting the right leads.
As someone who is always eager to add ‘exciting’ elements to WordPress websites, I am always on the lookout for new plugins that boost my web building experience. And what else can be more exciting than animated popups that help in lead generation goals?
With a powerful, advanced WordPress Popup Builder, the work becomes so much easy and quick!
So, recently, I came across PopupKit, the ultimate WordPress Popup Builder, or so it claims to be. As it is a WordPress plugin, I downloaded the ‘free’ version from the Plugin Directory and installed it to my WordPress CMS. And then tried out one of the Pro versions a couple of days back, with its Early Bird offer still in effect.
And how did I feel using PopupKit? That’s exactly what I’ll talk about here in detail. Plus, you can decide if you want to grab it now.
Features at a glance
After installing and activating the Free version of PopupKit from WP dashboard, I played around with the Editor Interface. PopupKit has everything you need to convert visitors into customers.
Gamification
The Popup Builder lets you create gamified popups in different styles and ways. You can create gamified popup campaigns to drive engagement with visitors. This is a great way to boost lead generation.
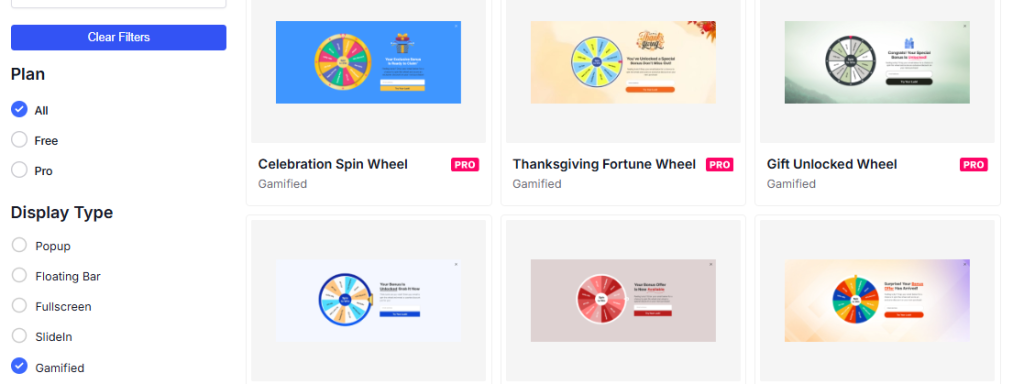
I benefited from the Gamified Wheels templates. PopupKit offers a good number of gamified templates, stylized for user-friendliness and user engagement. You can also customize the templates as per need to make them in line with your needs and brand.
Detailed Campaign Insights and Analytics
A great feature of PopupKit is the analytics it provides to optimize your campaigns for best results. When you activate your campaign, you can follow how much traffic it’s pulling, across which sections of the crowd, and where (geo targeting). You can also check the conversions. You can easily monitor every conversion generated by your campaign with PopupKit.
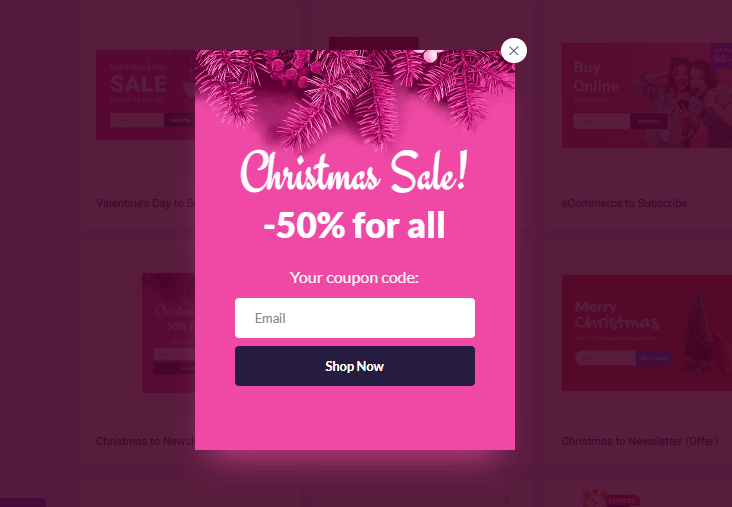
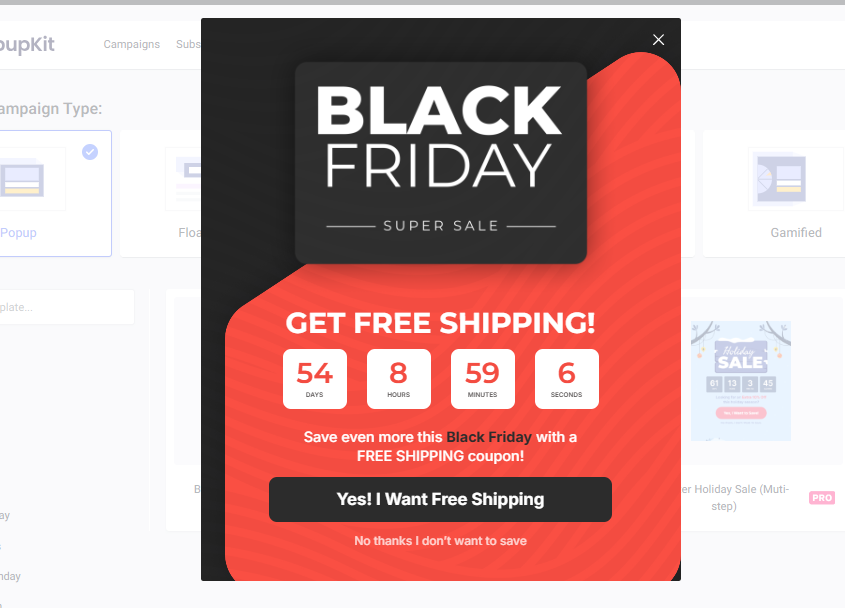
Campaign types for various seasons and occasions
One key benefit I really enjoyed is the types of campaigns the plugin offers. You can select from ready-made templates based on goal, industry, feature, and season.
On one hand, you have the traditional Popup Campaigns that popup when entering a site. You can get popup campaigns based on Cyber Monday, Winter Holidays, Black Friday, Halloween, etc.

Then, you have Fullscreen campaigns that are instant attention grabbers for your audience. But yes, you have the customization option to make them effective rather than annoying.
And the Floating Bar campaign, at the top or bottom of your screens, lets you scroll the site or page without harming your concentration. You can also keep an eye on the floating bars and click whenever you think it’s the right time.
Over 180 Templates
PopupKit lets you choose from 180+ templates and gives you lots of creative options. Based on seasons, industry, goals, and features, I got to customize many templates and speed up my process.
The animations, content, and style you can customize these templates with are quite tempting. I became invested instantly with the options at hand.
Creating Campaigns from Scratch
Besides customizing templates, you can easily and with more freedom build a popup from scratch, especially with the Pro version.
The working process is the same as the free version. But you have more options with the PopupKit blocks (like adding forms and countdown timers) as well as more options for scheduling.
The interface is easy to work around, helping you feel at ease.
Learn: How to Create a Popup Campaign from Scratch with PopupKit
Display Conditioning and Rules
The plugin ensures your popups appear the right number of times, during the right times, at the right places, and to the right audience. I was intrigued by how I could launch my targeted campaign by showing popups on selected pages. posts, tags, categories etc.
You can also trigger popups based on exit intent, inactivity, custom clicks or other user actions. Plus, you have the option to block IPs and set geo targeting for better lead generation.
Popups that help generate leads
The number of templates and features that I noticed in PopupKit when using it offers a strong way to improve lead generation. For instance, its scheduling options, geolocation targeting, IP blocking, and analytics help create effective lead generation popups.
You can also collect the lead gen info by learning who interacts with your popups, including their country, device, browser, and email.
Easy integrations with top tools
PopupKit lets you integrate with a bunch of APIs. And these are quite valuable, too. Some prominent names include Mailchimp, WooCommerce, Zapier, HubSpot, Slack, and more, all in one tool!

Hands on experience of PopupKit
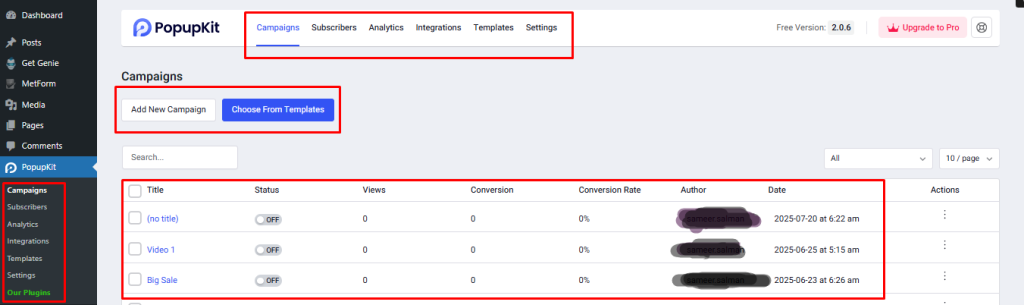
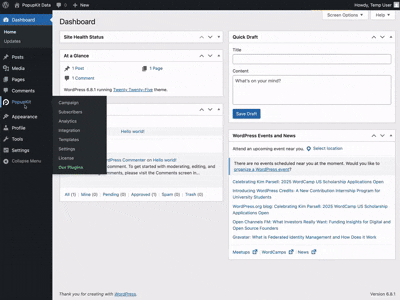
At the WordPress dashboard, when I clicked on ‘PopupKit’ in the menu on the left, I noticed its first options that you work with. It includes:
- campaigns
- subscribers
- analytics
- integrations
- templates
- settings
By default, you will notice the “Campaigns” option selected. This is actually where the game begins once you pick either ‘Add New Campaign’ or ‘Choose From Template’. The former lets you create from scratch. The latter, as the name implies, lets you customize from the 180+ prebuilt campaign templates of PopupKit.
Below the two options are a list of campaigns created, either running or pending for publish.
And guess what I did next?
To make my life easy, I chose to customize a template from the existing collection!
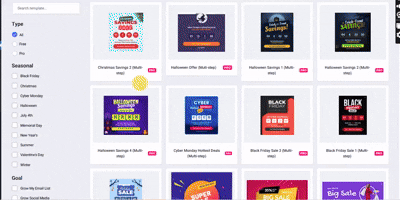
Templates Galore
The moment I entered the collection of templates, I was taken aback. Not knowing what to do, with SO MUCH at my disposal!
So, the first thing you will notice is the ‘Select a Campaign Type’ option. PopupKit offers six broad campaign types as of now: Popup, Floating Bar, Fullscreen, SlideIn, Gamified, and Inline.
Moreover, there are numerous themes you can select for your template based on Season, Goal, Industry, and Feature. Both free and paid.
So I went for the most engaging one, Gamified Campaign type, and picked a Thanksgiving Fortune Wheel template. Before using the template, I took a look at the Live Preview to get a glimpse of the template. And then I clicked on “Use Template”.
The following popped up, prompting me to add a campaign name.
I typed in a random name and pressed “Import”, leading me directly to the PopupKit editor screen.
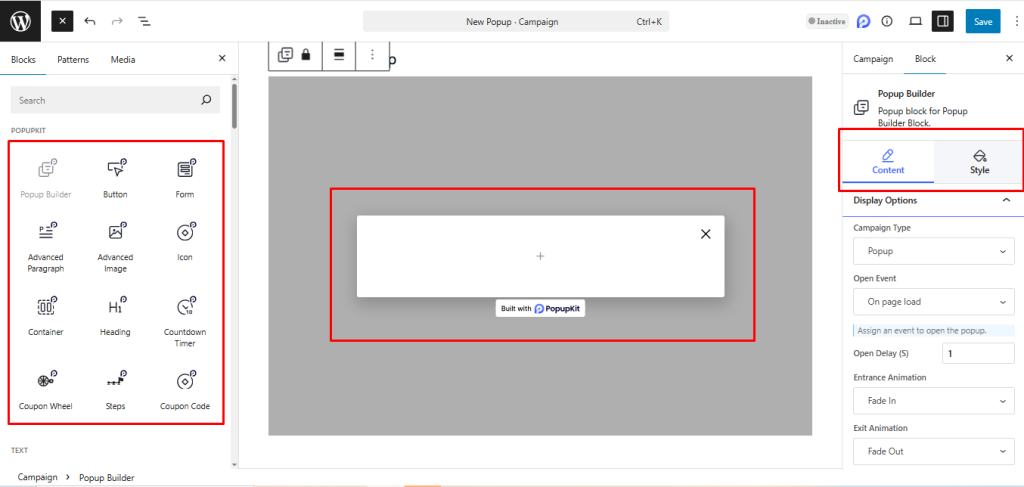
Entering the Editor
The PopupKit Editor opens and you get the view of WP Gutenberg elements. However, this time there are Popupkit blocks as well as block editors for the template at hand.
To the right of the screen, you will see a list of features to work with under Block > Content. Or, Block > Style. For that, you would need to have the template selected. However, we will first customize the template with the “+” and get the layout ready.

I prefer going directly to the top left and clicking on the “+” as it gives me the full list of blocks.
From there, I will go for the PopupKit blocks by typing on the search bar “popupkit”. And it gives me the following options:
Looking at the prebuilt template that I chose, the heading feels a bit off So, the first thing I’ll do is edit the text and add a new ‘Heading’ block to the template dragging it to the editor area. There, I’ll rewrite the Heading to give the popup more context and meaning.
But hey, I would like to change the Form block text “Try Your Luck” to Try Now. So, I’ll simply reword it by selecting it.
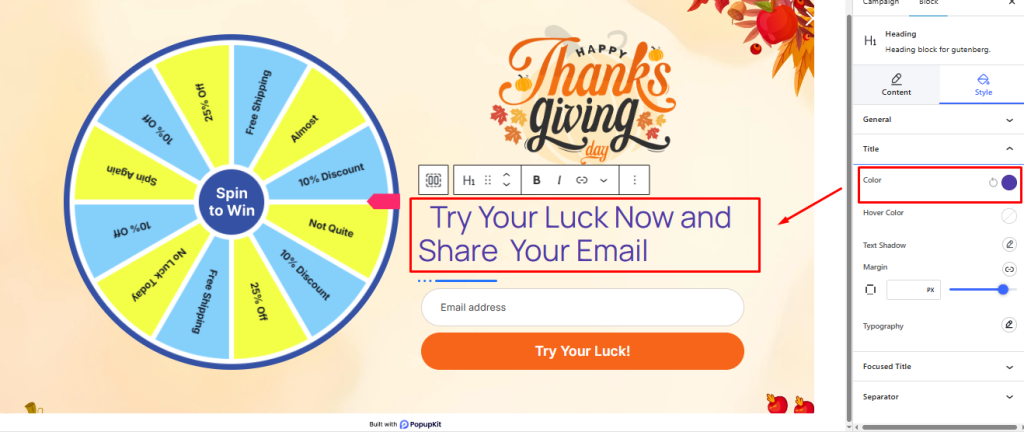
I’ll change the font color so that it contrasts well with the background. To do that, move to Block > Style > Text > Color and select purple.
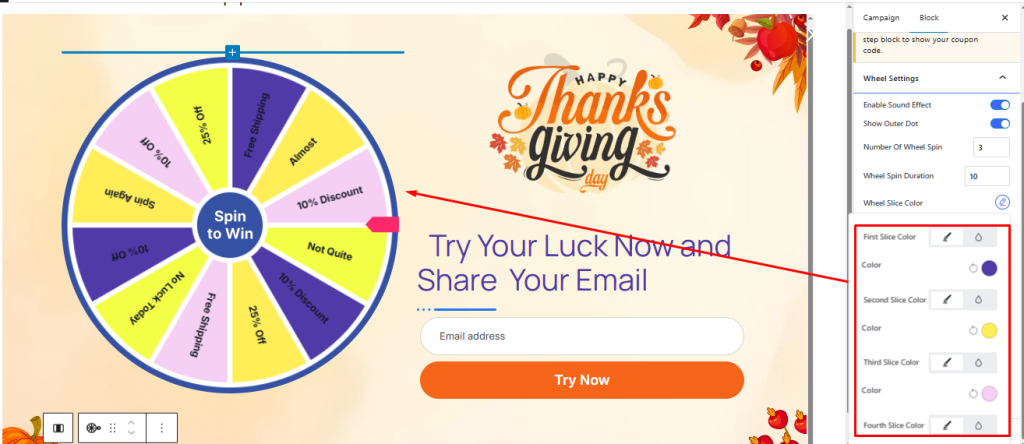
Next, I move to the most engaging part of the gamified popup, the Coupon Wheel. To customize the wheel, I navigate to Block > Content > Wheel Settings. There, I can edit the sound effect, decide on the number of spins, duration of spin, slice color, flipper coin customization, etc.
The two things I’ll do are change the slice colors and flipper coin.
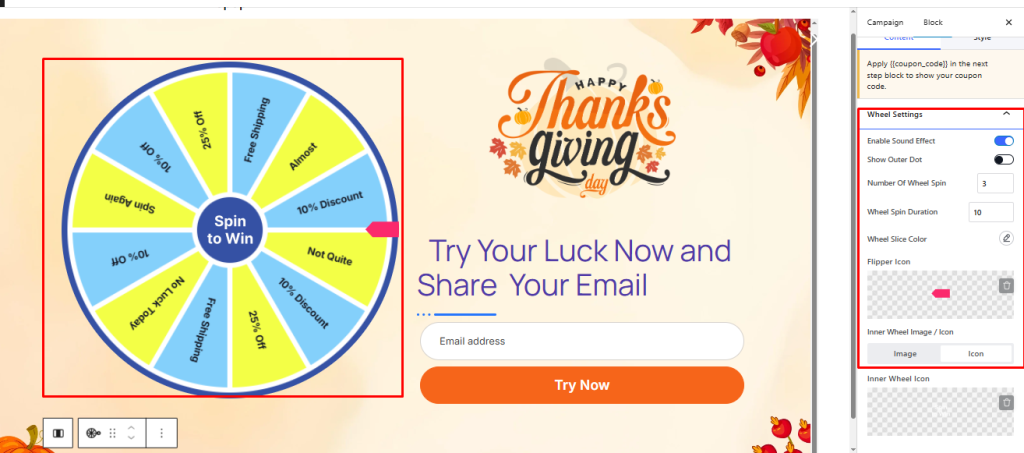
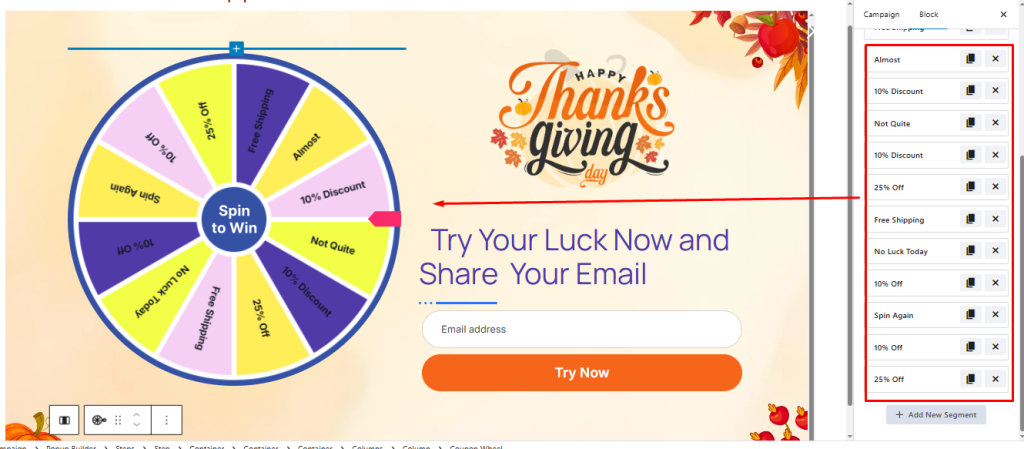
Now, I’ll shift my focus to Block > Content > Wheel Content. There, I can change the label for each slice of the wheel. And also add a coupon
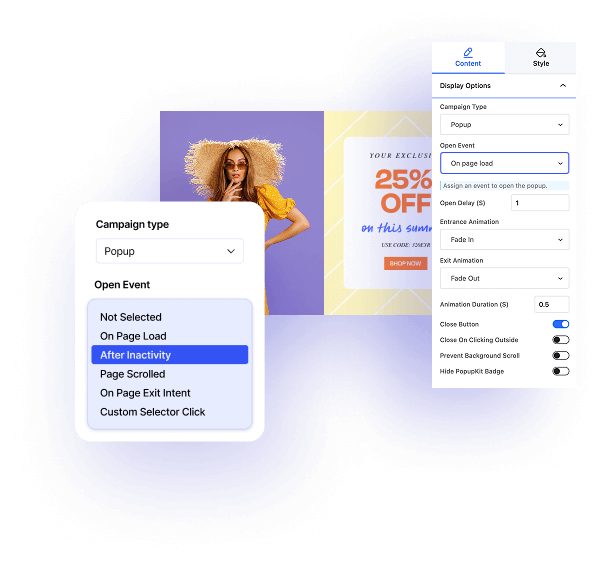
Then, I would need to set how, when, and where the popup shows up. So, going to Block > Content > Display Options, I selected Open Event, and dropped down to the only available options in the free version, On Page Load. Following that, I adjusted the Open Delay time. And added the Entrance and Exit Animations with duration.
Moving on, I’ll set the Display Conditions next. Here, you need to add a Condition > Include > Entire Site / Singular / Archive / WooCommerce / Custom URL. Under all these conditions, there are particular parameters that you have to set for the optimum outcome.
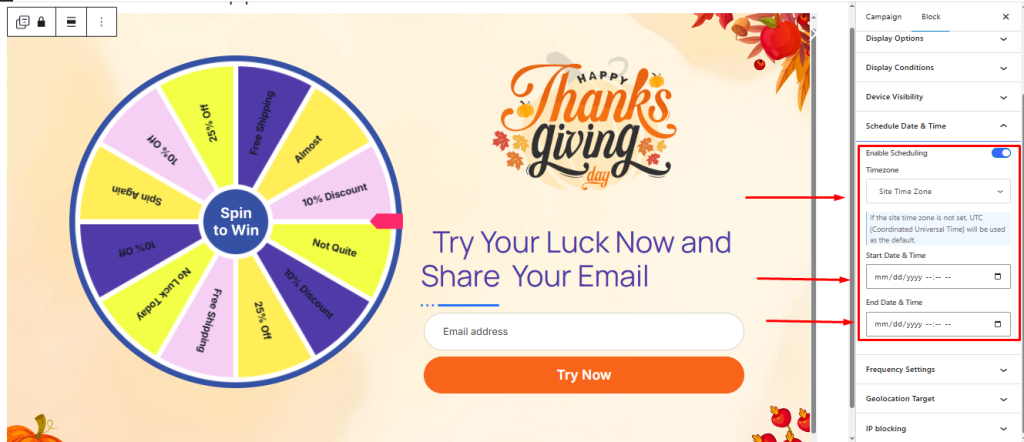
Once that’s sorted, I will select the Device Visibility for Computer, Mobile, and Tab. Following that, I move on to the Scheduling options. There, I needed to enable scheduling and then set the time zone, start date, and end date.
So on to the next step, where I set the Frequency options. You can only select Everyone, Once a Day, Returning and New users, along with Every Visit, Every Session, etc.
Finally, when I want to select the Geo Tracking and IP Blocking for my popup campaign.
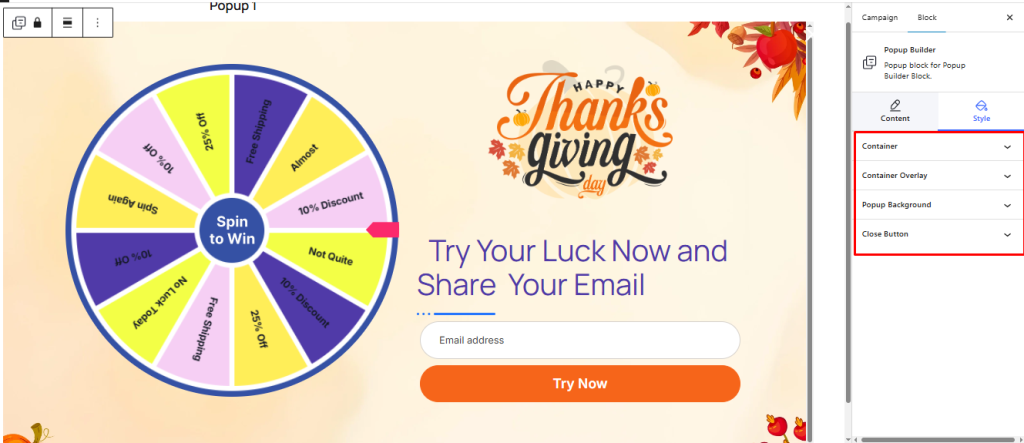
You can also stylize and customize the popup template by choosing Block > Style > Container/Container Overlay/Popup Background/Close Button and editing the parameters there.
In fact, you can customize all the blocks of a popup as per your needs, choosing Content or Style.
But remember, to get the best outcomes and options, YOU NEED TO BUY THE PRO VERSION! And that’s exactly what I did. ‘Cause, PopupKit seems to be a pretty handy tool for lead generation using popups. So, you can spend some bucks on it. Especially if the ROI is worth it.
Claiming & Using the ‘Ultimate Popup Builder’
I visited the PopupKit landing page. and clicked on “Claim Now” on the floating bar popup on top of the screen and entered the Deals page. From there, I selected the Personal yearly package to kickstart my Pro journey with PopupKit. I purchased a license code for the package and began setting up the product.
To activate your Pro License, from your WP dashboard > Go to PopupKit > License > License Setting > Your License Key Here. Add your purchased license key in the box and click Active Now.
Who should use it?
If you are someone trying to increase leads through popups, then PopupKIt is a must. Plus, if you want to improve your website with better elements and more engagement, you must try PopupKit. The ROI I believe, will be worthwhile.
Some use cases and templates
PopupKit lets you use different campaign types with various templates for different occasions, seasons, and reasons.
Promoting Events
You can create popups to let audiences know about an upcoming event. Or, promote a discount offer to celebrate that occasion/event.

Grow Email List
A direct way you can get help in lead generation with PopupKit popups is by growing an email list by collecting emails. This is a sure-shot way to gain long-term users, if your campaigns are created correctly.
Retargeting Users
You can also redirect users to your landing pages that you want to highlight for a particular campaign. Understanding the needs of your target audiences, you can easily create popups that will ensure the visitor lands at the right place.
What makes PopupKit different?
PopupKit offers the flexibility of Gutenberg blocks with a full-fledged campaign management feature. It’s a drag‑and‑drop builder with 180+ modern templates, gamification popups, multi-step campaigns, smart scheduling, granular triggers, real‑time analytics, and built-in lead verification. All within the WordPress dashboard.
Unlike traditional popup builders that rely on proprietary editors, PopupKit uses the built-in block editor for strong design freedom. You can easily work with conditional display, device‑specific popups, A/B testing, and integrations with Mailchimp, WooCommerce, Zapier, HubSpot, Slack, and more
Head‑to‑Head Feature Comparison
Feature |
PopupKit |
OptinMonster |
Popup Maker |
ConvertPlus |
Elementor Popup Builder |
Editing Interface |
|||||
Templates & Blocks |
180+ ready templates |
700+ responsive templates |
100+ templates; |
||
Triggers & Targeting |
Exit‑intent, on‑click, scroll, two‑step; behavior filters & modules |
||||
Analytics & Testing |
Real‑time analytics dashboard; conversion tracking; A/B testing |
No built-in analytics |
|||
Integrations |
|||||
Unique Differentiators |
Combo of popups, info bars, slide‑ins, multiple positions |
||||
Pricing Model |
One‑time license on CodeCanyon starting $22/year; bundle with themes; tiered support |
Included with Elementor Pro (starting $59/year); no standalone popup pricing |
Pricing Plan
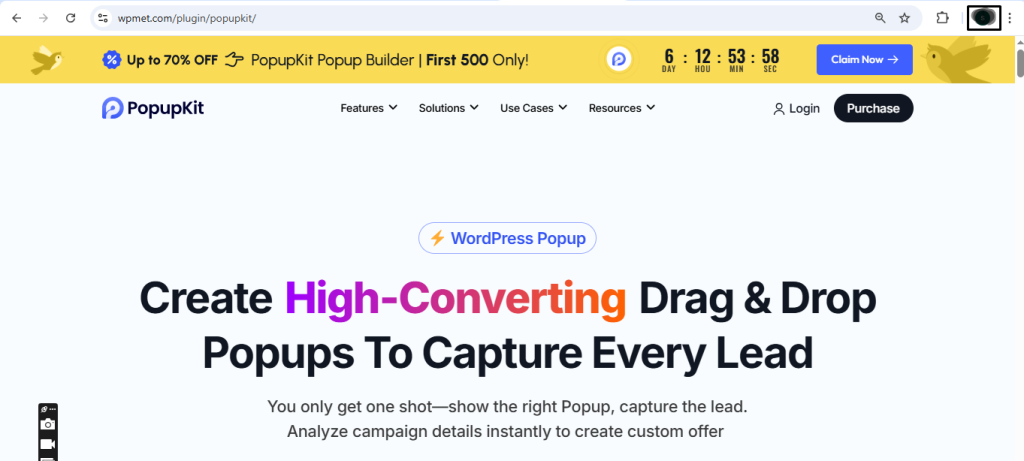
Currently, PopupKit is offering discounts, up to 70%. And that too for only the first 500 users. So, you can purchase NOW to avail the discount or skip it, it your own loss! Remember, time is flying by, so better hurry up!
In case you feel like skipping it, then the yearly and lifetime pricing are as follows:
Yearly subscription plans
Tier |
Price per year |
Highlights |
Personal |
$31.60 / year |
5‑site licence, 1‑year updates & support |
Professional |
$79.60 / year |
10‑site licence, 1‑year updates & support |
Agency |
$119.60 / year |
Unlimited‑site licence, 1‑year updates & support |
Lifetime (one‑time‑payment) deals
Tier |
One‑time price |
Highlights |
Personal |
$59.70 |
5‑site licence, lifetime updates & support |
Professional |
$119.70 |
10‑site licence, lifetime updates & support |
Agency |
$179.70 |
Unlimited‑site licence, lifetime updates & support |
These amounts include the Early‑Bird discount (60 % off for yearly plans, 70 % off for lifetime deals). Prices may rise once the promotion ends. All plans unlock the same feature set; the differences are license count and support/update duration.
Final Verdict, is PopupKit the Ultimate Popup Builder?
PopupKit is the new kid on the block, making all the noise with its interactive popups, especially the gamified ones, and advanced analytics. Its user-friendly interface and editor that lets you create popups from scratch help you build popups for lead generation. But of course, there is room for improvement. Which I am sure it will optimize as it becomes more prevalent.
It is a good alternative to popup builders like OptinMonster, Popup Maker, Popup Builder, etc. With an edge over gamified popups, usable templates, and real-time analytics. It comes close to being the ultimate popup builder. But there is some work to be done.
VERDICT: 4/5. A must-buy popup builder for gamified popups and campaign insights.
FAQs
1. Can you try PopupKit for free?
Yes. “Download for free” from WordPress Plugin Directory > PopupKit > Download.
2. What features does PopupKit offer to edit campaigns?
PopupKit’s editor combines with the Gutenberg editor’s drag‑and‑drop canvas
Real‑time analytics & instant reporting so you can iterate without leaving WordPress CMS
180+ ready templates that you can import and tweak.
Display & trigger rules like exit intent, scroll depth, inactivity, click, page‑level, device, geolocation, and more.
Styling panel for fonts, colours, animations, and full‑screen, floating‑bar, slide‑in, sidebar, or lightbox formats.
Smart scheduling & frequency controls to launch, pause, or loop campaigns on chosen dates/times.
3. How many packages does PopupKit have?
Currently, it has three license tiers: Personal, Professional, and Agency. Each is available as a yearly subscription or a one‑time lifetime deal (for a total of six purchase options, but only three core packages).


Leave a Reply