
Having a sitemap for your WordPress site is crucial to ensure your content is visible to search engines. A sitemap helps search engine crawlers to find and index all posts and pages.
Now the good news is WordPress comes with a built-in sitemap. That means when you install WordPress, it automatically generates a sitemap for your site.
In this post, I’ll show you how to check your default sitemap and create an advanced sitemap using a plugin.
Before diving into the tutorial, let’s learn more about the sitemap.
What is a Sitemap?
A sitemap is a list of posts and pages on a website. It may include other resources like images, videos, documents, etc. Search engine crawlers mainly use it to better website content.
Sitemaps are of two types XML and HTML.
XML: This type of sitemap contains metadata together with the website’s URLs and all the information, URL update information and how soon the changes occur, etc.
HTML: This type of sitemap provides straightforward navigation for the visitors to your website. It specifies which pages are the shopping pages or contact us pages. It makes your website user-friendly and gives you the benefit of ranking in search engines.
It is recommended to have XML and HTML both sitemaps in your WordPress website.
Now let’s dive into the tutorial.
Creating a Sitemap in WordPress Without a Plugin
From Version 5.5, WordPress introduced a built-in sitemap feature. That means an XML sitemap will be generated automatically. You don’t need to do anything.
You can check the sitemap by adding wp-sitemap.xml at the end of your domain name. (Example – https://yourdomain.com/wp-sitemap.xml)
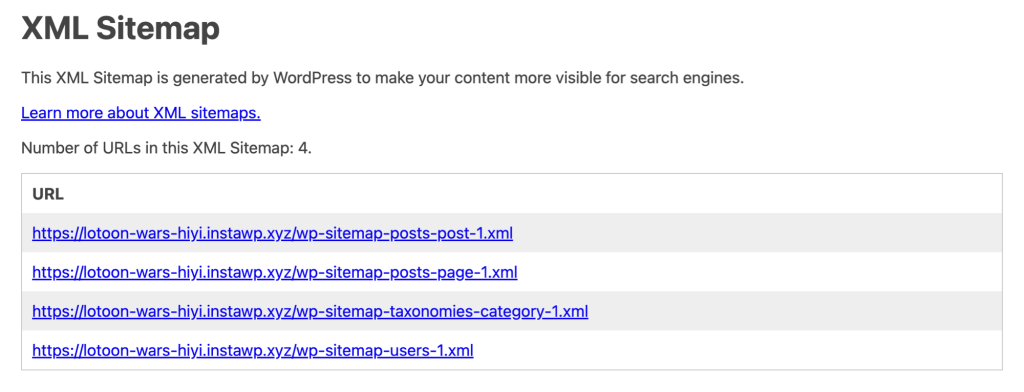
This a very good feature for a new WordPress site to make sure that the content is visible to search engines.
However, the default sitemap is not very flexible. It doesn’t allow users to control which URLs to add or remove.
Creating a Sitemap in WordPress With a Plugin
Almost all major SEO plugins let you create a sitemap. There are some individual sitemap plugins as well. But it’s better to use an SEO plugin.
We use and recommend Rank Math. It has everything you need to make your WordPress site SEO-Friendly.
Now let’s see how to create a sitemap using the Rank Math plugin.
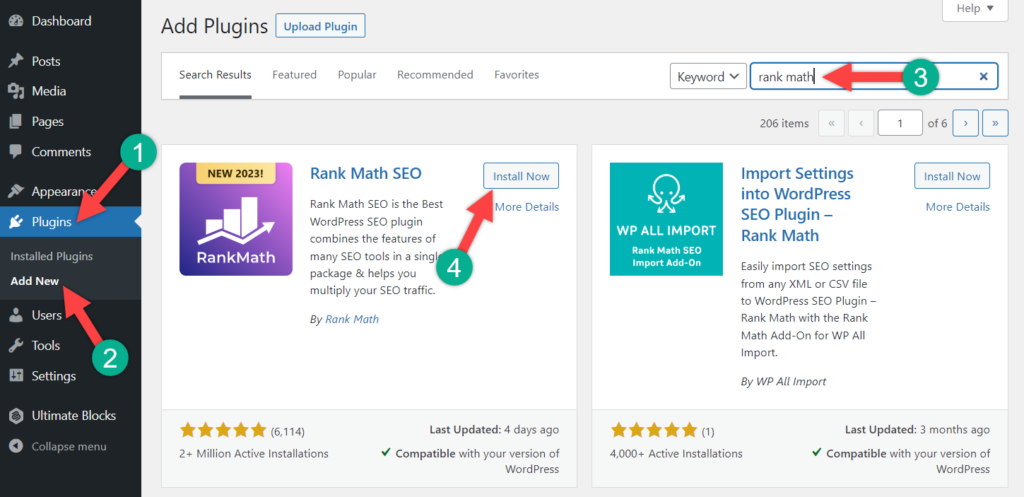
First, install and activate the Rank Math plugin. (Read: How to Install a Plugin)
Once you’ve activated the plugin, go to your WordPress Dashboard and click on ‘Sitemap Settings’ from the ‘Rank Math’ menu.
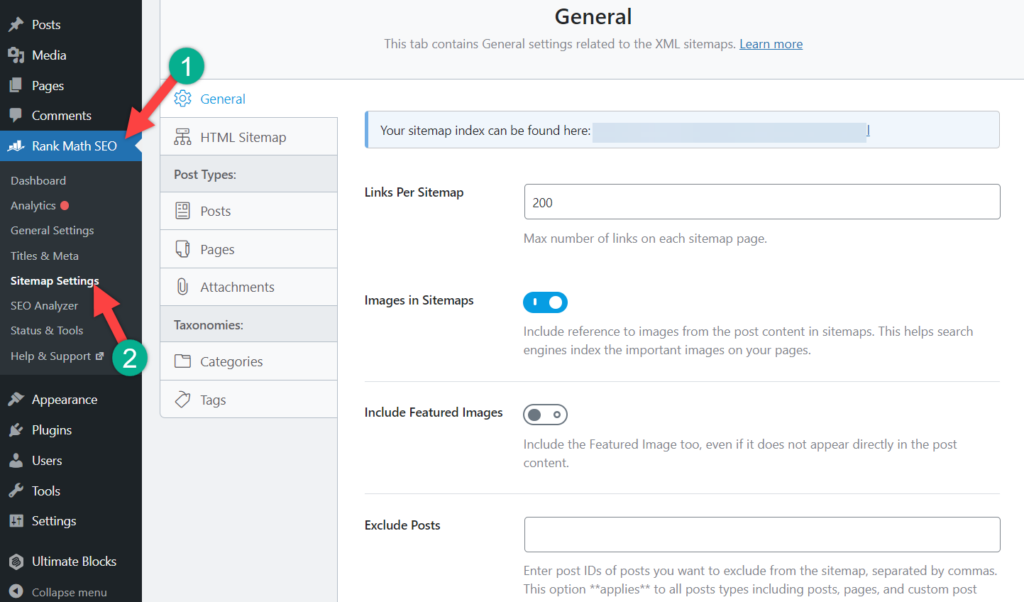
Your sitemap will be generated automatically, and it will overwrite the default site. Just click on the marked link, and it will take you to the sitemap page.
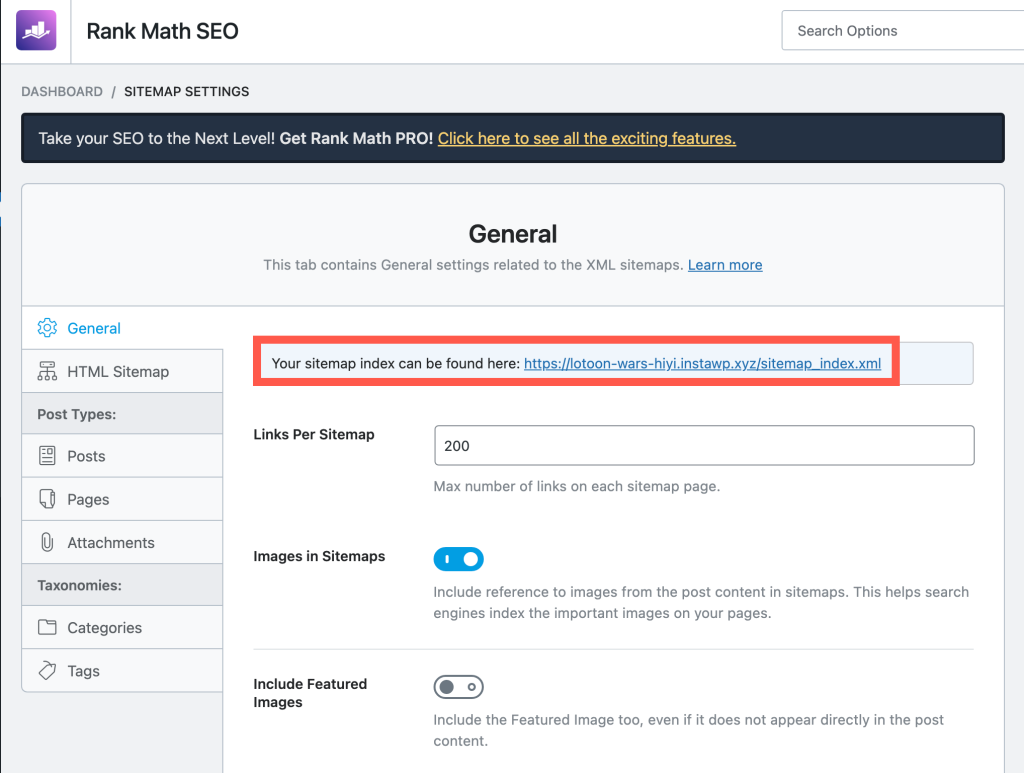
That’s it. Your sitemap is ready. The new sitemap will look like this –
If you want, you can make changes from the ‘Sitemap Settings’ option. But the default options are good to go.
Submitting Sitemap to Google Search Console
Before you submit your XML sitemap to Google, you have to verify the site ownership via Goole Search Console.
Once your site is verified, select site (1) and navigate to Sitemaps (2). Then enter your sitemap URL (3) and click on the ‘Submit’ button (4)

If the process is successful, you’ll get a notification like this –
That’s it. You’re done.
Conclusion
Hope this tutorial helped you to create a sitemap for your WordPress site. If you’ve faced any issues while creating your sitemap, feel free to let us know via comment.
If you’ve liked the post, please consider sharing the post.


Leave a Reply