
If you want to add extra space between blocks in WordPress, follow today’s tutorial.
Today, we will discuss “how to add space between blocks in WordPress” without using any plugins. We will use two of WordPress’s core blocks to add space.
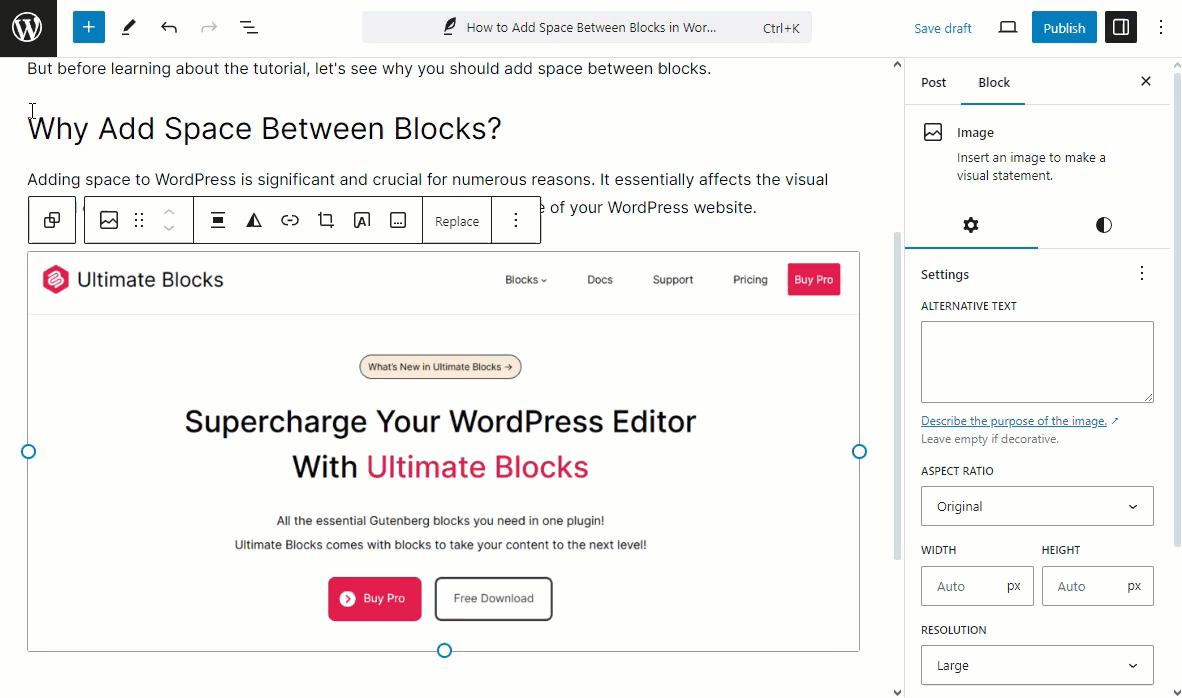
But before learning about the tutorial, let’s see why you should add space between blocks.
Why Add Space Between Blocks?
Adding space to WordPress is significant and crucial for numerous reasons. It essentially affects the visual appeal of the content, its readability, and the overall user experience of your WordPress website.
Here are some of the reasons why spacing between blocks matters.
- Improves Readability: Adding space between blocks makes reading your text and media easier. Blocks with no space often confuse visitors, making them difficult to understand.
- Prevents Overlap or Clutter: if you do not add space between different blocks, such as images, buttons, and text, it will look cluttered. Adding space ensures content elements have their own space, avoiding layout issues.
- Enhances Visual Appeal: Addig space helps improve the website’s overall design, making it more attractive and professional-looking. On the other hand, crowded or cluttered content looks unprofessional.
Now, let’s focus on our main part below.
How to Add Space Between Blocks in WordPress
Today, we will show you two ways of adding space between blocks; the first method is below.
Method 1: Add Space Between Blocks Using the Spacer Block
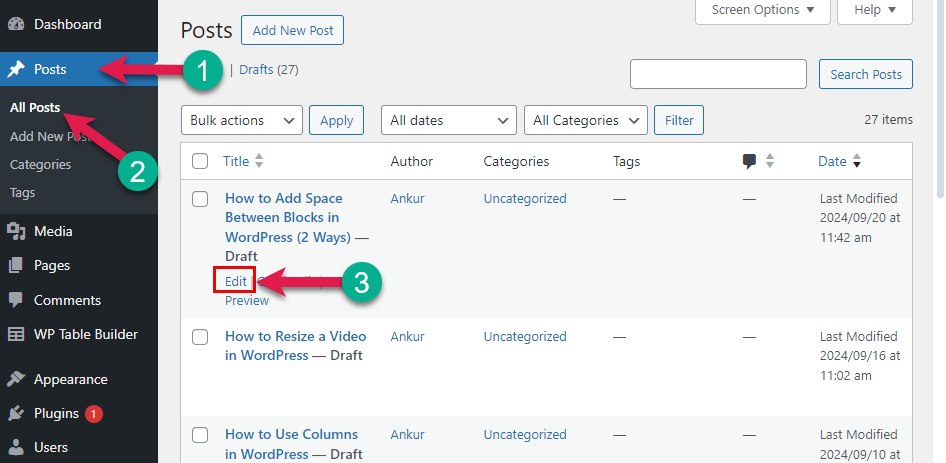
The first method is super easy. For that, navigate to Posts/Pages(1) > All Posts (2), and edit that post or page (3).
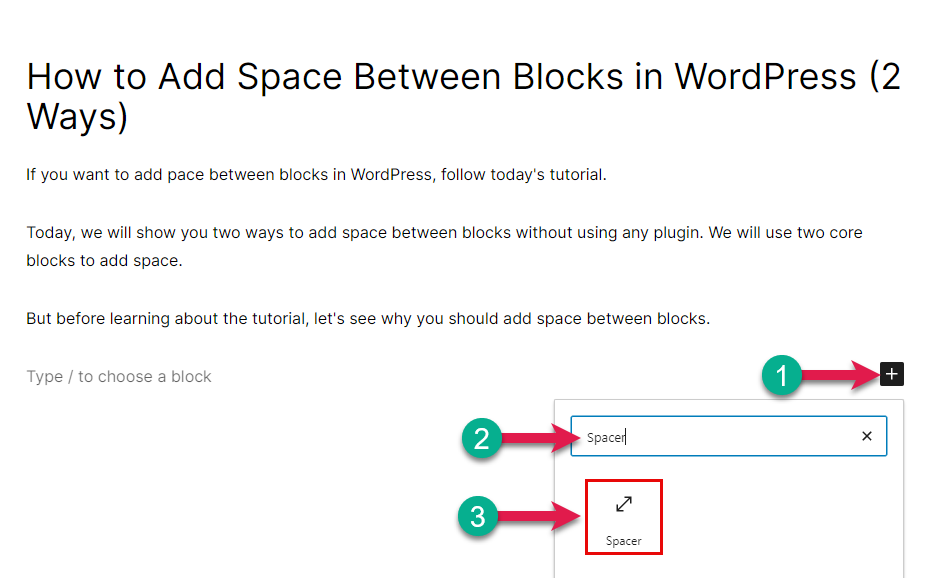
After opening the post, click “Add Block (+)” (1), type Spacer in the search box (2), and click on the Spacer block (3).
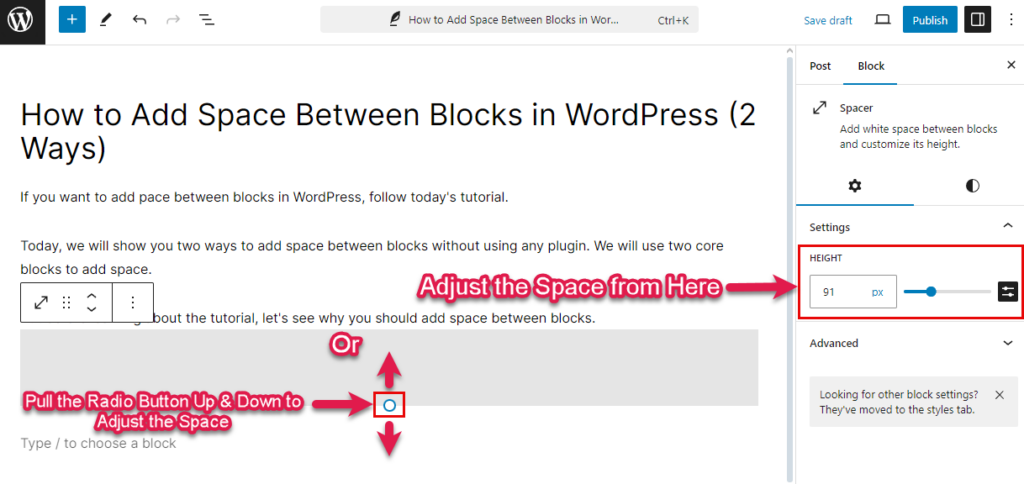
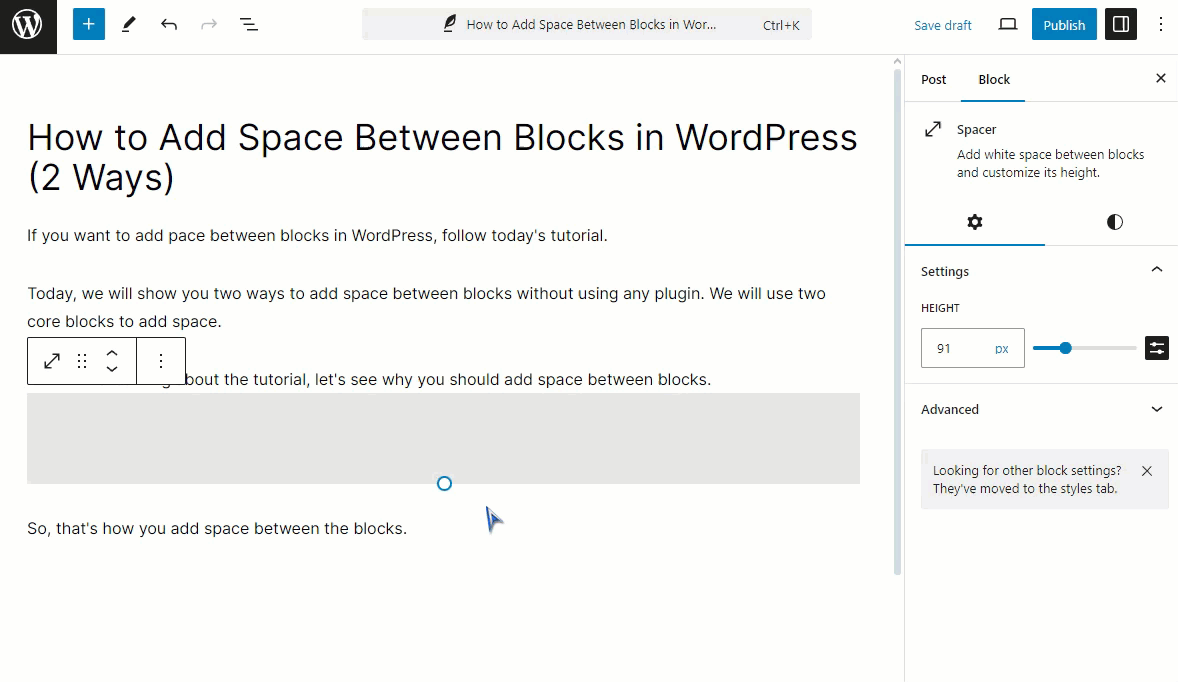
When the Spacer block is inserted, you can modify the height to adjust the space between the blocks. You can adjust it from the editor or block settings panel.
And that’s how you can easily add space between blocks in WordPress. Here’s a video demo below.
Method 2: Add Space Between Blocks Using the Block Spacing Settings
By the title, you’ve already guessed how it works. Let me demonstrate below.
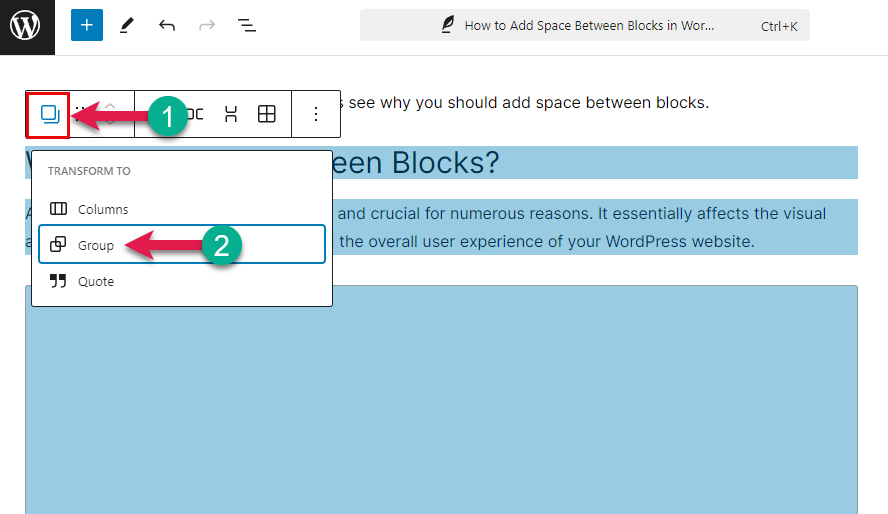
We will use the Group Block to add space between the blocks.
First, select the blocks between which you want to add space. Click the left mouse button and hover across the blocks you want to add as a group. (Tips! The selected blocks should be different.)
Now click the “Multiple block selected” (1) and “Group” options (2).
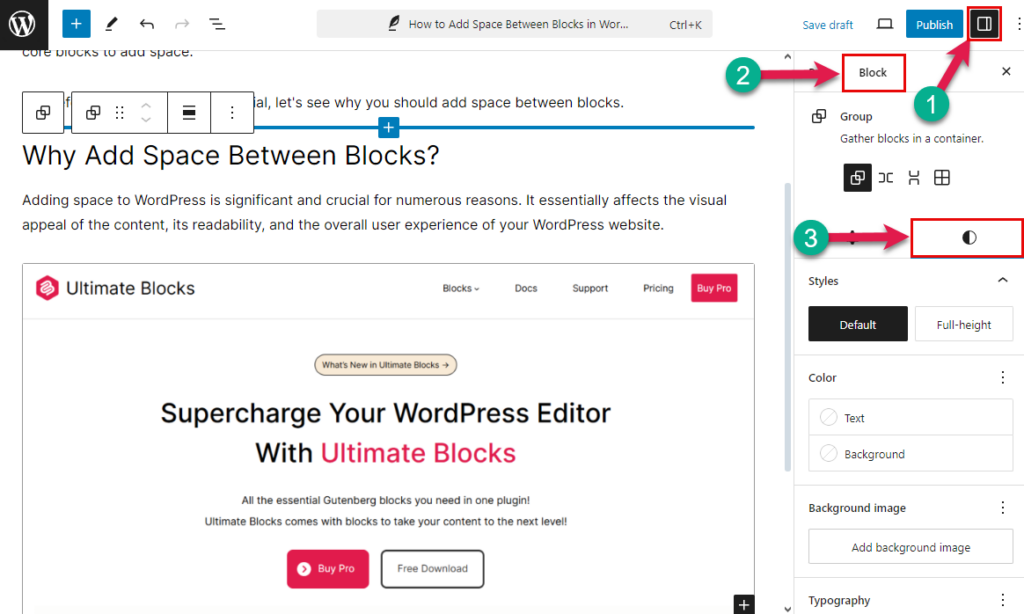
After that, click “Settings” from the top right side (1). Select the “Block“(3) and “Styles” after that.
Now, scroll down a bit. Go to the “BLOCK SPACING OPTION” and adjust the navigator according to your needs to add space between the blocks.
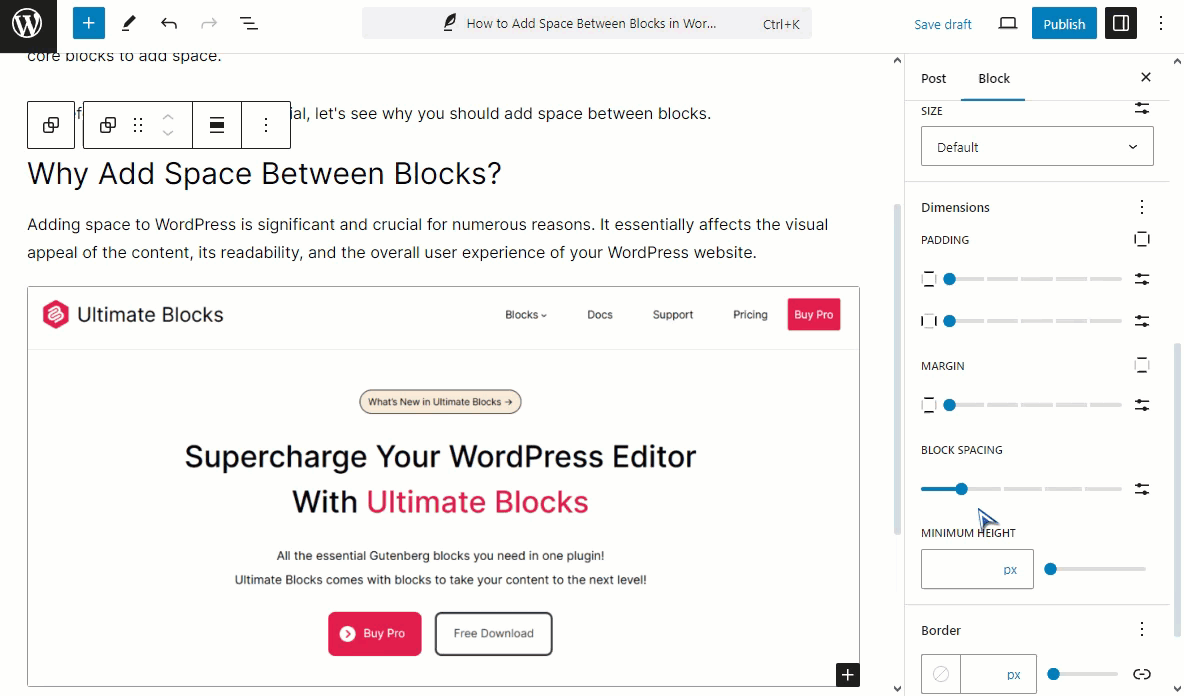
Tips! Using the Block Spacing option, you can both remove and add spacing between two blocks.
So that’s how you add space between blocks in WordPress.
Final Thoughts!
Though adding space between blocks may be a small task, it has its significance. It greatly impacts how visitors perceive and engage with your content.
I hope you haven’t faced any difficulties following the tutorial. Let me know in the comment section if you have faced any while following the tutorial. I would love to help you.
Feel free to share the post on social media with your friends who use the Gutenberg Block editor. If you want to enrich your knowledge about WordPress’s Gutenberg Block editor, follow our blogs.
More Gutenberg Block Editor Tutorial


Leave a Reply