
Want to add a dynamic touch to your WordPress images? Look no further than the flip effect on hover! This cool animation brings an element of surprise and interactivity to your website, grabbing users’ attention and enhancing their visual experience.
But here’s the question: how can you achieve this magical flip trick on your WordPress site? Worry not! This guide will unveil a method to effortlessly flip images on hover in WordPress, regardless of your technical expertise.
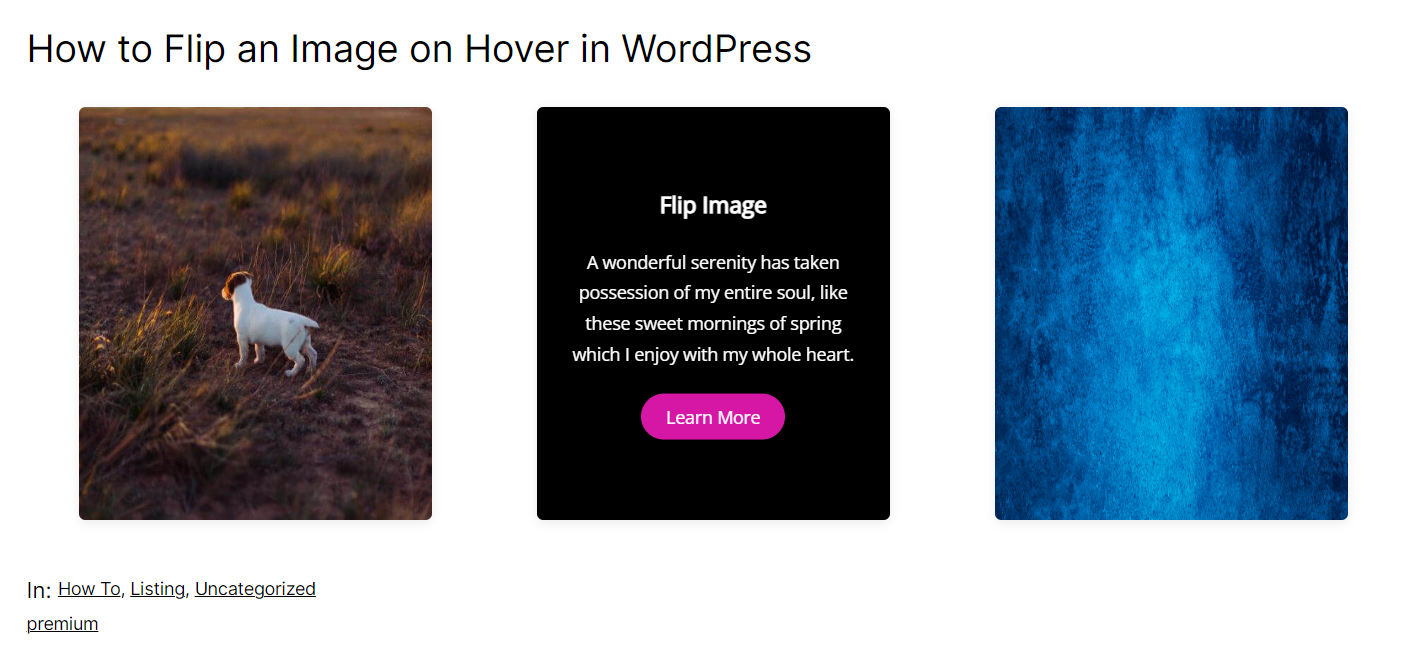
Flip an Image on Hover in WordPress
You can easily flip an image on hover by using Flipbox plugin. This allows you to insert an image on the box, and upon hovering on it image flips. Here are the steps.
Step 1: Install Flipbox Plugin
First, navigate to Plugins -> Add New Plugin and search for Flipbox.
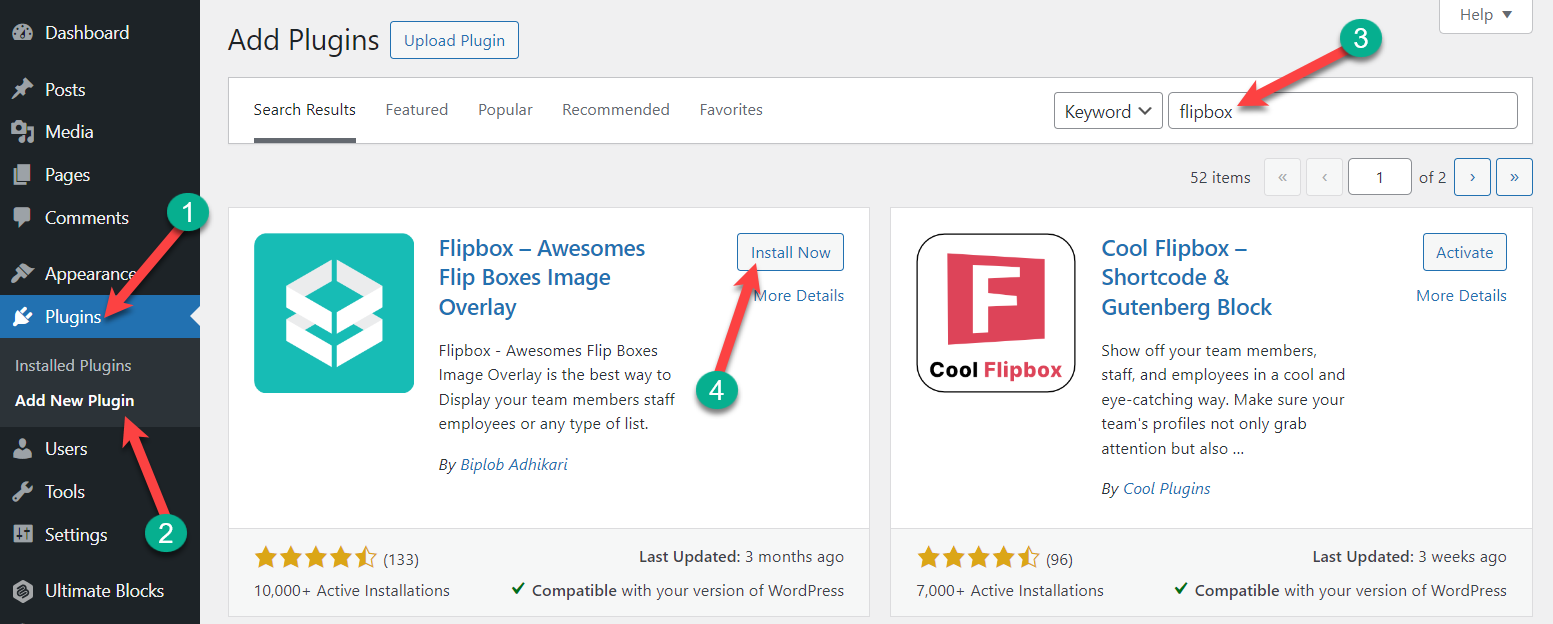
Install the plugin, and don’t forget to activate it.
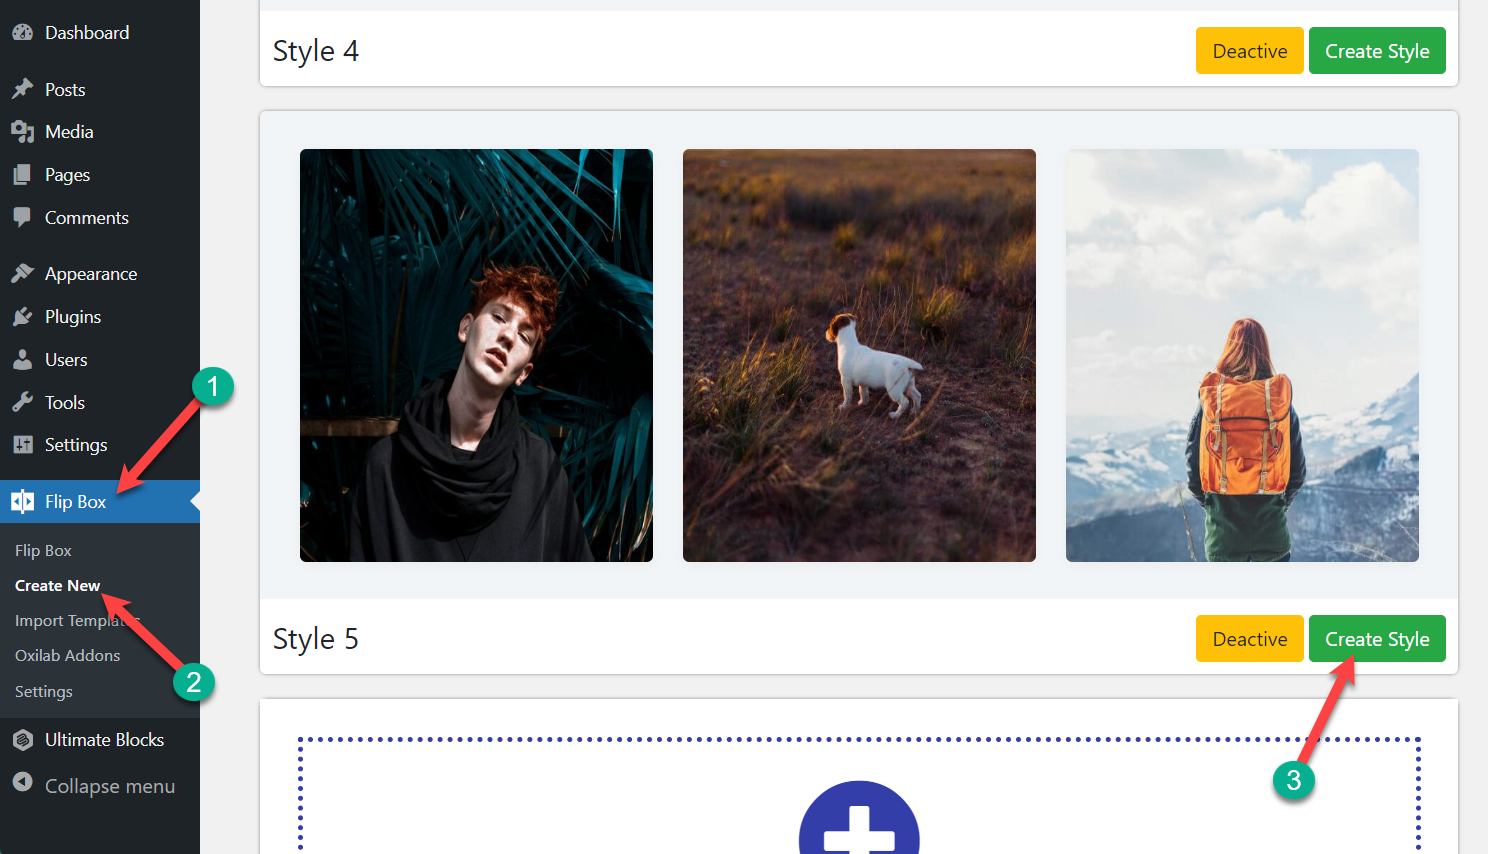
Step 2: Create a Flipbox
Now, navigate to Flip Box -> Create New. Here, you will find lots of awesome templates for Flipboxes. Choose one template for your Flipbox and hit the ‘Create Style’ button.
Provide the name for your Flipbox and choose the number of layouts on your Flipbox. Hit the ‘Save button.

Step 3: Customizing Flipbox
Now, you have huge customization options for your Flipbox.
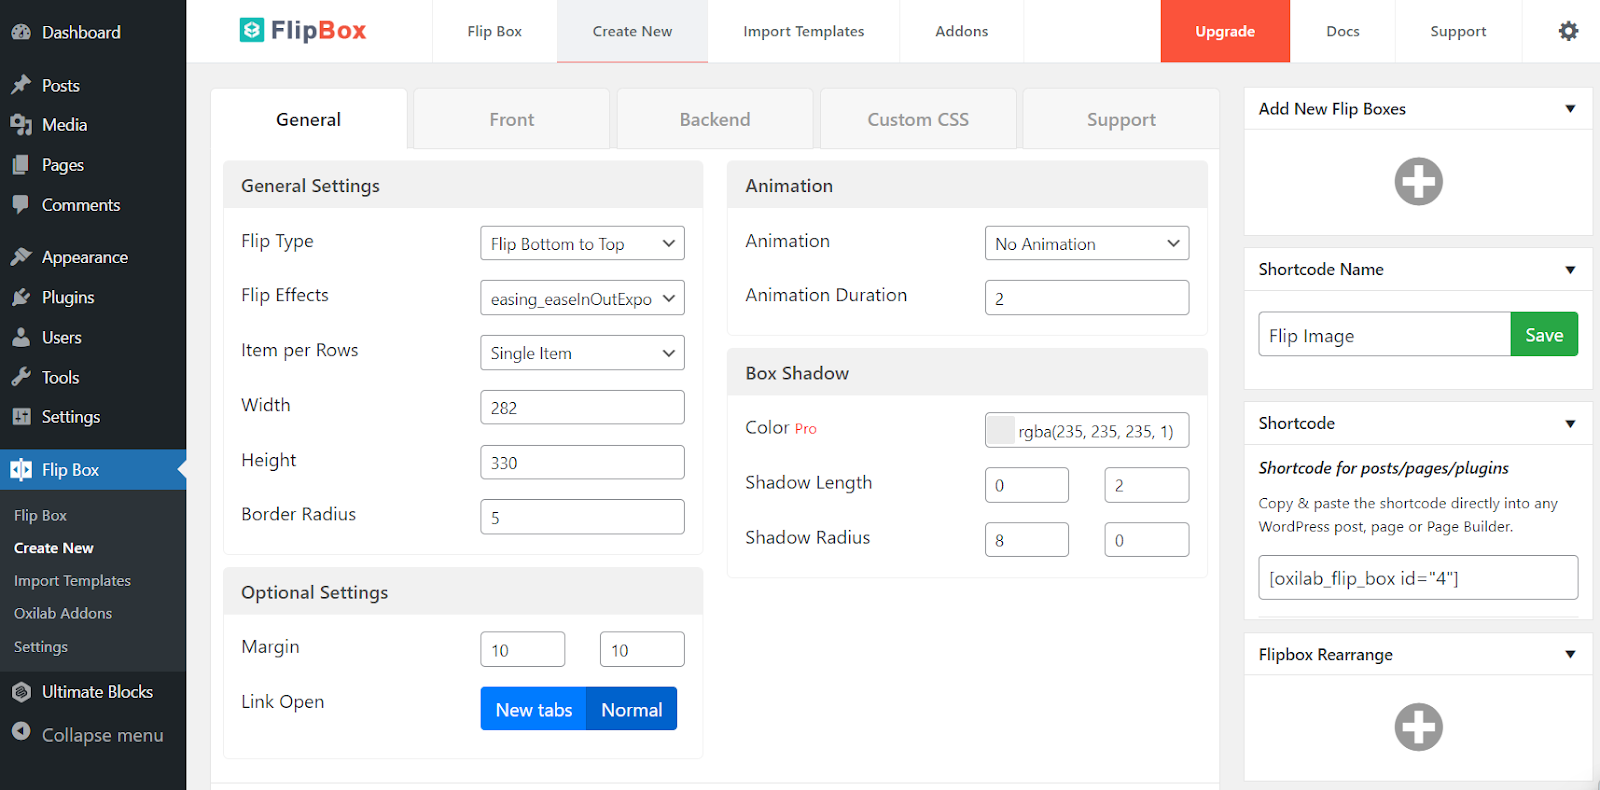
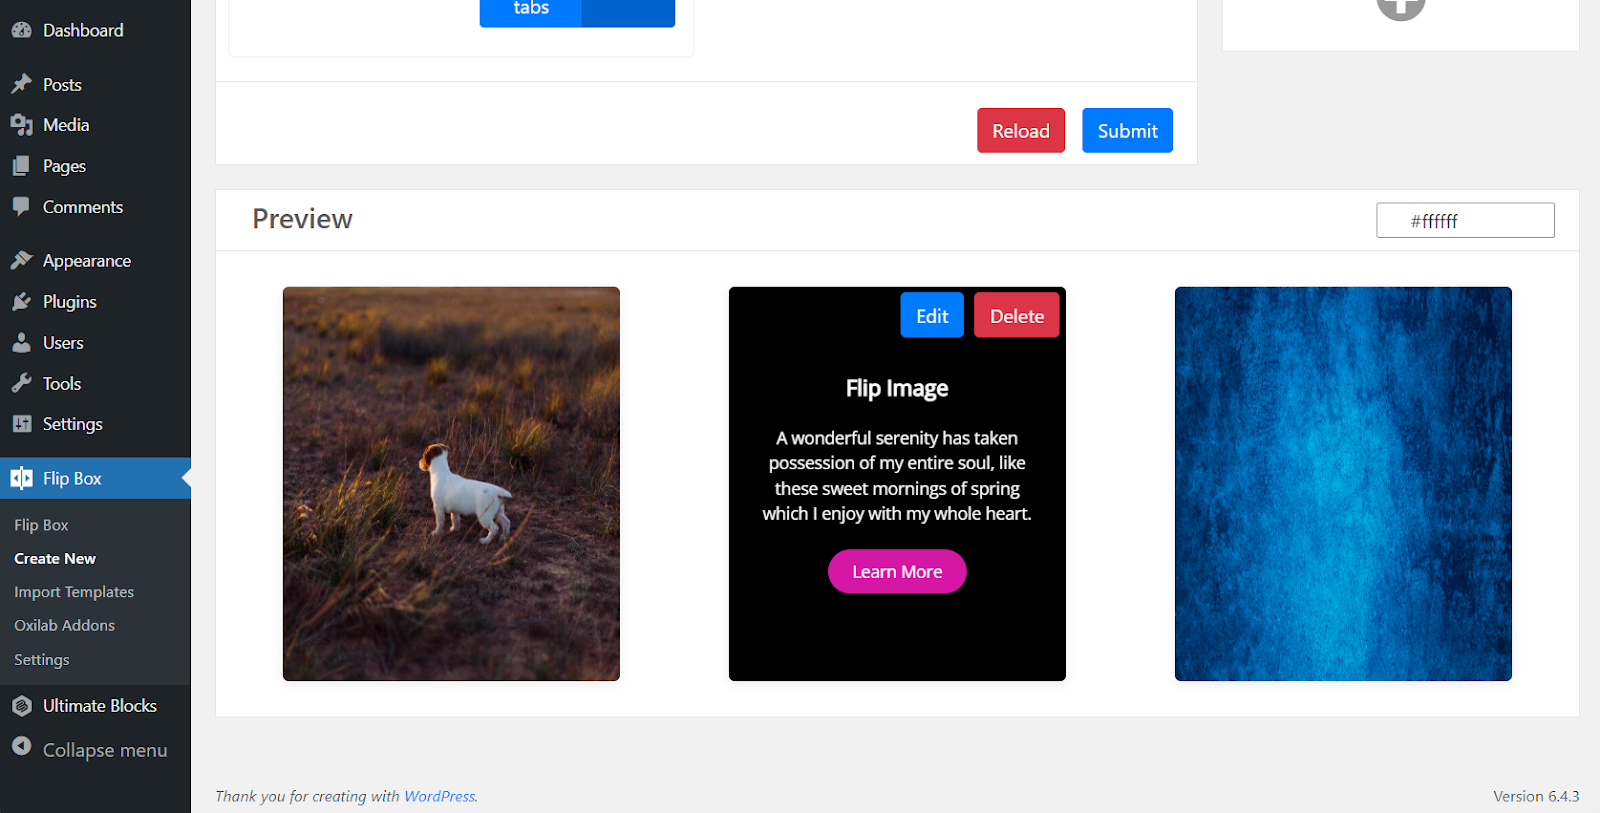
Customize general settings animation and other settings as you require. You will be able to see the preview below.
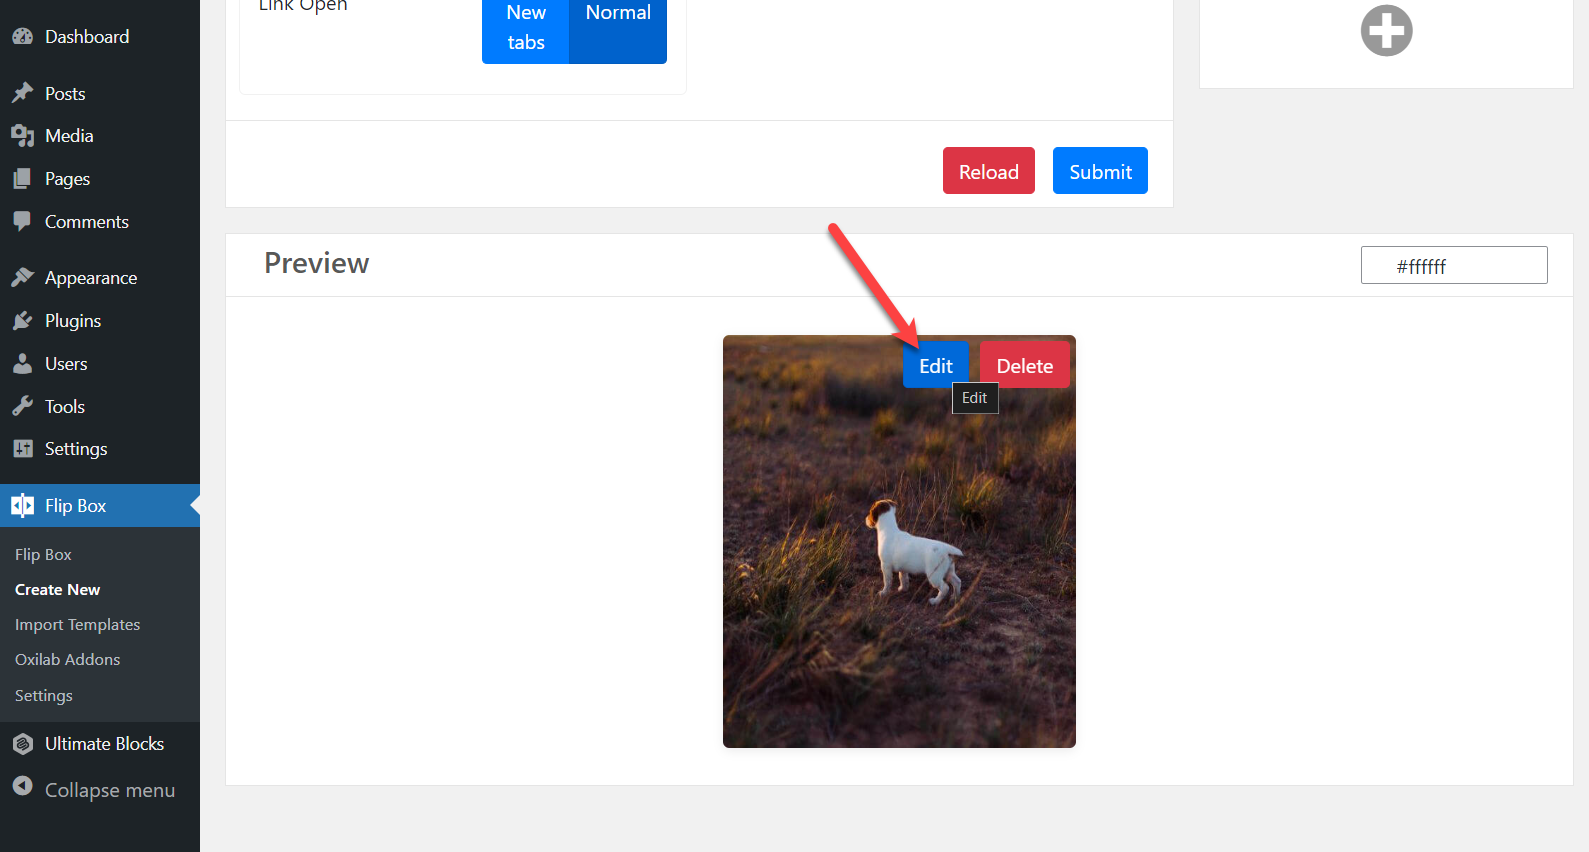
Step 4: Change the Content of Flipbox
To change content, scroll below to the preview section. Hover your cursor over the Flipbox and hit the edit button.
For the Front section, edit the ‘Front Settings’. Enter the front title, icon, and image link. You can add an image link or choose an image from the Media.
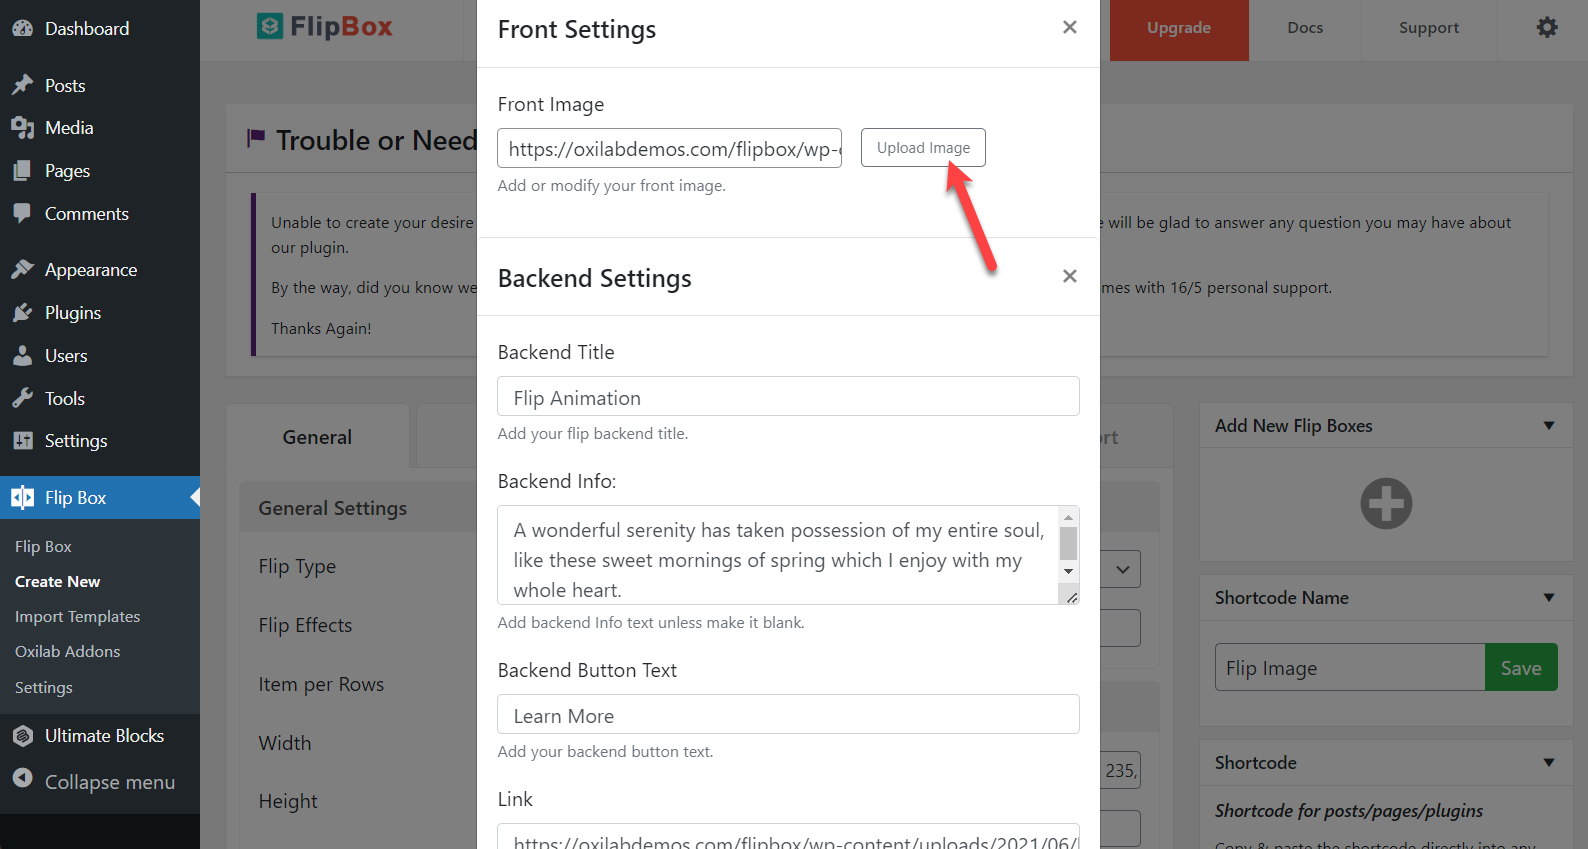
To change the front image, click on the ‘Upload Image’ button and then choose your media file.
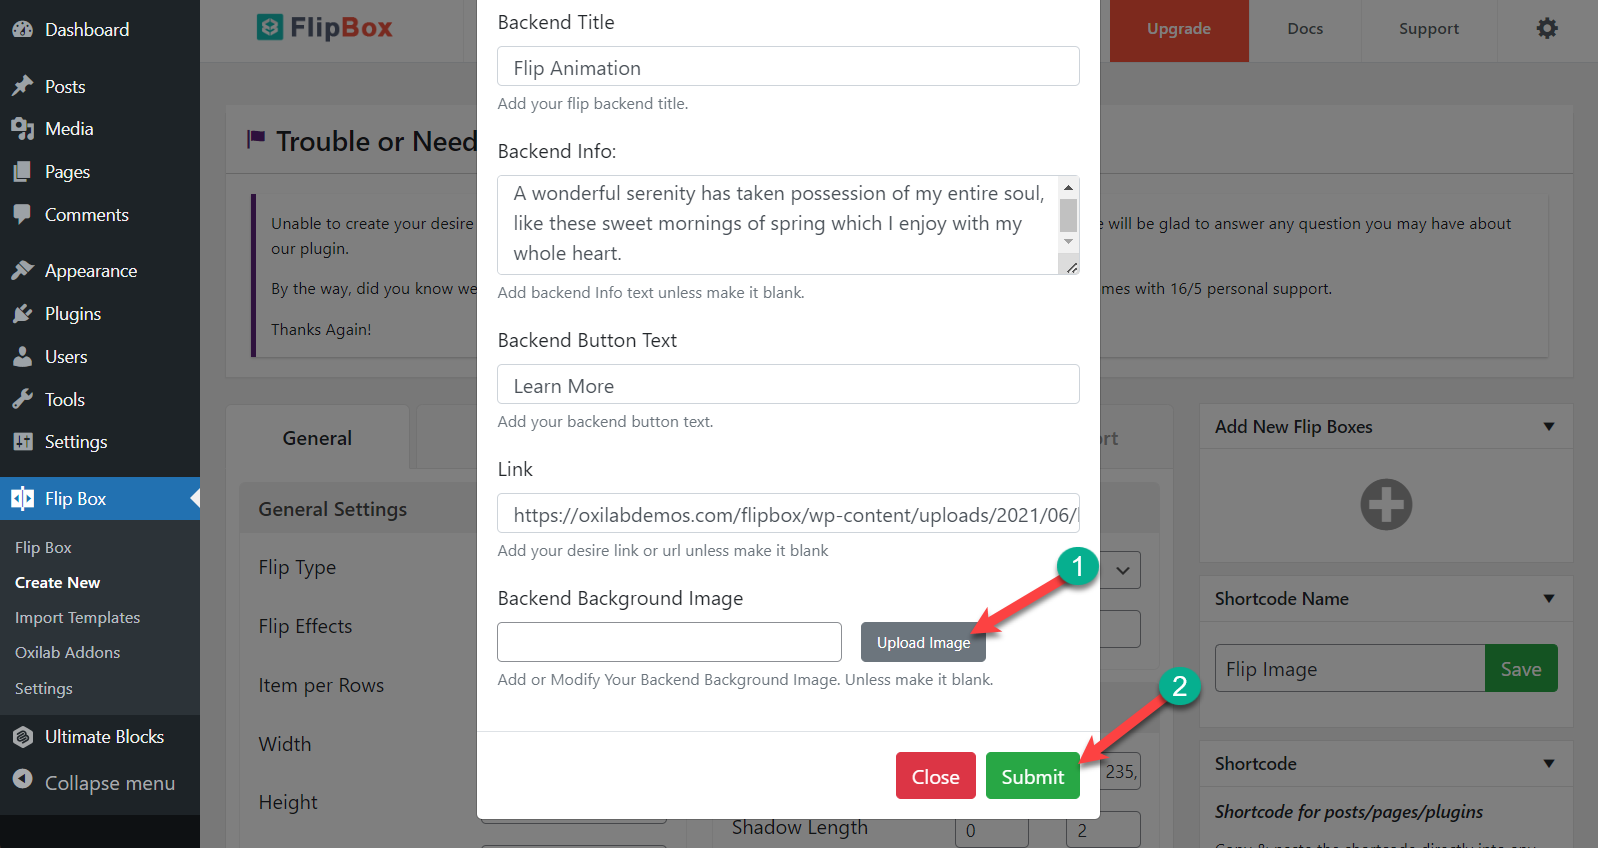
In the same way, edit the backend setting and choose backend image. When you are done, hit the submit button.
Step 5: Add More Flipboxes
If you need more flipboxes, hit the ‘Open Flip Boxes Form’ button on the top right.
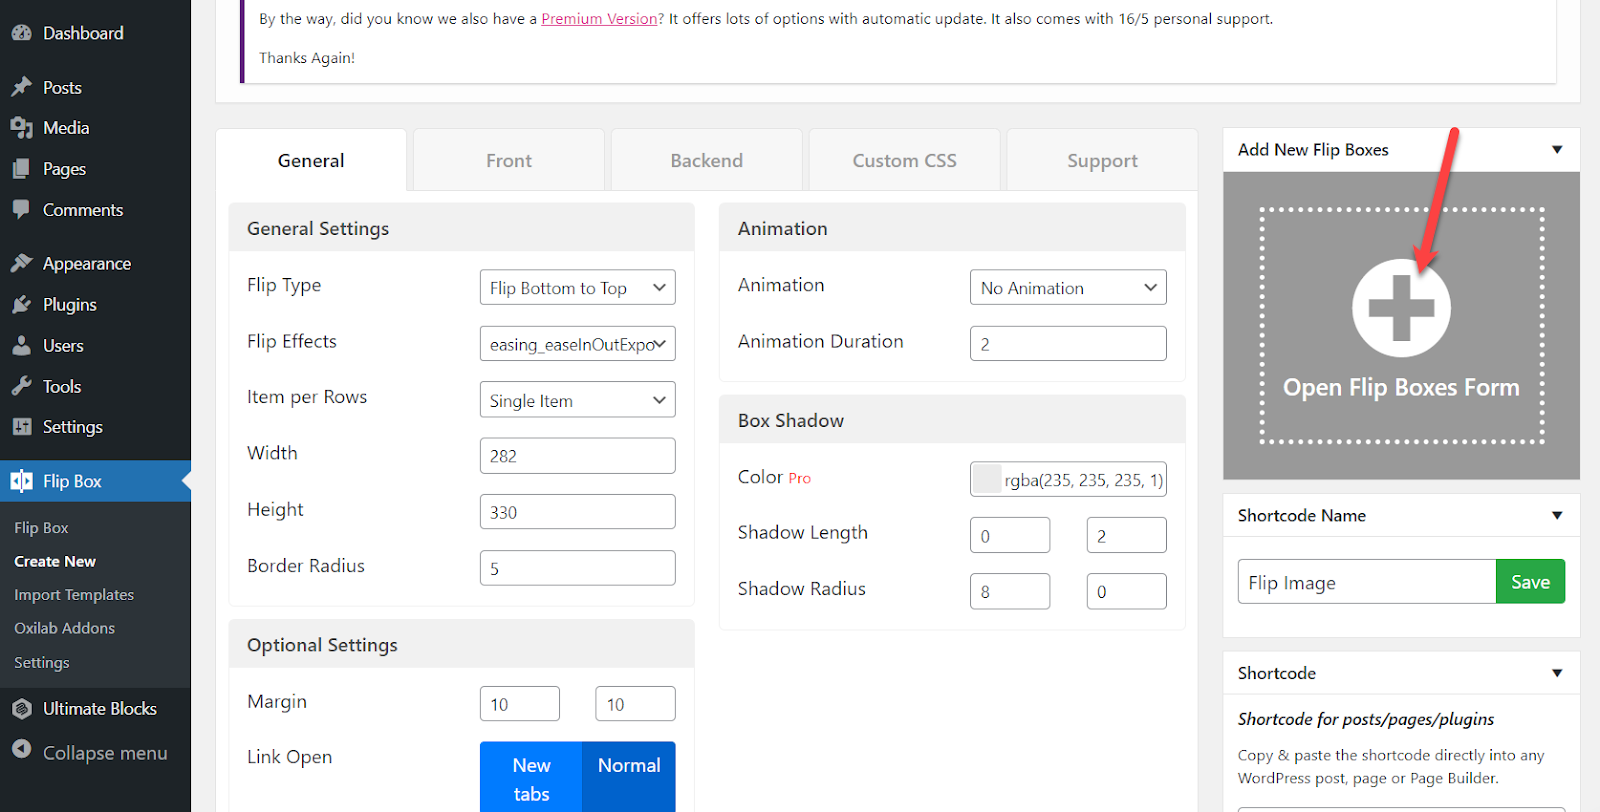
It will ask you to provide frontend and backend data. Provide data as you desire and hit the Submit Button. In this way, add as many as Flipboxes as you require.
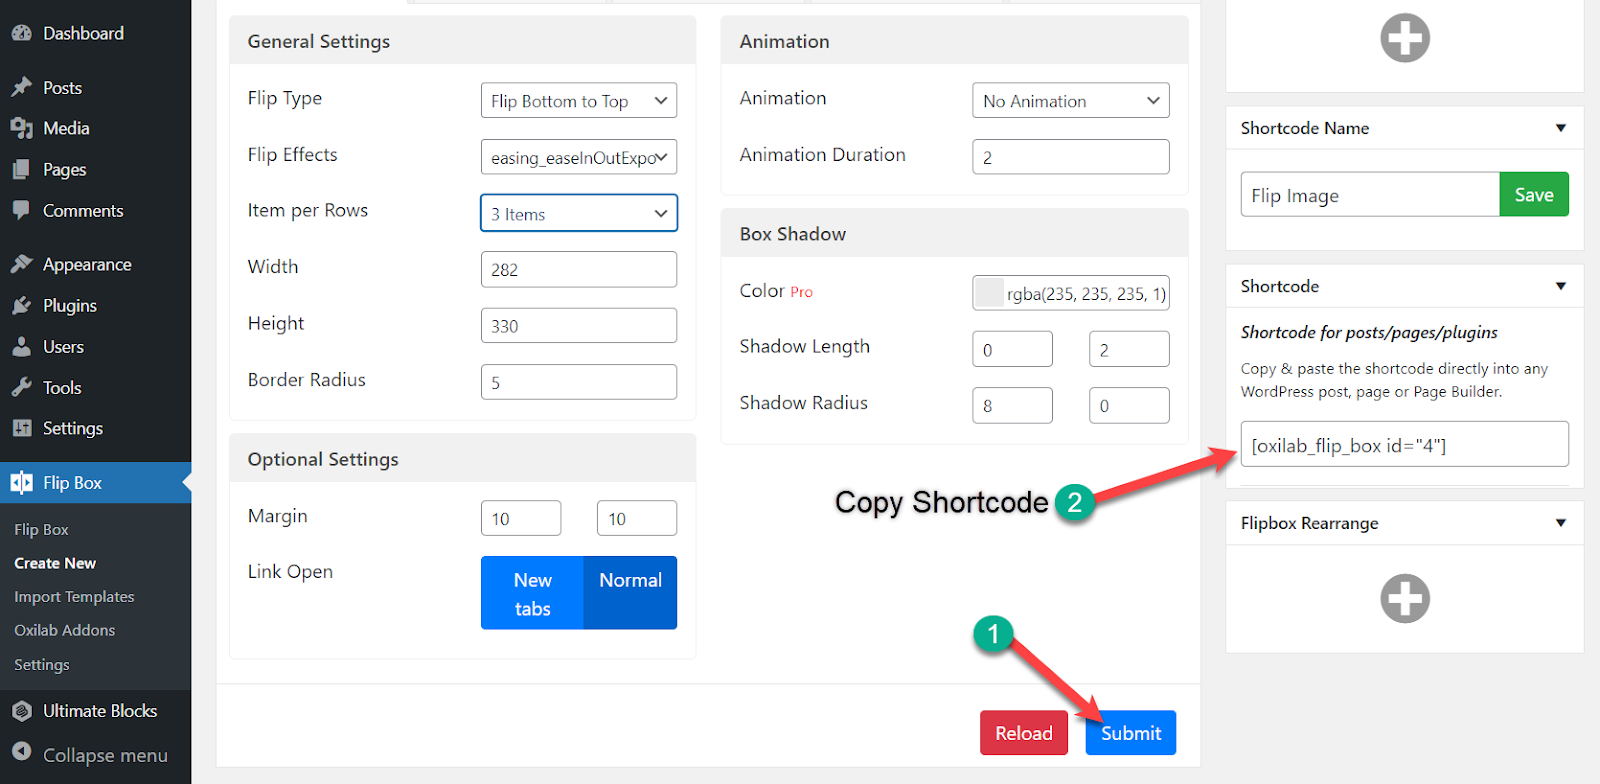
By default, you will get flipboxes one above one. If you want flipboxes side by side, then scroll above and click on ‘Item per Rows’.
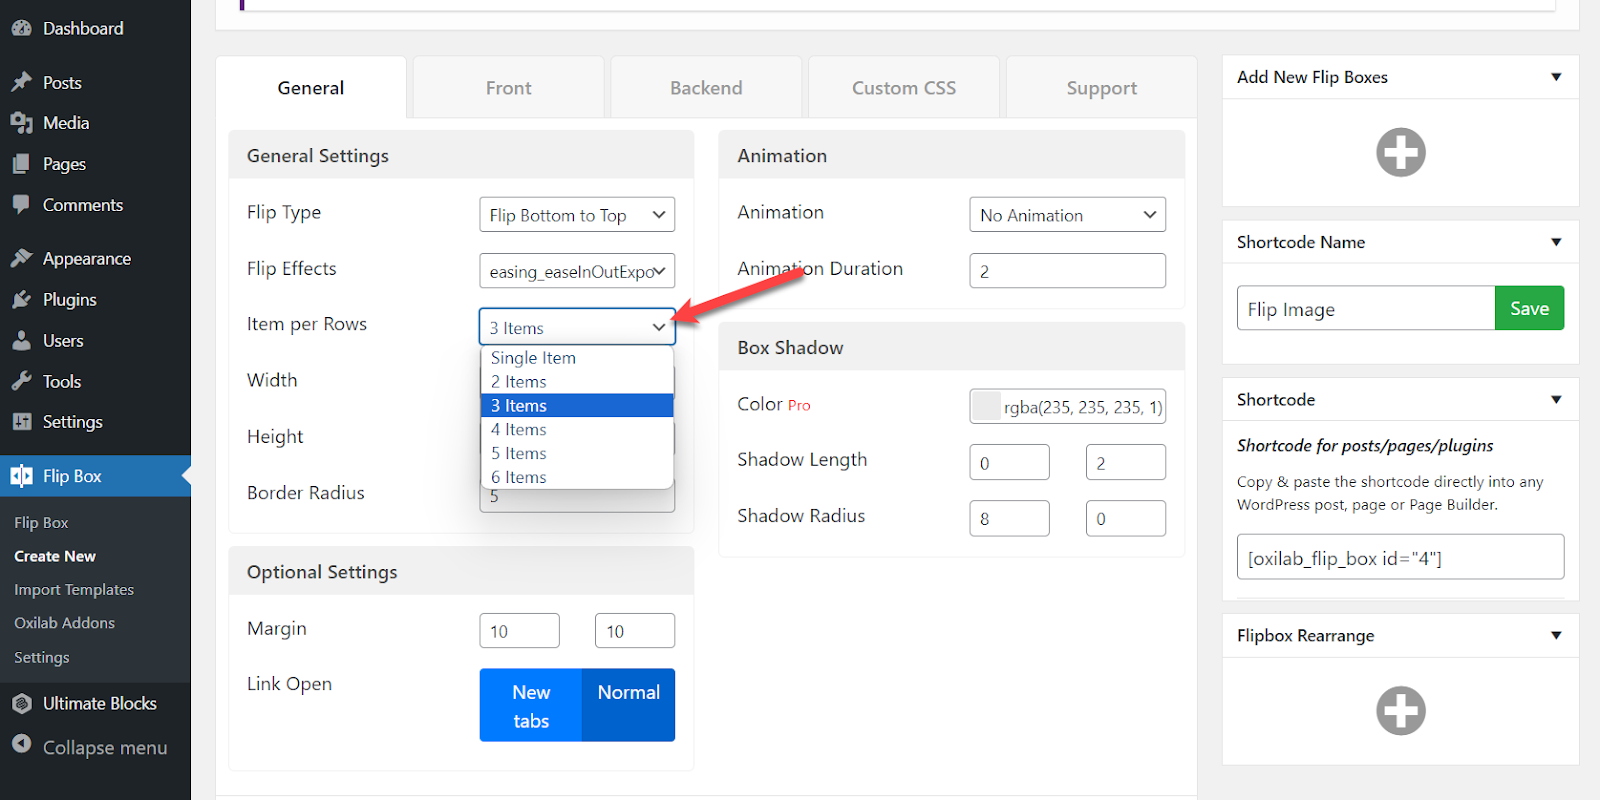
From here, choose how many flipboxes you want in a single row. When you are all done, hit the ‘Submit’ button. Don’t forget to copy the shortcode afterward.
Step 6: Add Flipboxes to your post
Open the page or post, where you want to add your flipbox. Click on the ‘Add New Block’ button and search for ‘shortcode’.
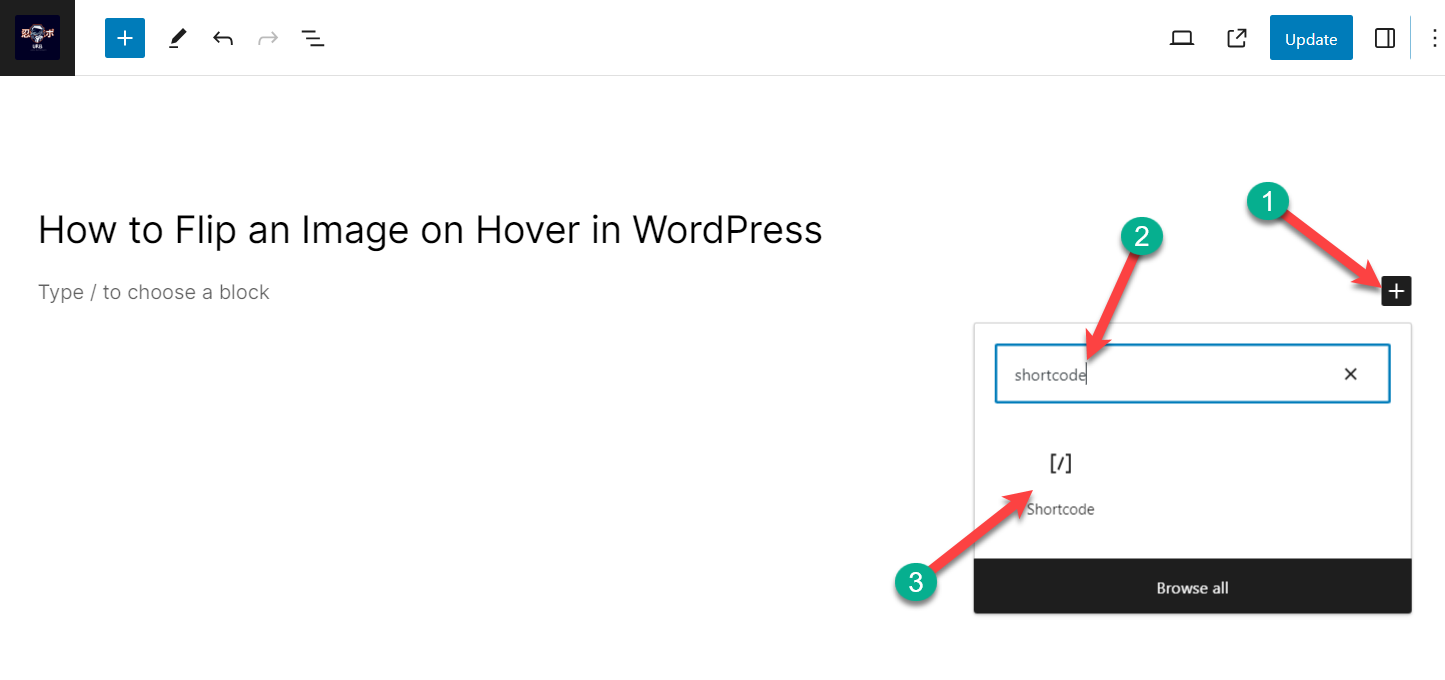
Insert the block by clicking on it. Paste the shortcode that you copied earlier.
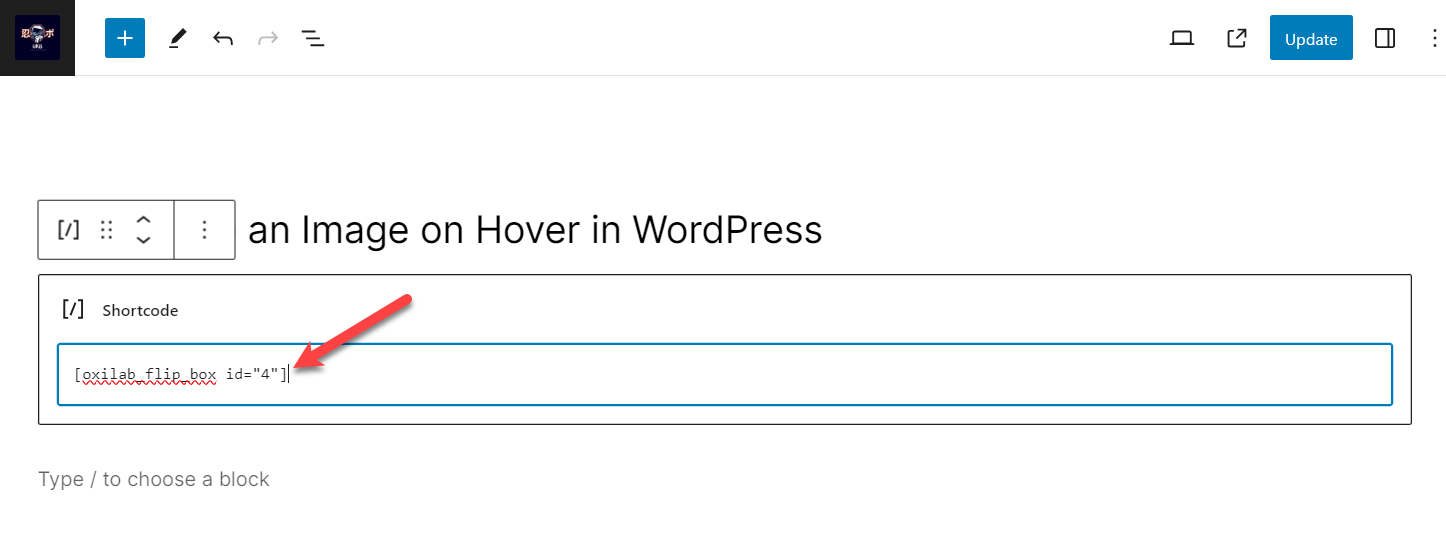
Publish or Update the post and see your Flipbox in action.
Final Words
With the method shown above, you can now make your images dance and flip, adding a touch of magic to your WordPress website. So go forth, unleash your creativity, and watch your visitors get mesmerized by your visually stunning content!


Leave a Reply