
Every web post and page serves as a vast resource of useful information. But almost every post or page contains some information that is useful only at certain times of the year, month, or week and may mislead users at other times.
As a result, it’s better if you apply conditions on particular contents so that they are automatically hidden and visible at specified times. WordPress provides many handy ways to do this.
This article will explain how to hide a block in WordPress block editor, showcasing one of the easiest ways. We’ll use the plugin Block Visibility to explain the process. Keep reading it to the end.
Hiding a Block Using Block Visibility Plugin
You can easily hide any of your blocks using the Block Visibility Plugin. To hide any block,
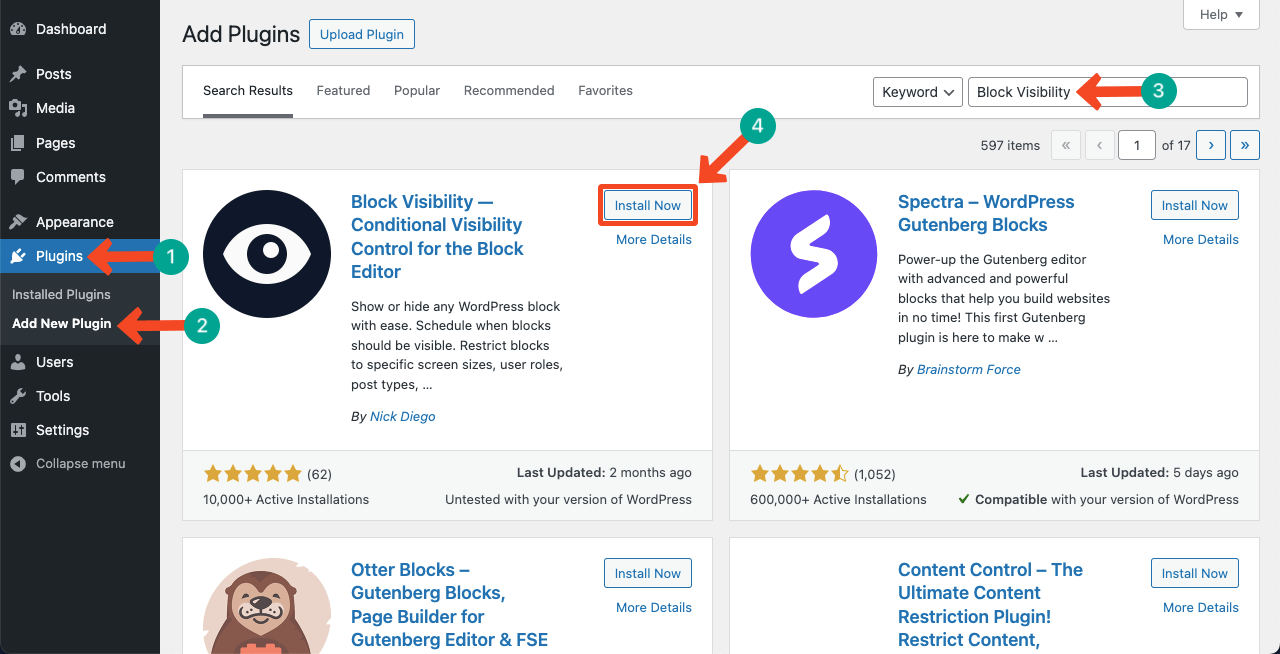
Step 01: Install and Activate the Block Visibility Plugin
Log into your WordPress dashboard. Navigate to Plugins > Add new Plugin. Type Block Visibility in the search box. The plugin will appear below in a few seconds. Install and Activate it afterward.
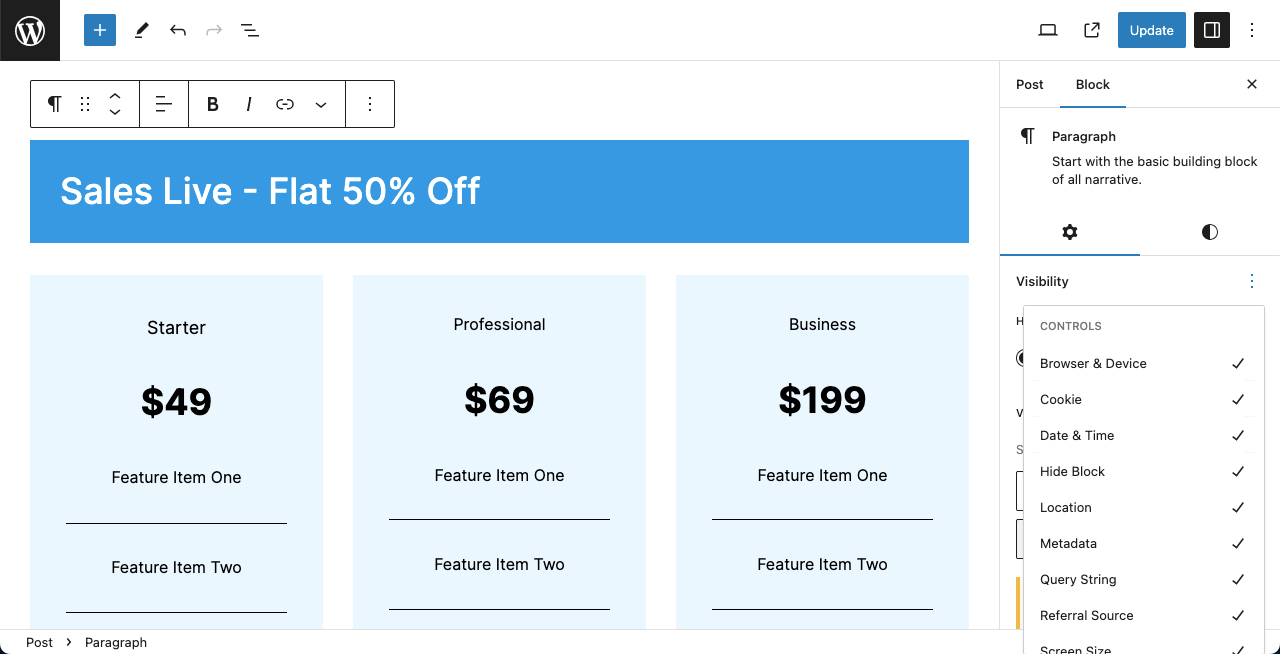
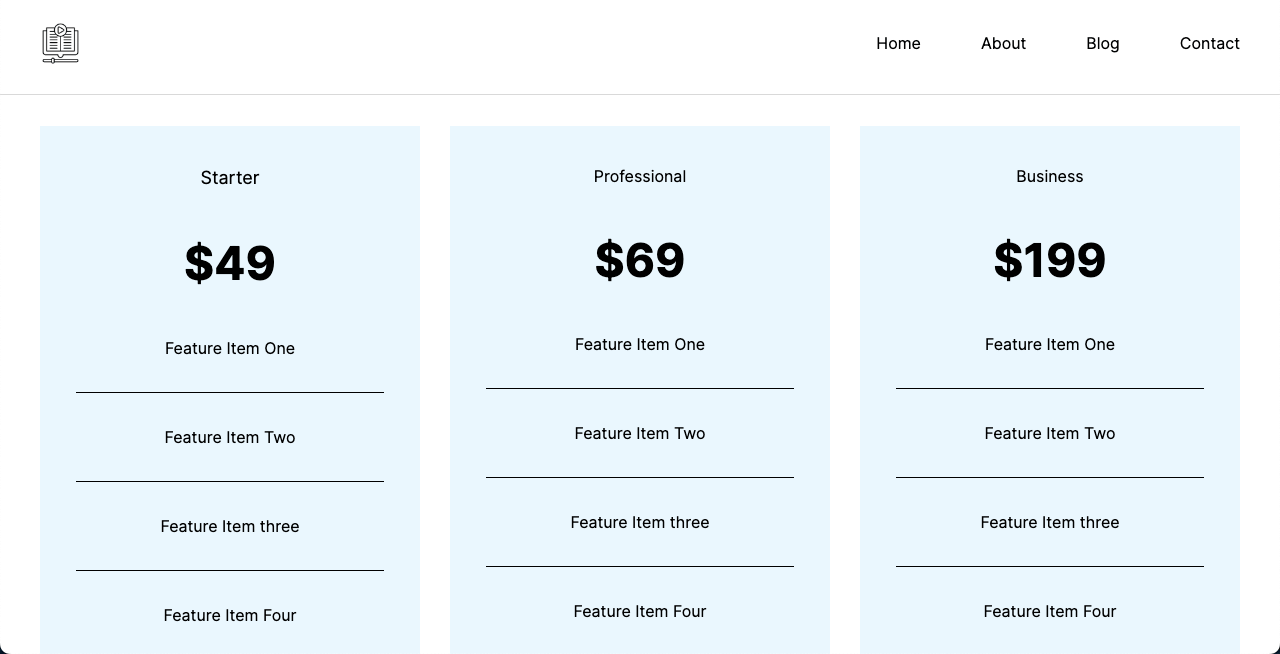
Step 02: Select the Block You Want to Hide
You can see in the image below we have created a dummy page. We’ll now hide the Sales Live block of the page by applying Visibility Configuration settings.
Select the block first by clicking on it. Press the Plus (+) icon on the right sidebar next to the Visibility option. This option will appear on the right sidebar after installing the Block Visibility plugin we have shown above.
You’ll get a list of various options appearing after pressing the plus (+) icon.

Tick Mark all the options or the specific ones you want to configure. Each one has specific functionalities. Here’s a quick explanation.
- Browser & Device – Hides the block from specific browsers (Chrome, Firefox, Opera, etc.) and device types (mobile, desktop, and tab)
- Cookie – Hides block based on the set cookie name.
- Date & Time – The block automatically disappears at the predefined date and time.
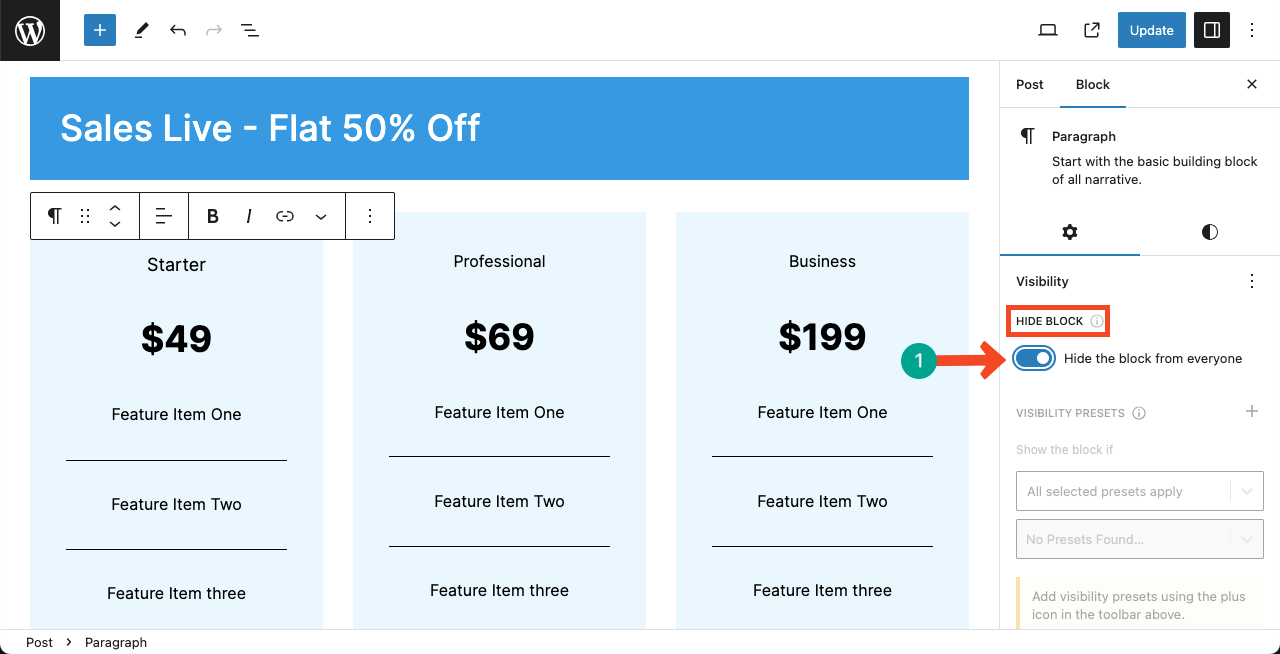
- Hide Block – Instantly disappears the block from all places, both browsers and devices.
- Location – Allows to exclude the block from specific post type, ID, taxonomy, author, comment, etc.
- Metadata – Appeares/disappears the block based on Post Metadata and User Metadata.
- Query String – Hides block according to the Query string in the URL.
- Referral Source – The block will automatically disappear if traffic comes from referred domains and URLs.
- Screen Size – You can hide the block from desktop, mobile, and tab screens.
- URL Path – The block will hide if your defined URL paths are triggered.
- User Role – Hide the block from specific users like public, logged-in, logged-out, user roles, users, etc.
Note: We hope you have got an idea of how each option works. But remember, not all these options are available for free users. If some options don’t allow you configuration, take that these are for premium users. Once you upgrade to the premium version, you’ll be able to use them.
Step 03: Configure the Block Visibility Settings
Now, explaining the functionality of each of these options in this short article is as difficult as it is time-consuming. So, we will explain the usage of some options as examples.
# Hide Block
Toggle on the Hide Block option to entirely disappear the block from the frontend of your website. This will disable all the other options because they are no longer necessary, as you have entirely hidden the block.
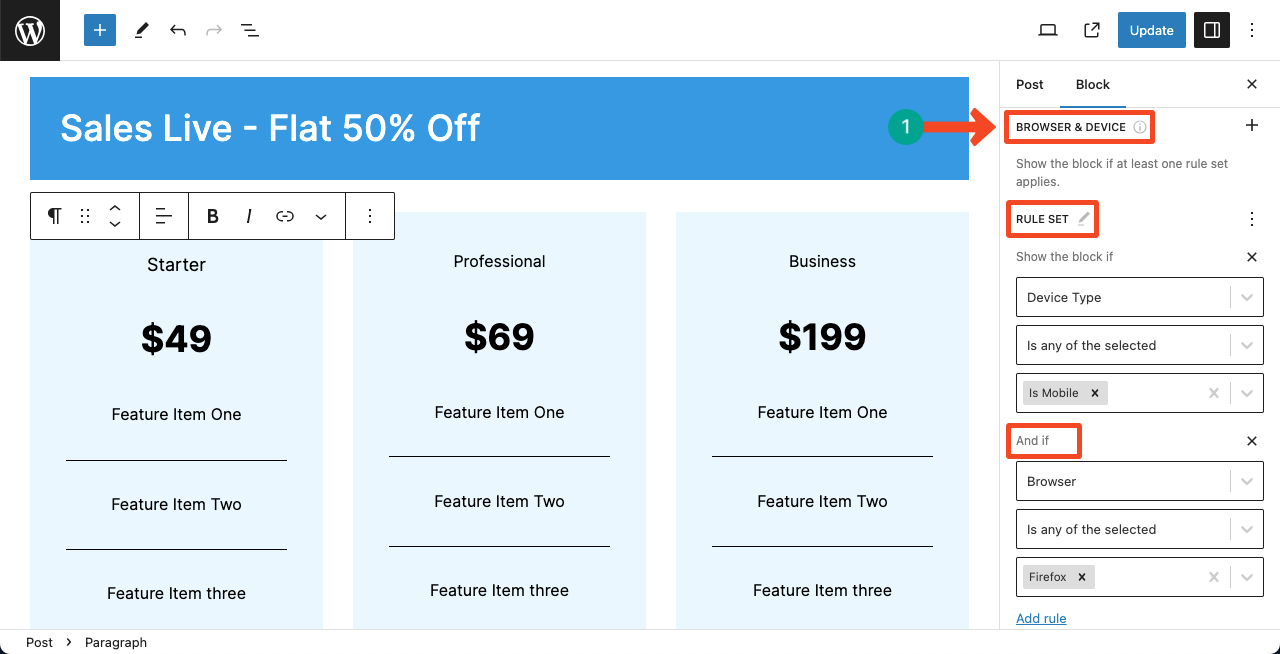
# Browser & Device
Some options will let you configure multiple settings and configurations. Browser & Device is one of them. Using this option, you can specify from which device and browser your selected block will automatically hide itself.
You can specify multiple devices and browsers. You can even specify device-specific browsers as well using this option.
Step 04: Preview the Configuration
Come to the frontend of your website. If the block is hidden, you can take that the configuration has been set successfully. You can see the in the following image the block is missing. This means the block has hidden itself.
Hiding a Block Using The Ultimate Blocks Plugin
You can also hide a block using the Ultimate Blocks plugin. It comes with more than 20 awesome blocks that makes your development process easier. All of these block comes with ‘Visibility Control’ settings.

This is a premium feature of the plugin. You can access this feature once you have the premium version of the plugin. You’ll get this feature with all blocks of the plugin. Here, I am going to insert the ‘Button (Improved)’. You can use the function with any of the blocks of Ultimate Blocks.

Insert the block and select it. Come to the Settings tab. You’ll see the Visibility Control feature under this tab. Click to expand this feature.
Configure the Visibility Control Option
Toggle on the option Hide the block from everyone. Enabling this option will hide the block from all users.

If you like to hide the block on schedule based, then Toggle the Enable Schedule option. This will show two more options for scheduling the From and To dates. Then toggle ‘Hide when schedules apply’.

The block will be hidden as soon as the schedule starts.
If you like to show the block to a specific group of people, then you can use the ‘USER ROLE’ option.

Select any user role, and then your block will be visible to that group only.
Conclusion
Once you become a pro at hiding blocks in WordPress posts and pages, it will be easy to take your website customization skill to the next level. But remember, just because you know how to hide blocks doesn’t mean that you’ll add all information on the same page and apply visibility conditions one by one.
Make sure your content perfectly aligns with the objectives of the particular pages and they add value for web visitors.
Changelog
- Updated on 2024-08-31 (Uzzal Raz Bongshi)
- Added ‘Hiding a Block Using The Ultimate Blocks Plugin’ section.
- Added Table of Contents


Leave a Reply