
Have you ever been impressed by the author’s bio? Adding an author bio can significantly enhance your readers credibility and engagement. An author bio not only make an introduction with your readers to the person behind the content but also helps to built trust and a deeper connection.
If you don’t know how to add one, then you’re in the right place. Here I’ll show you how to display the author bio box in WordPress. The author bio box is a small section that allows you to display information about the author of the post with social media profiles.
In this tutorial, we will cover three easy ways. So let’s get started.
Adding an Author Bio Box in WordPress
There are several ways to add an author info box in WordPress. You can add the author info box by using the block editor, plugin, custom code, etc. Let’s see the block editor option first.
Method 1: Using the Block Editor
To show author bio box, make sure you have author biographical info written. If you don’t know, then follow below steps.
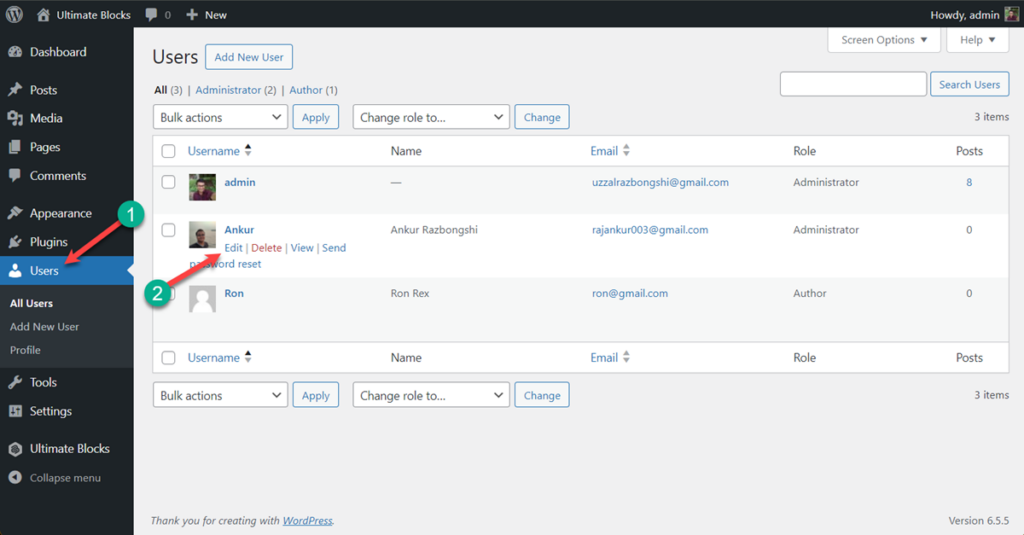
Step 1: Write Author Bio
navigate to the Users -> All Users page. Now click on the user’s ‘Edit’ button.
A new page will open, scroll down to the ‘Biographical Info’ section. In this section, add all the information of the author. You can also add HTML in this field to add links.
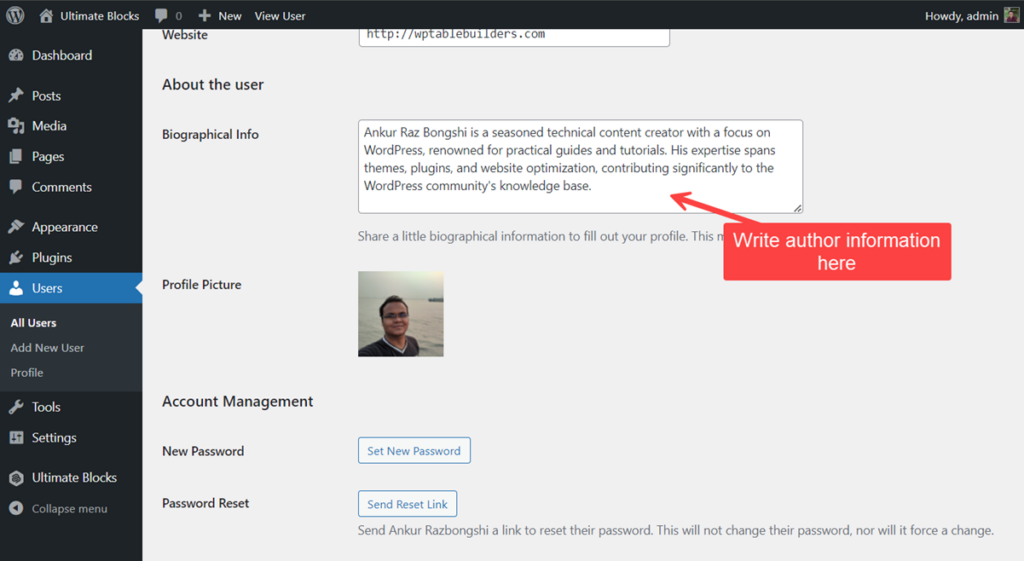
If the author has no profile picture, tell the author to set it from Gravatar. Finally, click on the update user, and user information will be saved.
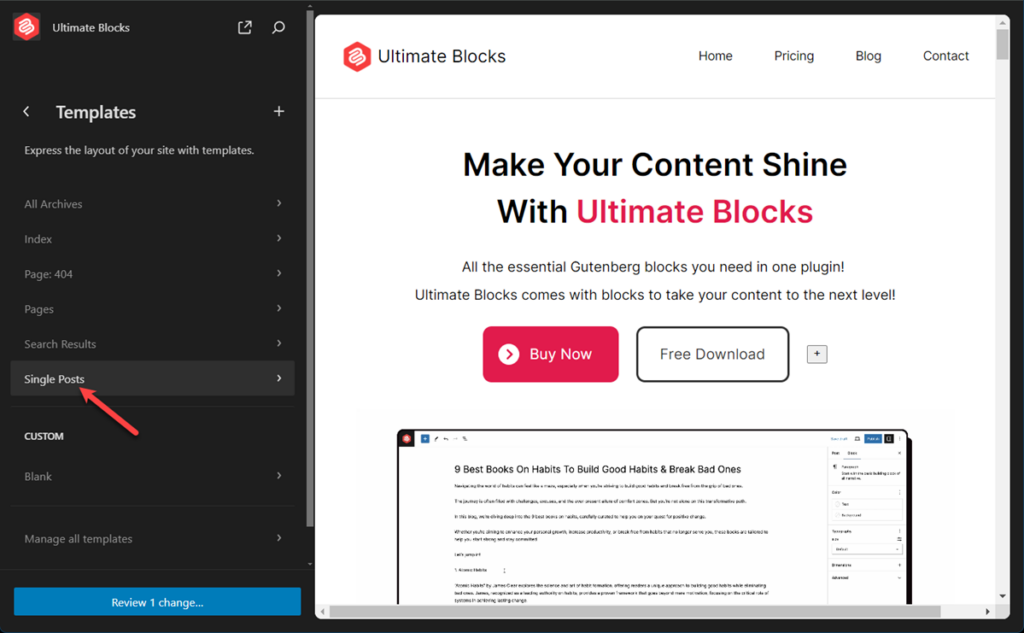
Step 2: Open ‘Single Post’ Template
Navigate to Appearance -> Editor.
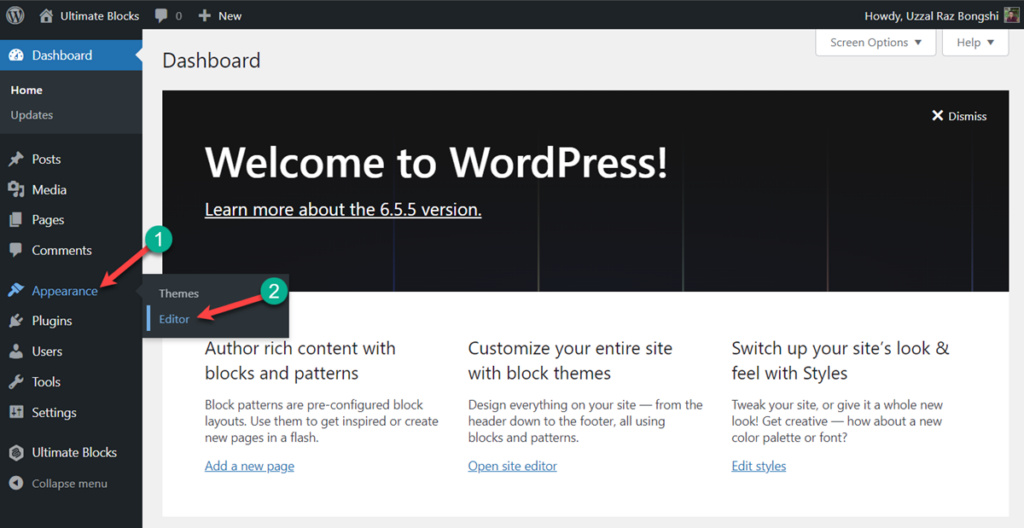
Click on Templates.
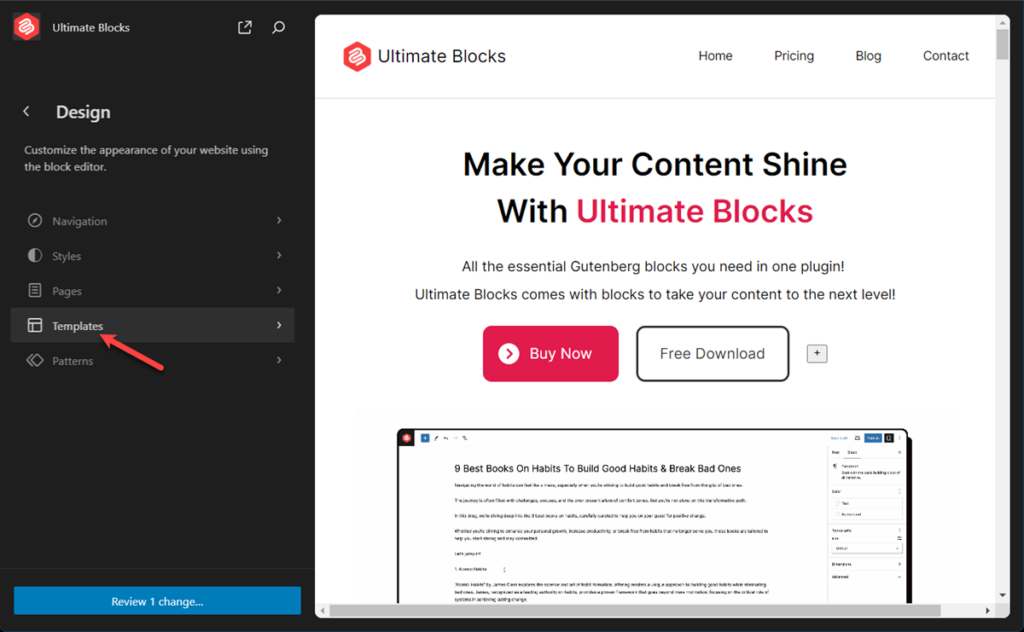
Hit ‘Single Posts’.
Step 3: Add Author Bio Block
Now, you will see the single post template. Click anywhere in the template and it will be expanded.
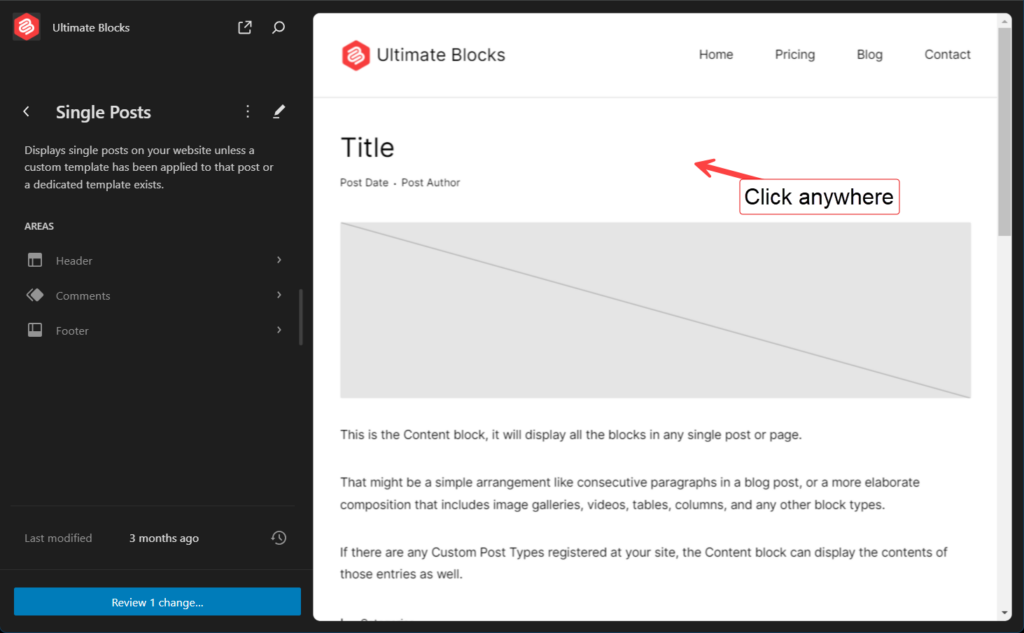
Scroll to the area, where you want to add author bio box. For me, I am going to add author bio box above comments.
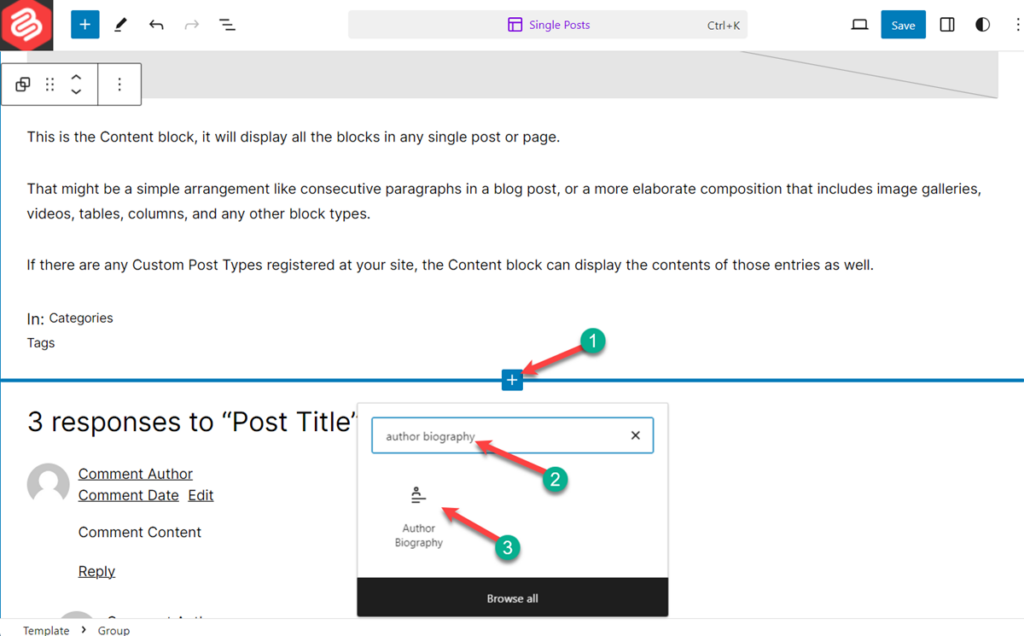
Click on the add block button and search for ‘Author Biography’ block. Insert the block by clicking on it.
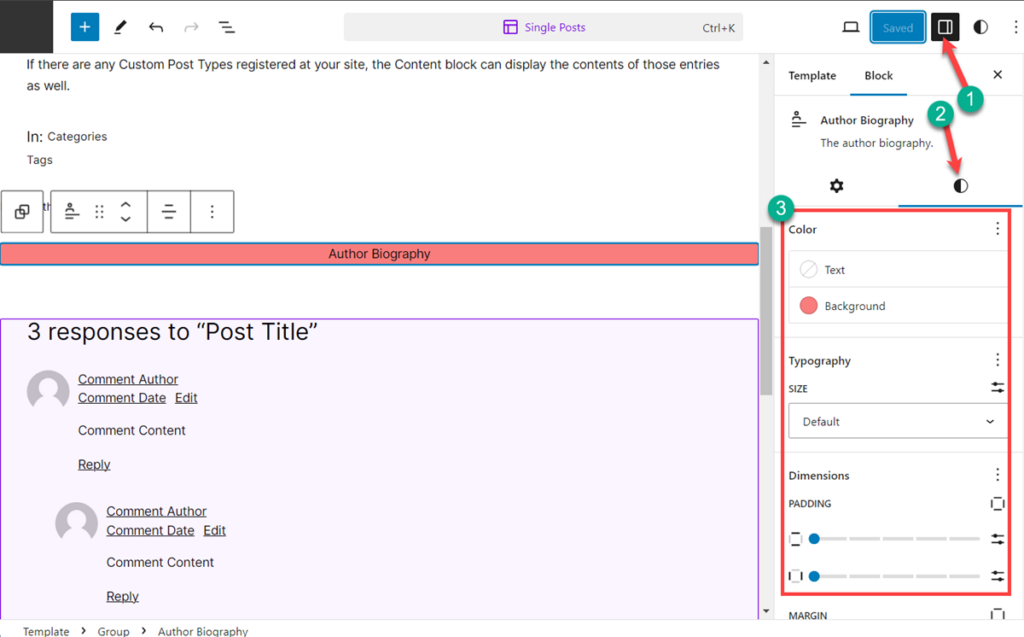
If you like you can also customize your author bio box from the block settings.
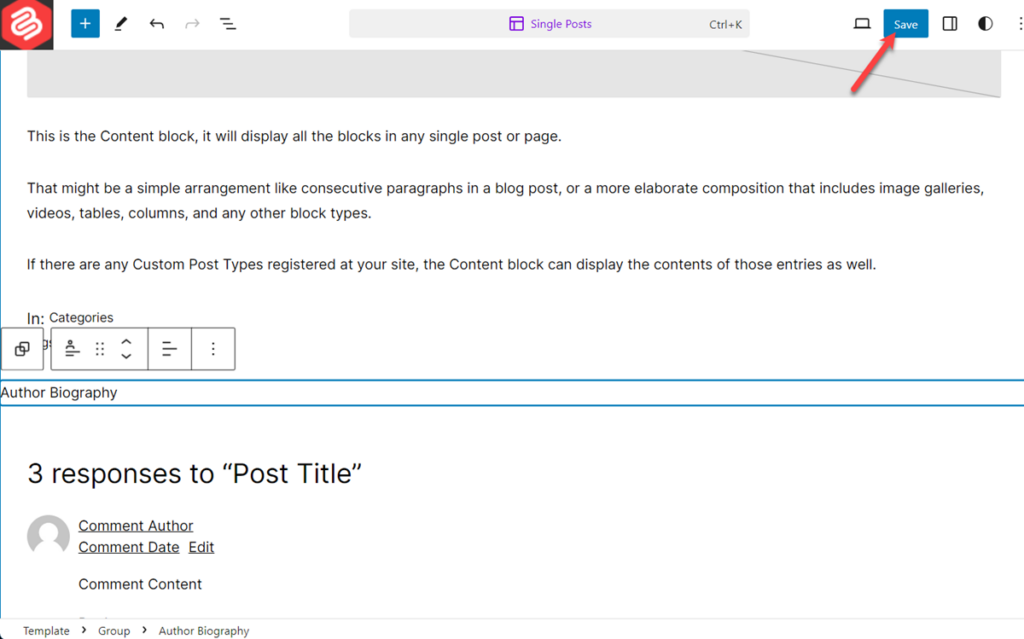
Finally, hit ‘Save’ button.
Now, you will have a author bio box in your post’s.
Method 2: Using An Author Bio Box Plugin
If you are using a theme that doesn’t come with an author info box, then you can use this method. In this method, you are going to need a plugin named Simple Author Box.
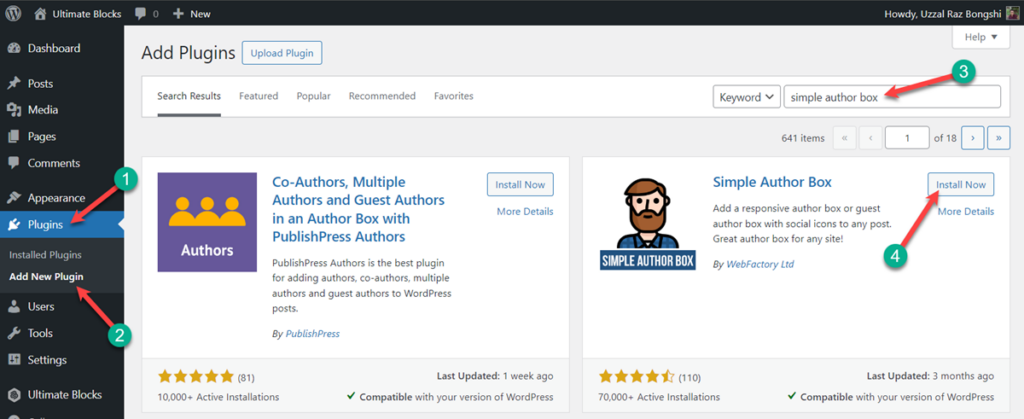
Install & activate the plugin. If you like to customize any settings then navigate to Appearance -> Simple Author Box.

From here, you will be able to customize your author box.
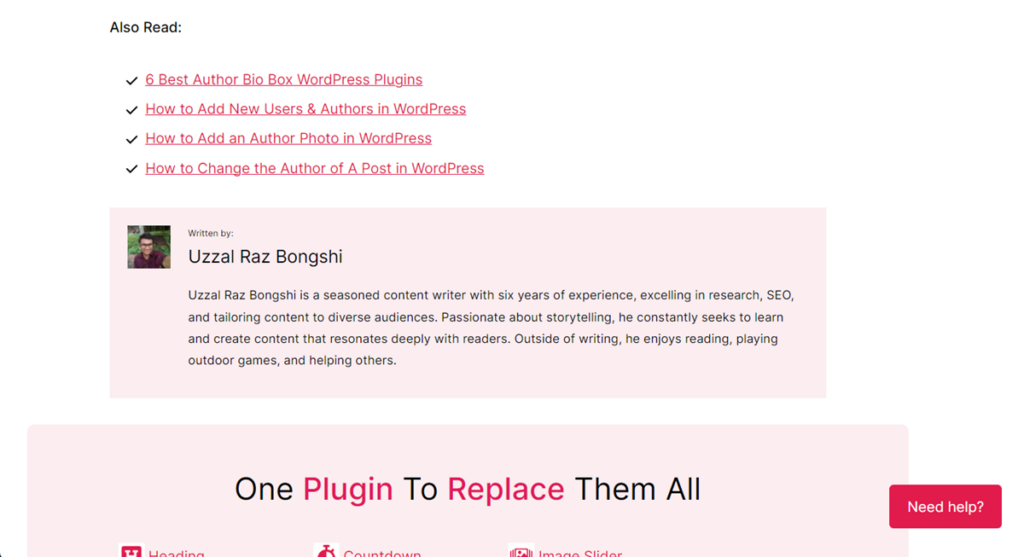
To add a author box, your don’t need to do anything. After the activation of the plugin, an author box will be automatically added to every post.
Here’s a look of the author box.

Method 3: Using Custom Code
In this method, you need to add code to your website.
First, navigate to ‘Appearance -> Theme Editor’ then click on Theme Functions(functions.php)

Now copy the below code and paste it in the editor.
function wpb_author_info_box( $content ) {

global $post;

// Detect if it is a single post with a post author
if ( is_single() && isset( $post->post_author ) ) {

// Get author's display name
$display_name = get_the_author_meta( 'display_name', $post->post_author );

// If display name is not available then use nickname as display name
if ( empty( $display_name ) )
$display_name = get_the_author_meta( 'nickname', $post->post_author );

// Get author's biographical information or description
$user_description = get_the_author_meta( 'user_description', $post->post_author );

// Get author's website URL
$user_website = get_the_author_meta('url', $post->post_author);

// Get link to the author archive page
$user_posts = get_author_posts_url( get_the_author_meta( 'ID' , $post->post_author));

if ( ! empty( $display_name ) )

$author_details = '<p class="author_name">About ' . $display_name . '</p>';

if ( ! empty( $user_description ) )
// Author avatar and bio

$author_details .= '<p class="author_details">' . get_avatar( get_the_author_meta('user_email') , 90 ) . nl2br( $user_description ). '</p>';

$author_details .= '<p class="author_links"><a href="'. $user_posts .'">View all posts by ' . $display_name . '</a>';

// Check if author has a website in their profile
if ( ! empty( $user_website ) ) {

// Display author website link
$author_details .= ' | <a href="' . $user_website .'" target="_blank" rel="nofollow">Website</a></p>';

} else {
// if there is no author website then just close the paragraph
$author_details .= '</p>';
}

// Pass all this info to post content
$content = $content . '<footer class="author_bio_section" >' . $author_details . '</footer>';
}
return $content;
}

// Add our function to the post content filter
add_action( 'the_content', 'wpb_author_info_box' );

// Allow HTML in author bio section
remove_filter('pre_user_description', 'wp_filter_kses');
Don’t forget to update the file. Now the styling of the info box is left.
Navigate to Appearance -> Customize, then click on Additional CSS

Now paste the following code in the editor.
.author_bio_section{
background-color: #F5F5F5;
padding: 15px;
border: 1px solid #ccc;
}

.author_name{
font-size:16px;
font-weight: bold;
}

.author_details img {
border: 1px solid #D8D8D8;
border-radius: 50%;
float: left;
margin: 0 10px 10px 0;
}
Then click on the Publish button above. Now you got a designed author info box.
Last Words
No matter which method you follow here, you will always be able to add an author info box very easily. But it is recommended to use method one, as it is easy and doesn’t involve any hardship. If you face any problem, ask without any hesitation. If you have liked this article, then help us by sharing this article.
Changelog
Updated on 2024-06-30 (Uzzal Raz Bongshi)
- Updated ‘Method 1’Method 1: Using the Block Editor’.
- Updated ‘Method 2: Using An Author Bio Box Plugin’.
- Updated meta description.
- Updated intro.
Also Read:


Leave a Reply