If you’re new to WordPress, you must be discovering a lot of new things you can do with the Block Editor.
One of the best things about the Block Editor is the ability to move blocks anywhere you want.
And in this short tutorial, I’ll show you how to move blocks in WordPress. This will help you get a better grasp of the Block Editor and use it more efficiently.
Moving Blocks In WordPress
There are 3 different methods you can use to move blocks in WordPress. All three methods are very simple and easy to follow.
Let’s see how to move blocks in WordPress using these three methods.
Method 1: Move Block Handles
The Block editor displays a quick toolbar for each block that lets you customize the block easily. This toolbar also has two up and down handles that let you move the block.
When you click on these up and down arrows, the block shifts one position up or down in the editor.
This is one of the quickest ways to move blocks in WordPress. If there are blocks that need to be moved a few positions up or down, you can use these handles on the block settings toolbar.
Method 2: Drag & Drop The Block
The second method of moving blocks in WordPress is to drag and drop the entire block to where you want.
Right next to the move handles in the block toolbar, you’ll see the drag icon displayed by 6 dot icons.

Click and hold the icon to move the block anywhere you want in the document. The editor displays a blue separator line to indicate the position where the block will be placed.
Release your mouse and place the block in your desired position.
This is another quick and easy method of moving blocks in WordPress. It can be really helpful when you want to move the block way up or down from its original position.
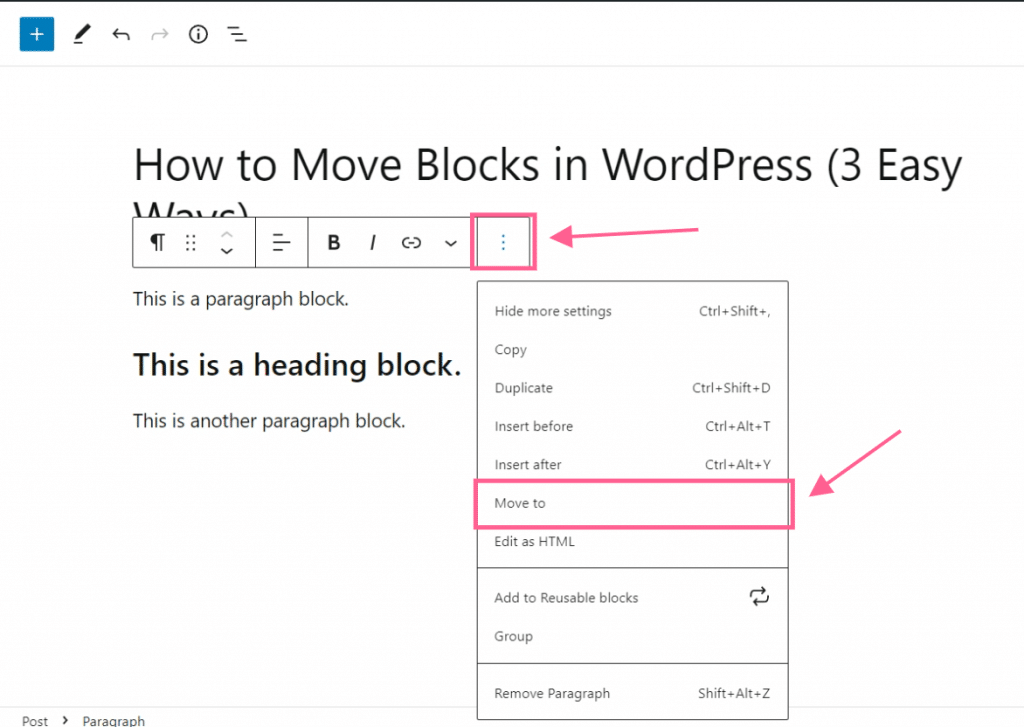
Method 3: Use The ‘Move To’ Option
The new way of moving a block in WordPress is by using the ‘Move To’ option in the block settings.
In the block toolbar, click on the three dots to get more options. Here, you’ll find a ‘Move To’ option.
Click on this option and the editor will now display a blue separator line indicating the position where your block will be moved to.
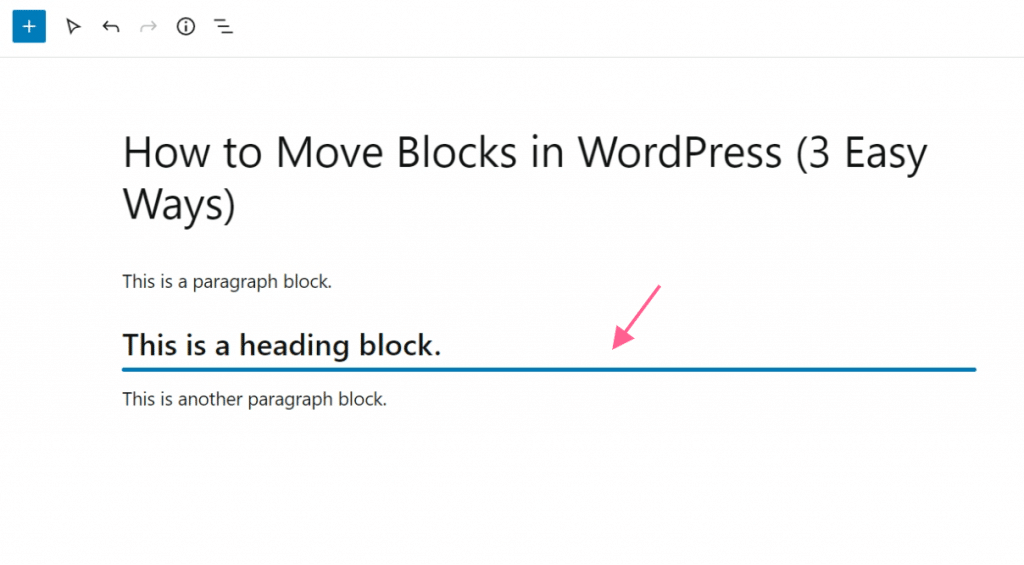
You can use the up and down arrow keys to change the desired position of the block. Once you’ve decided on where to move the block, click on the Enter key and your block will be moved to that position.
This method can also be quite useful as it allows you to use your arrows keys to quickly move the block to a new position.
Method 4: From the List View
The last way of moving a block is using the List View. Simply click on the ‘Document Overview’ icon from the higher left-hand side corner and drag the block & drop it where you want to move it.

Conclusion
So, that’s all about how to move blocks in WordPress. With these three methods, you can easily move blocks inside the WordPress editor with no problems.
I hope this tutorial helped you learn more about WordPress and the Block editor. If you have any questions, feel free to ask them in the comments below.
Also, do check out other tutorials on our blog if you’re new to WordPress.
Also Check:


Leave a Reply