
Are you searching for a way to add alert messages in WordPress?
With alert messages, you will be able to notify your visitors about important promotions, updates, or other relevant information. Alert messages are an effective way to catch the attention of your visitors and ensure that they don’t miss any vital information.
In this post, I will show you how to add alert messages in WordPress. After reading the post, you will be able to add alert messages on your own. For you, I will show three different ways to add alert messages. You can choose any of these procedures to add alert messages in the WordPress site of yours.
Let’s begin.
Method 1: Adding Alert Messages by Using a Notification Box
To add alert messages by adding a notification box,
Step 1: Install the Ultimate Blocks Plugin
First, you need to install the Ultimate Blocks plugin from the WordPress plugins directory.
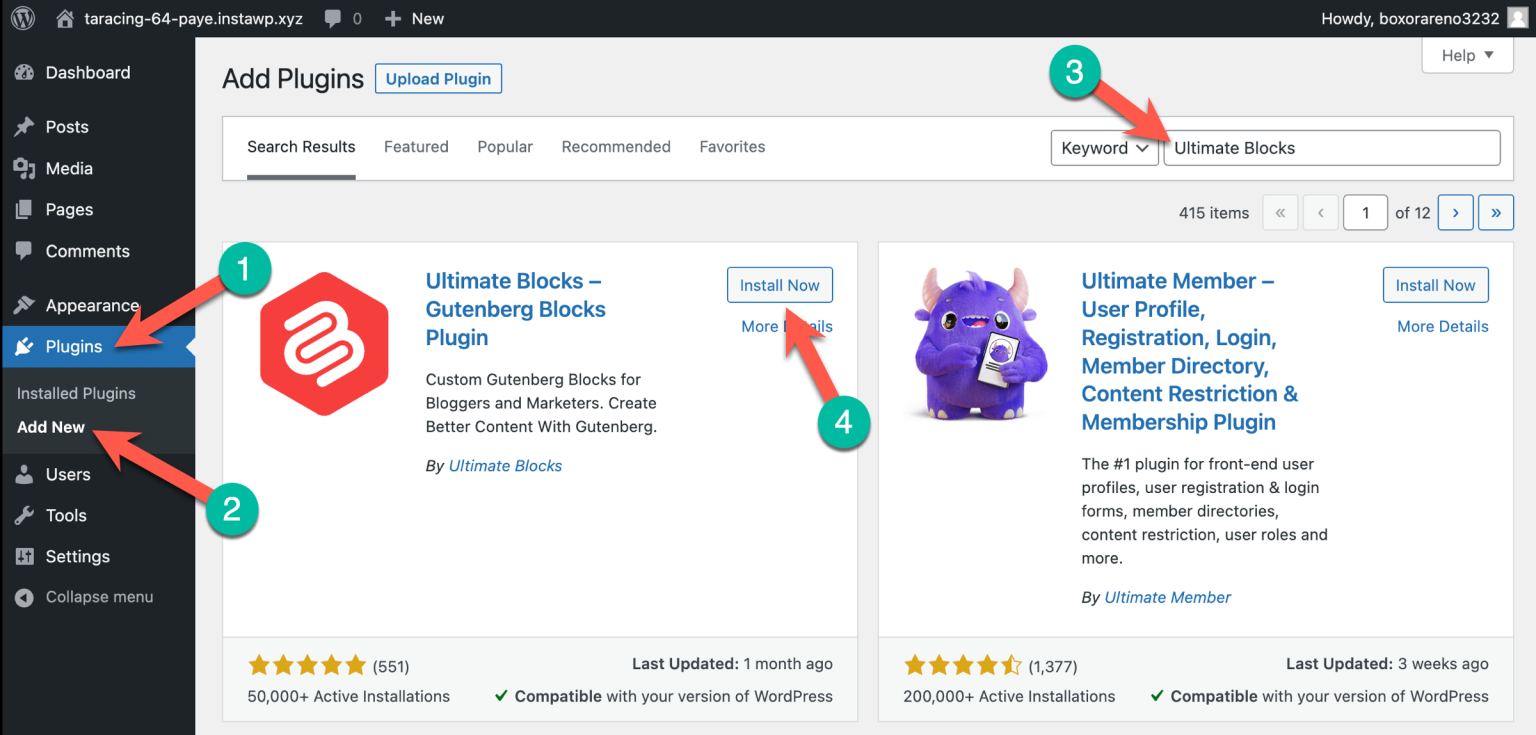
Don’t forget to activate the plugin after the installation is complete.
Step 2: Add Alert Message
Now, click on the ‘Add Block’ button and search for “Styled Box”.

Insert the block by clicking on it. You will see four options; click on “Notification Box”.

Write your alert message in the text field. Then, you can choose any type of alert, such as information, proceed, warning, or danger.

Step 3: Customization
If you like, you can also change the color scheme in the way you want. Just click on Settings -> Block and change the color scheme in the way you want.

There’s another option called scheduler. If you enable this option, your alert message will be shown to a specific group of people at a specific time.

To enable it, open the block settings and click on visibility control. Then, enable the scheduler and set the time. Remember, this is a pro feature; therefore, you must have the pro version of the Ultimate Blocks plugin.
After you are done creating your alert message, don’t forget to hit the Update or Publish button.
If you like more advanced options like Notification Schedule and notification hide, then you can purchase the pro version of Ultimate Blocks.
To purchase the pro version, navigate to the pricing page of Ultimate Blocks and buy the plugin.
Once you buy the plugin, you’ll get a confirmation email with the download link and a license key. Just download the plugin and upload it to your WordPress site. Then, activate the plugin and enter the license.
Learn: How to Install & Activate Ultimate Blocks Pro
Method 2: Adding Alert Messages Using a Notification Bar (with ConvertForce)
Another simple way to add alert messages in WordPress is by using a notification bar. For this, we’ll use the ConvertForce plugin, a lightweight popup and notification bar builder.
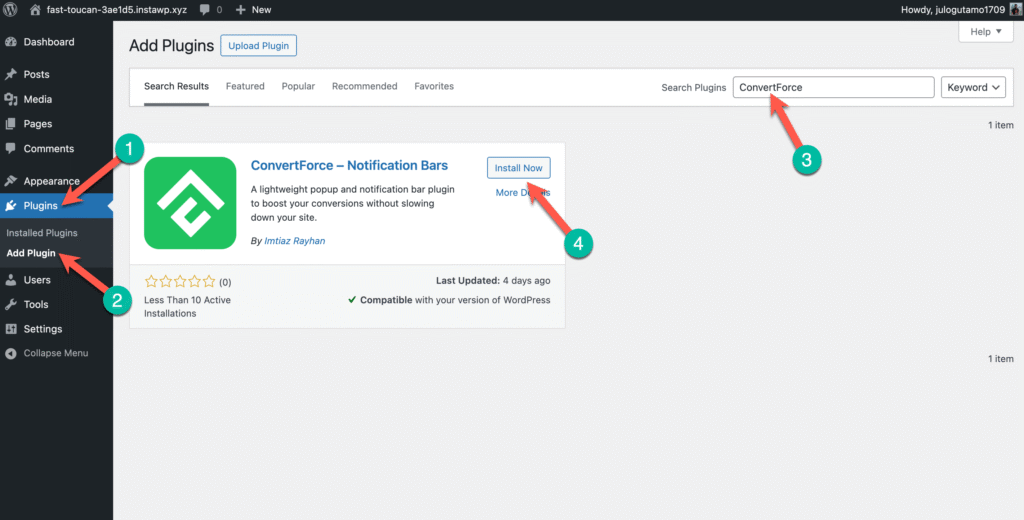
Step 1: Install the ConvertForce Plugin
Go to WordPress Dashboard → Plugins → Add New, search for “ConvertForce,” then click Install Now and Activate.
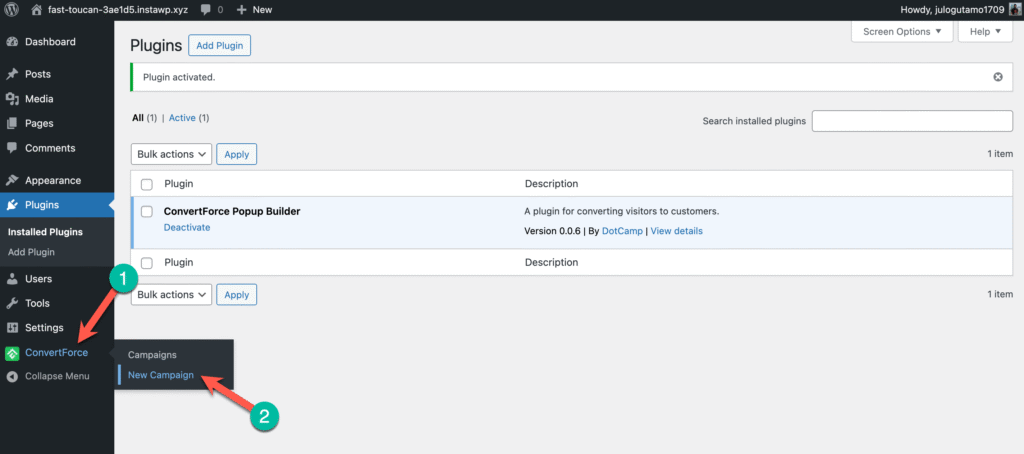
Step 2: Add a New Campaign
Once activated, you’ll find ConvertForce in your WordPress dashboard. Click on ConvertForce → New Campaign.
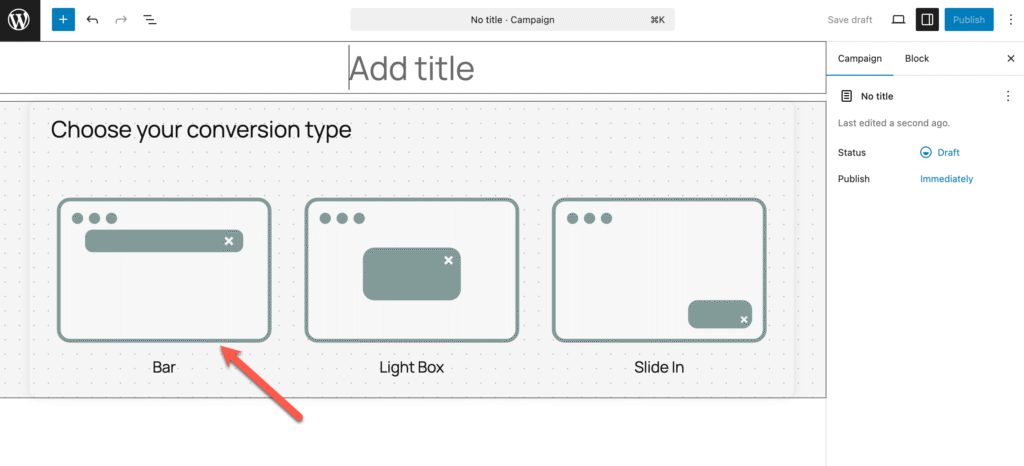
Step 3: Select a Campaign Type
You’ll be asked to choose your campaign type. Since we’re creating an alert message, select Bar.
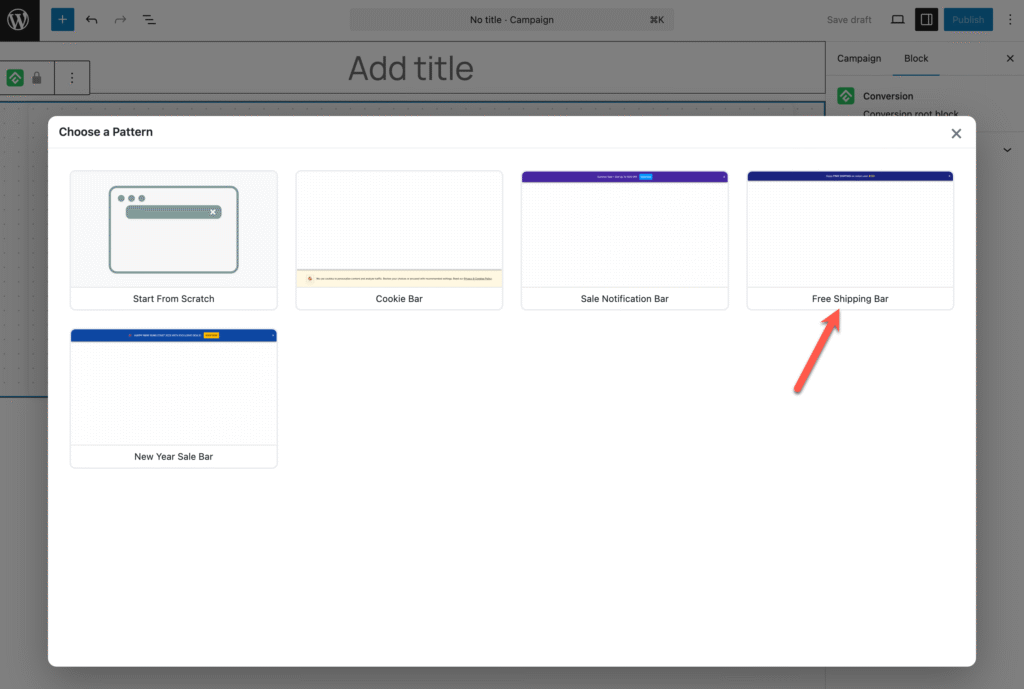
Step 4: Choose a Pre-Built Pattern or Start from Scratch
ConvertForce gives you the option to either start from scratch or use a pre-designed template. For this tutorial, let’s choose a pre-built pattern (e.g., Free Shipping Bar).
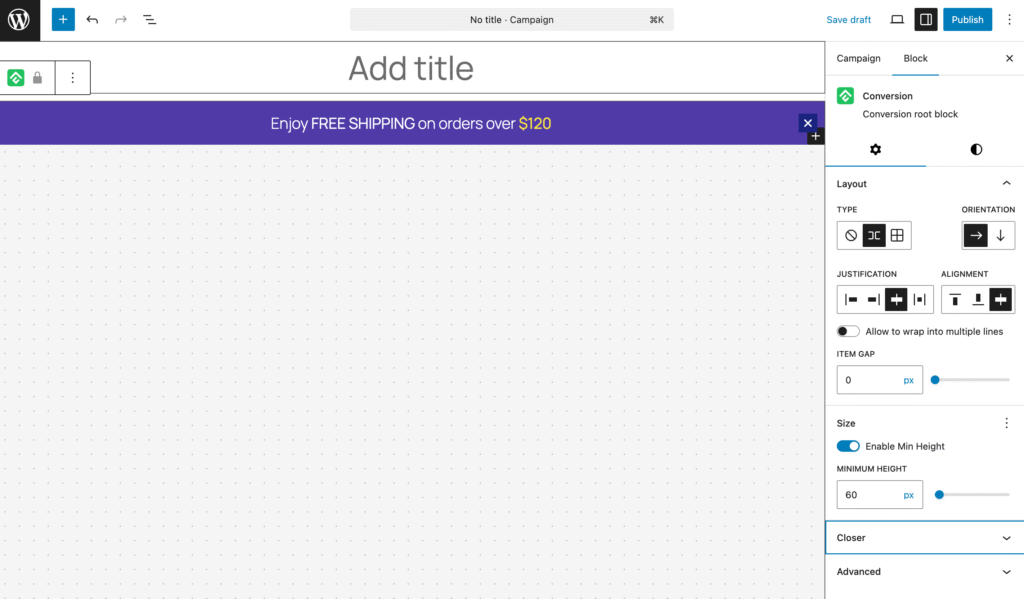
Step 5: Customize the Bar
Next, customize the look and feel of your bar. You can change the background color, text color, alignment, and font. Update the message text with your alert (e.g., “⚠ Important Update: Scheduled Maintenance Tonight”).
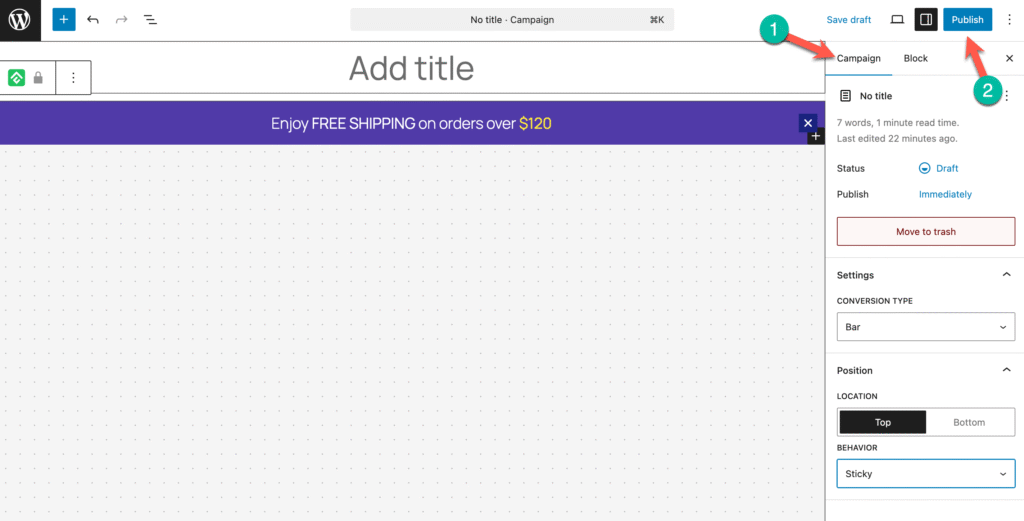
Step 6: Optimize and Publish the Campaign
Finally, review your settings, adjust behavior (sticky or fixed), and hit Publish to make your alert bar live.
And that’s it! Your notification bar is now ready, and visitors will instantly see your alert message at the top (or bottom) of your site.
Method 3: Adding Alert Messages by Using the Popup Maker Plugin
To add alert messages using a popup,
Step 1: Install Popup Maker Plugin
Navigate to Plugins -> Add new. Search for the Popup maker plugin.

Install and activate the plugin.
Step 2: Create a New Popup
Navigate to Popup Maker -> Create Popup. Write the popup name, Title, and alert message in the text field.

Scroll below, From the popup settings Triggers tab, click on “Add New Trigger”.

Here, you can choose to click open, time delay, and form submission. You can also set the stop popup to show according to action. Then click on the Add button.

Next, click on the Targeting Tab and choose a condition.

If you want to add an alert message to a specific post, click “Posts: Selected” and choose the posts where you want to show an alert message.

When you are done, hit the publish button.

If you wish, you can customize your warning from the settings.
Last Words
I hope now you will be able to add alert messages in WordPress on your own. If you ask me to choose a procedure, I would say to go for Ultimate Blocks. As this plugin not only allows you to add alert messages but also provides you with 21+ awesome blocks to create the content you want.
If you liked the post, then please share it with your friends, and don’t forget to leave your thoughts in the comment box below.
Changelog
Updated on 2025-09-16 (Istiak Rayhan)
- Replace ‘My Sticky Bar’ plugin with ConvertForce.
Updated on 2024-06-05 (Uzzal Raz Bongshi)
- Updated screenshots.
- Updated instructions for method 2.
- Replaced Method 3 with a new plugin.


Leave a Reply