Do you want to learn how to add borders around text in WordPress? Well, you’ve come to the right place!
In this short tutorial, I’ll walk you through the simple steps to add a border around any text to your posts and pages.
There are many benefits of adding borders around the text. It helps you emphasize certain parts of your content and grab the reader’s attention to it.
For instance, having a bordered box in your content can help you:
- Make important parts of the content more noticeable.
- Use it as a way to display caution or warning in your content.
- Turn your boring wall of text into something more attractive and engaging.
With that being said, let’s now learn how to add a border around text in WordPress.
Supercharge Your WordPress Block Editor!

Without Using a Plugin
You can add border around text in WordPress with or without using a plugin. Let’s start with the without using a plugin option.
Step 1: Transform the ‘Paragraph’ Block to the ‘Group’ Block
First, select the Paragraph block and click on the paragraph icon from the toolbar.
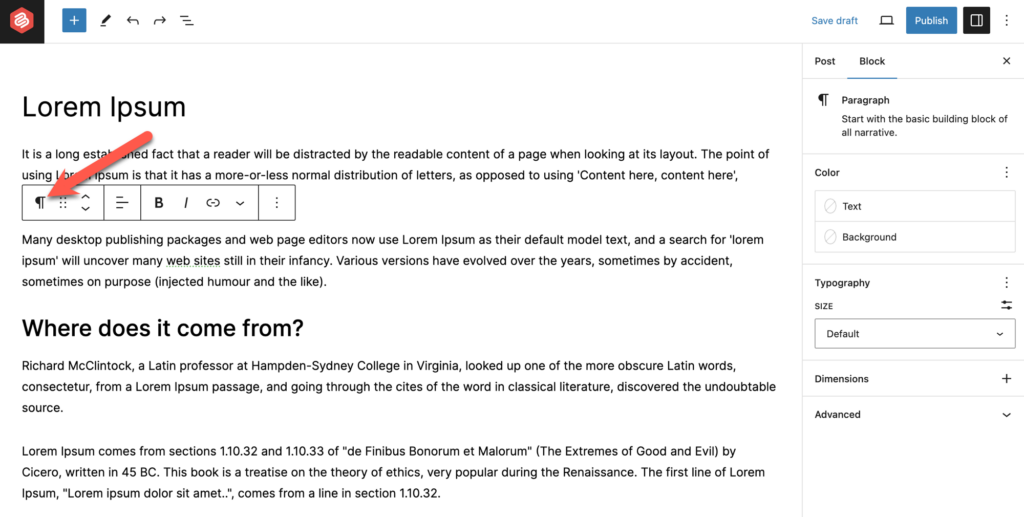
Then click on the ‘Group’ block.
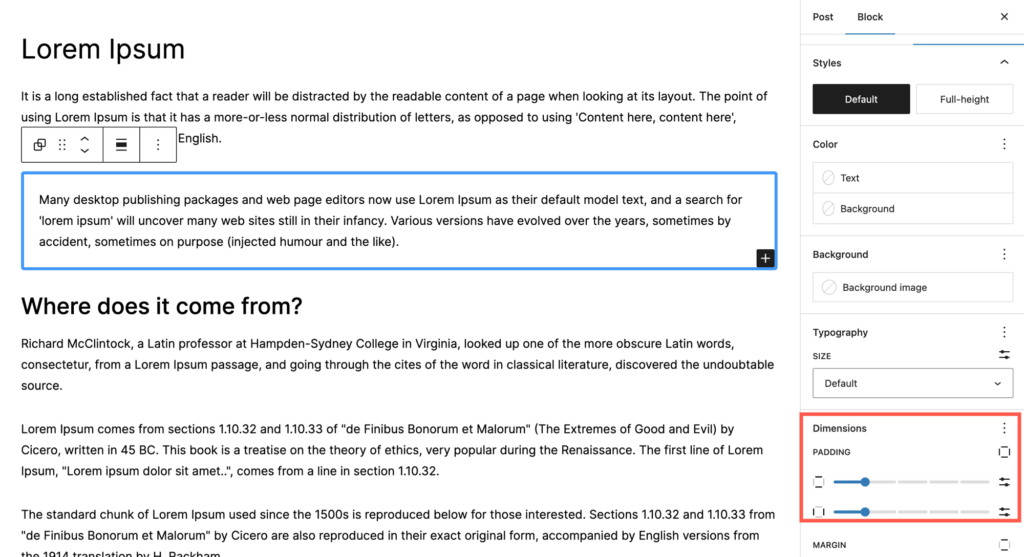
Step 2: Add Borders to The Group Block
Now click on the Styles tab and change the border.
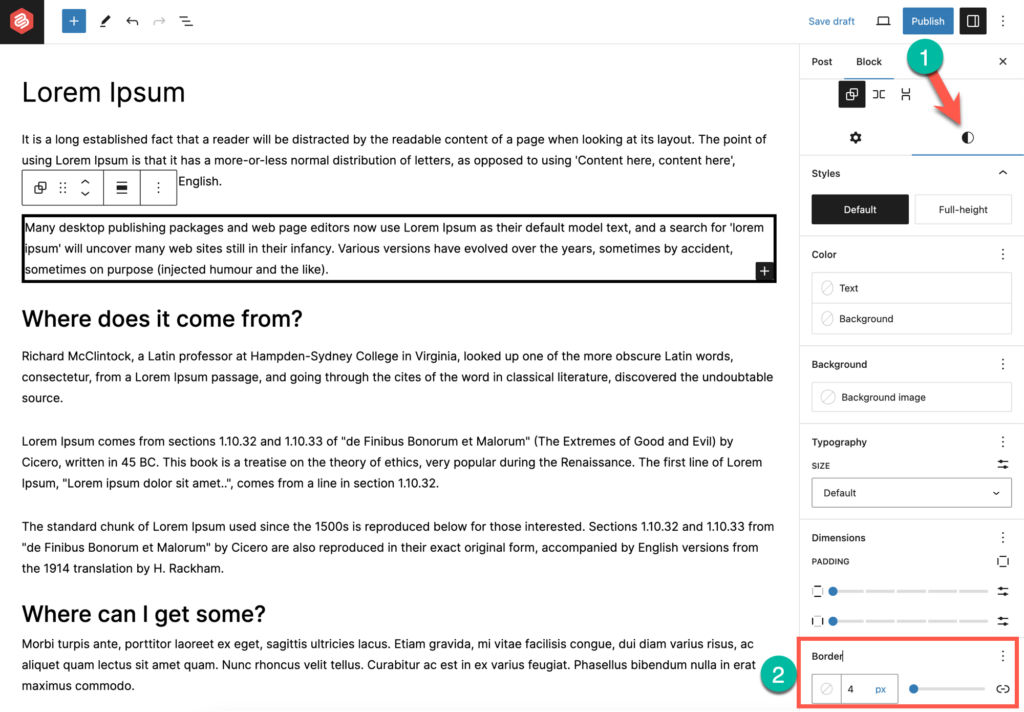
You change the border color (1) by click on the color picker and radius (2) from there.
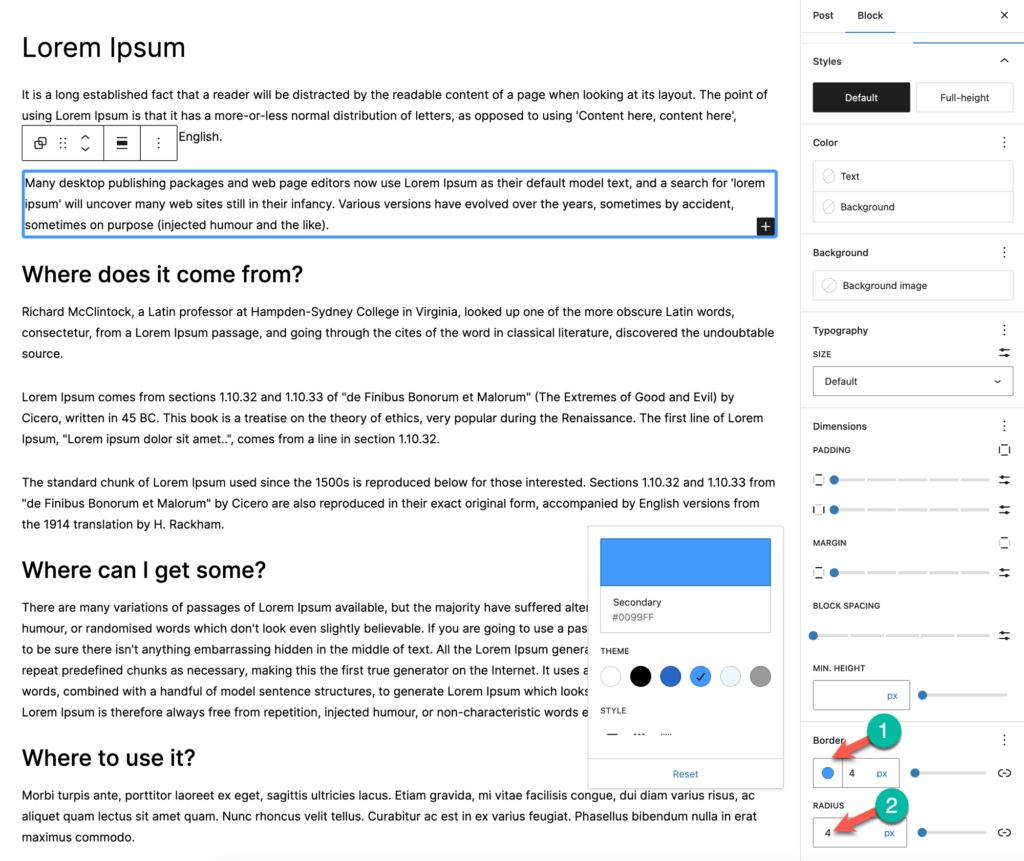
Step 3: Change the Padding
To make the text look good, change the padding from the Styles tab as well.
Using A Plugin
Now if you’re not using a block theme, the above method might not work for you. On that case, you can use the Ultimate Blocks plugin.
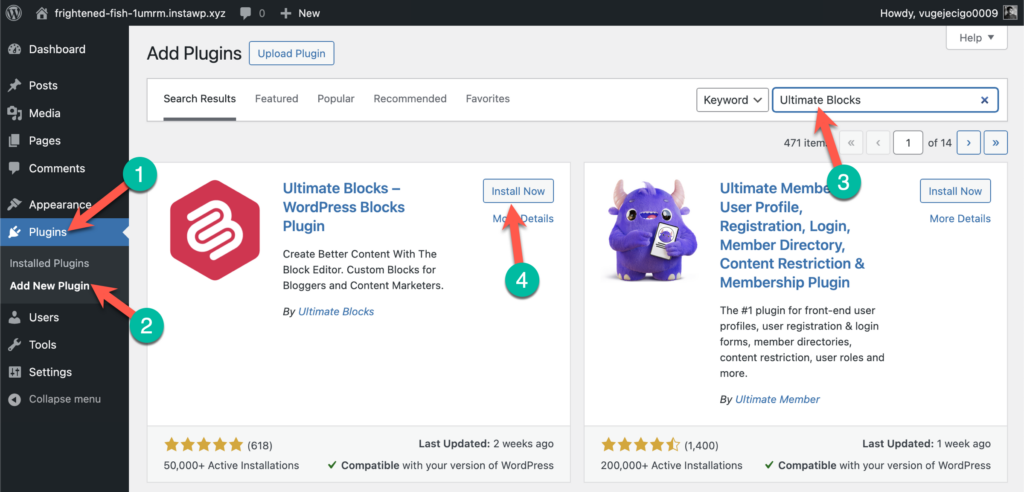
Step 1: Install the Ultimate Blocks Plugin
To install the plugin, go to your WordPress Dashboard > Plugins > Add New and search for ‘Ultimate Blocks’. Then install and activate the plugin.
We’ll be using this plugin to add borders around the text.
Step 2: Insert the ‘Styled Box’ Block
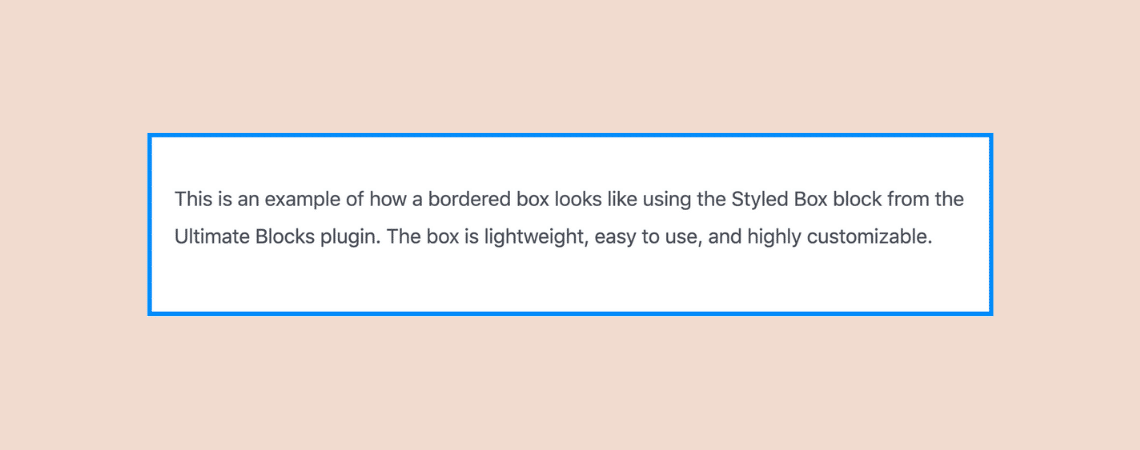
Now, insert the Styled Box block of Ultimate Blocks into your content. With the Styled List block, you can create beautiful content boxes.
Just click on the + sign in your editor and search for ‘Styled Box’ and select the block.

Once you insert the Styled Box, you’ll be asked to select a style:
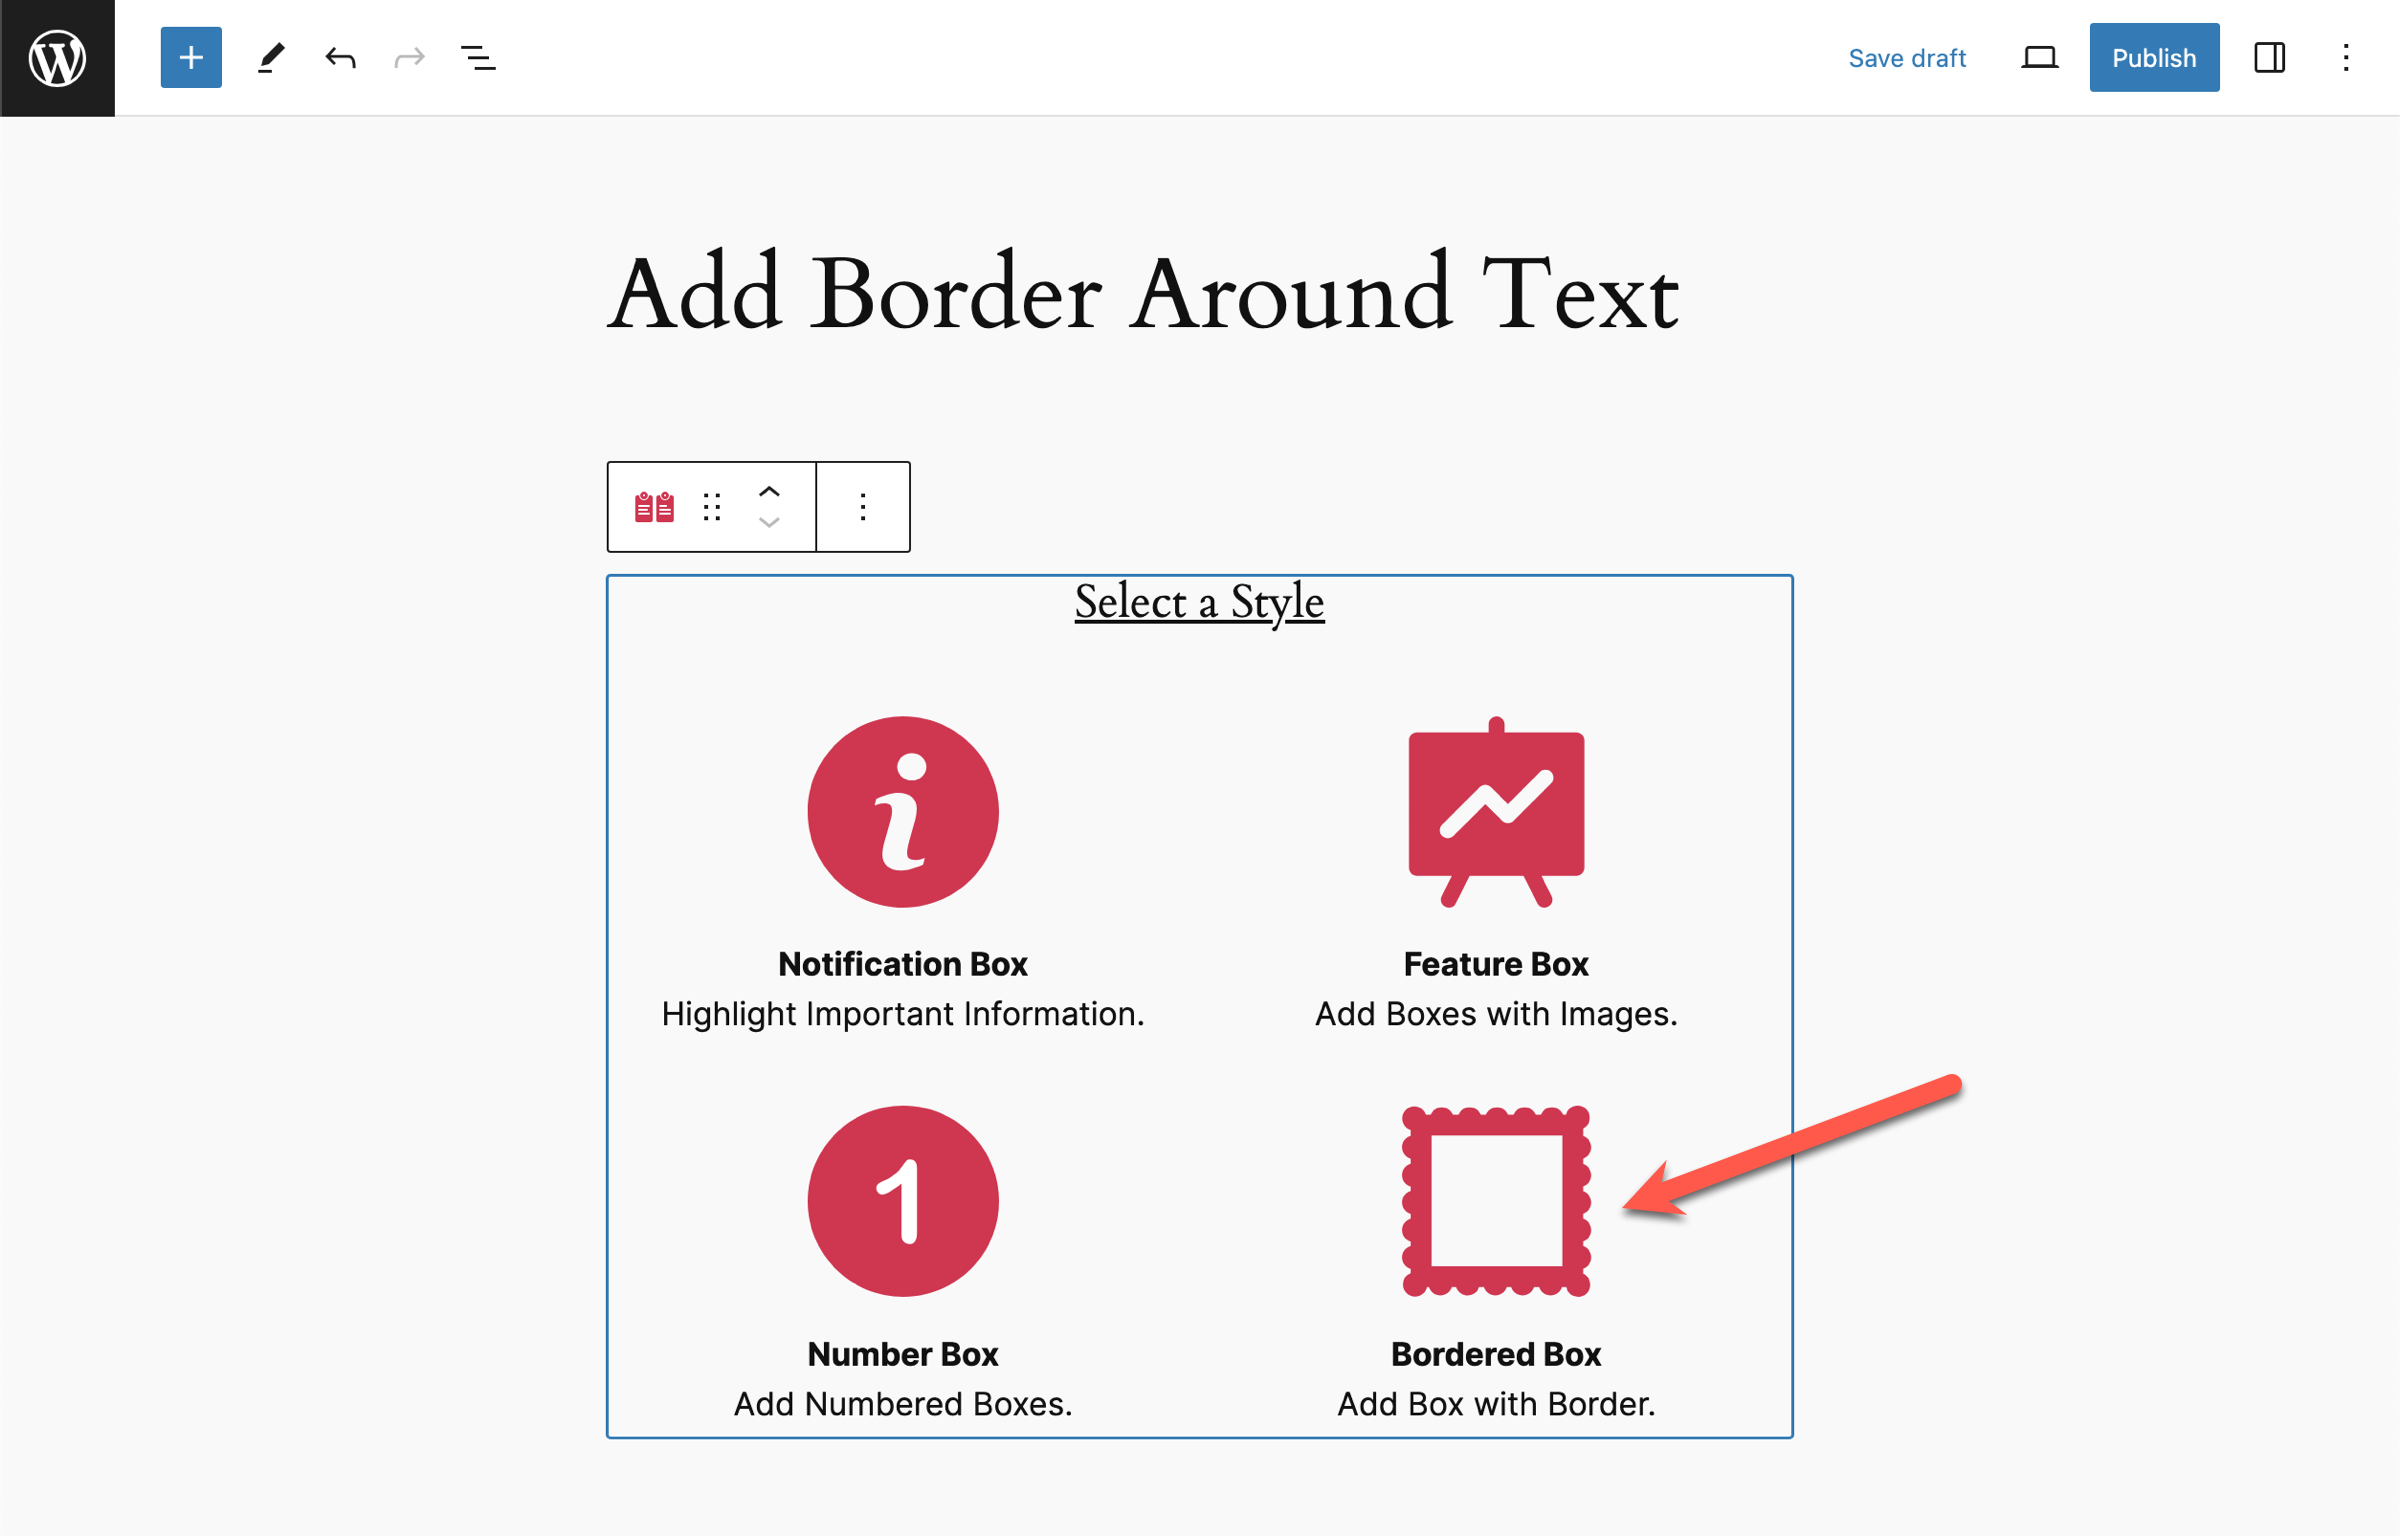
Click on the Bordered Box style.
Once the Bordered Box is added to your post, you can start adding your content inside the block.
Step 3: Add the Text Inside the Bordered Box
You can then customize the bordered box by changing the border size, style, radius, background color, text color, and more.

The block is highly customizable and lets you create beautiful bordered boxes with ease.
So, that’s how simple and easy it is to add a border around text in WordPress.
Using the Styled Box from the Ultimate Blocks plugin, you can easily create bordered boxes without writing any CSS.
Plus, the Ultimate Blocks plugin comes with many other useful blocks you can use in your content.
Conclusion
Adding a border around the text is now easier than ever. As demonstrated in the article above, you can add borders around text quite easily with the Ultimate Blocks plugin.
Ultimate Blocks is a free plugin that comes with many Gutenberg blocks designed to help you create beautiful and engaging content.
I hope now you’ll be able to add borders around text easily in WordPress. But if you have any further doubts or questions, feel free to ask them in the comments below.
I’d be happy to help you out with your queries.


Leave a Reply