The new WordPress block editor (Gutenberg) introduced an awesome feature called Reusable Blocks.
With reusable blocks, you can save a content block and use them on other pages on your website.
In this article, I’ll show you how to create reusable blocks in the Block editor. We’ll also take a look at how you can add your saved reusable content blocks to other posts on your website.
And finally, we’ll learn how to manage your blocks and how you can import or export content blocks.
So, let’s get started.
What Is A Reusable Block?
A reusable block is a content block that can be saved to be used later.
Reusable blocks were introduced in the WordPress 5.0. Prior to that, WordPress had no such feature allowing you to save parts of your content.
But with the Block Editor and its block functionality, this has become possible and is helpful in many ways.
Now, instead of just copying and pasting a content snippet you want to reuse, you can simply save the content block and add it to other posts with a simple click.
If you’re wondering how you can make use of reusable blocks, let me share some ways of using reusable content blocks effectively.
- Adding ad banners in your WordPress posts and pages.
- Quickly inserting call-to-action buttons or sections in posts.
- Adding social media follow buttons at the end of your posts.
There are many other ways you can use reusable blocks.
That being said, let me show you how to create reusable blocks in the WordPress block editor.
Also Read: 10 Time-Saving WordPress Editor Tips & Tricks You Should Know
How To Create A Reusable Block
Creating a reusable block is very simple. All content blocks can be individually saved as a reusable block.
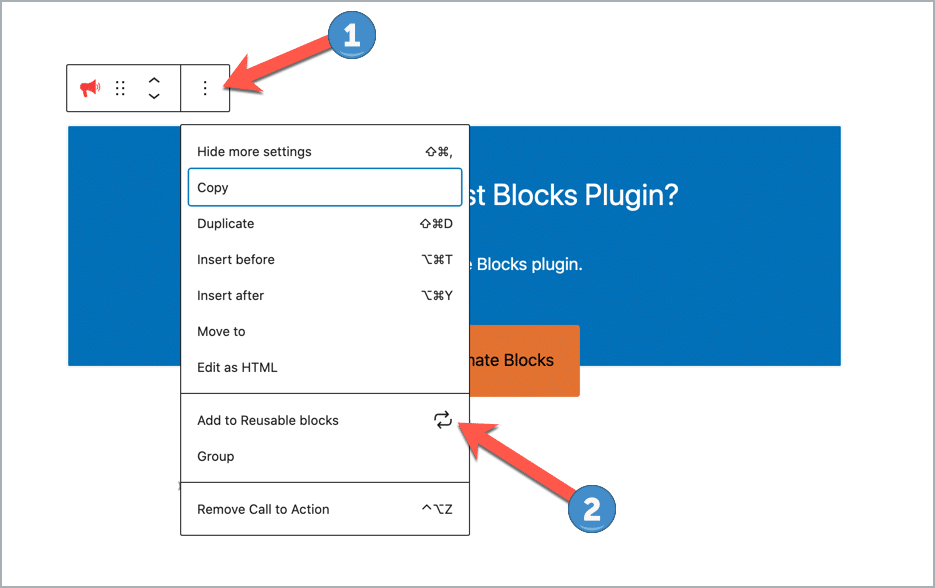
To create a reusable block, create or edit a post and add a new block. Once you’ve created the block, select the block and click on the three dot in the toolbar (1) and click on ‘Add to Reusable Blocks’ (2).
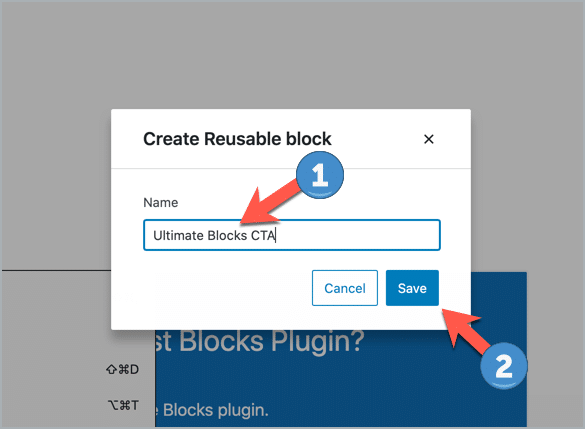
Enter an easy to identify name for the reusable block (1) and click on ‘Save’ button.
Once the reusable block has been created, you’ll see a ‘Reusable blocks created’ notification.
That’s how simple and quick it is to create reusable blocks in WordPress.
How To Add Reusable Block In Other WordPress Posts
So, you’ve created your first reusable block in Gutenberg. Now, how do you add this saved block to your other posts in WordPress?
Adding a saved reusable block to your posts is also a very simple process. Let’s take a look at it.
First, create a new post or edit the post where you want to add the recently saved block.
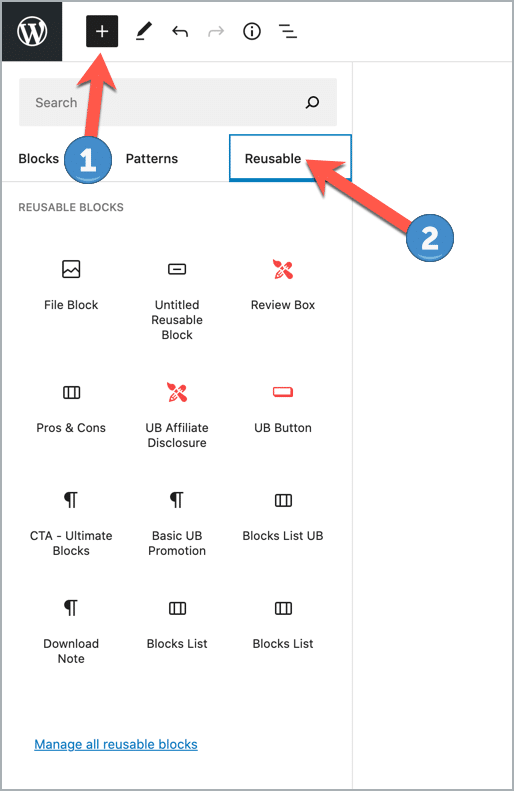
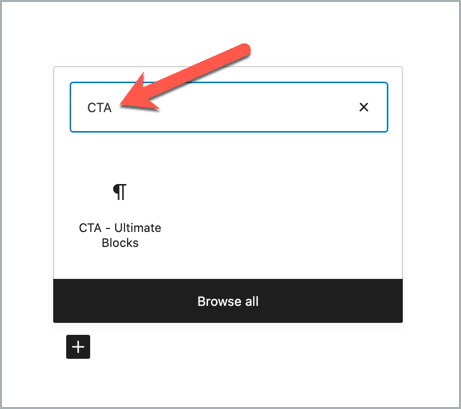
Then click on the ‘+’ sign from the top corner of the left-hand side and click on ‘Reusable’ tab. You’ll find all the reusable blocks there.
Simply drag and drop or click on the block to add it.
Alternatively, you can also find your saved block by just searching for it.
That’s it. You’ve just added a reusable block in your other WordPress posts.
Let’s now take a look at how to edit and update these saved reusable blocks.
How To Edit A Reusable Block
After adding your saved block to another post, you can also edit your reusable block.
But, do remember that changing a reusable block will change it on all the locations where it’s added.
Still, if you do want to edit a reusable block for one post, you can convert it into a regular block.
To do this, click on the three-dot menu in the toolbar and select the ‘Convert to Regular Block’ option. This will convert the reusable block into a regular block just for that post.
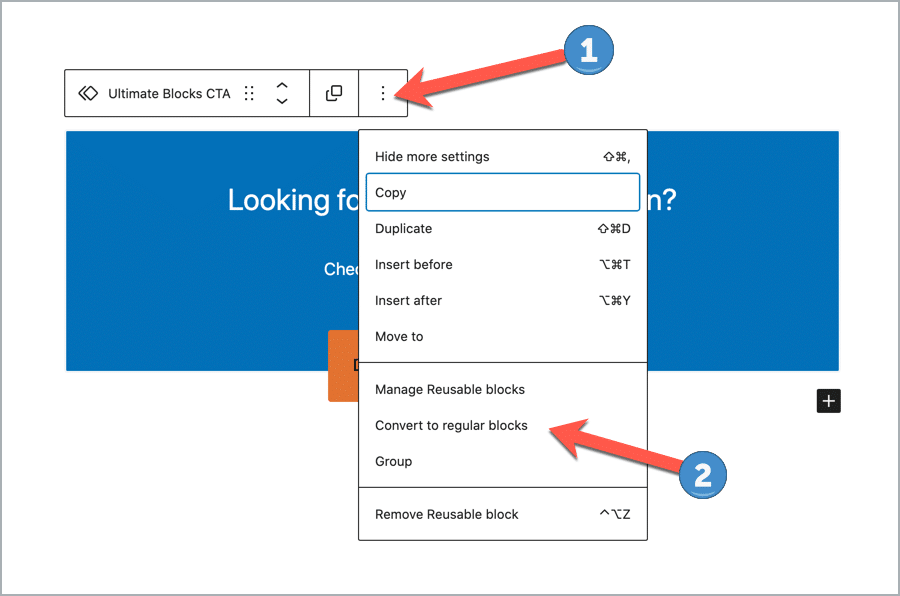
You can then edit this block without affecting the original reusable block and the other locations where it is used.
How To Manage All Reusable Blocks
Once you get used to the idea of reusable blocks, you’ll be saving blocks to avoid creating the same blocks over and over again.
Over time, there will be blocks that you don’t want to use anymore or blocks that need to be updated or renamed.
Managing all your saved blocks can be done in the Gutenberg editor. To manage your blocks, click on the ‘+’ sign from the top corner of the left-hand side and click on ‘Reusable’ tab.
Click on ‘Manage all reusable blocks’ from there.
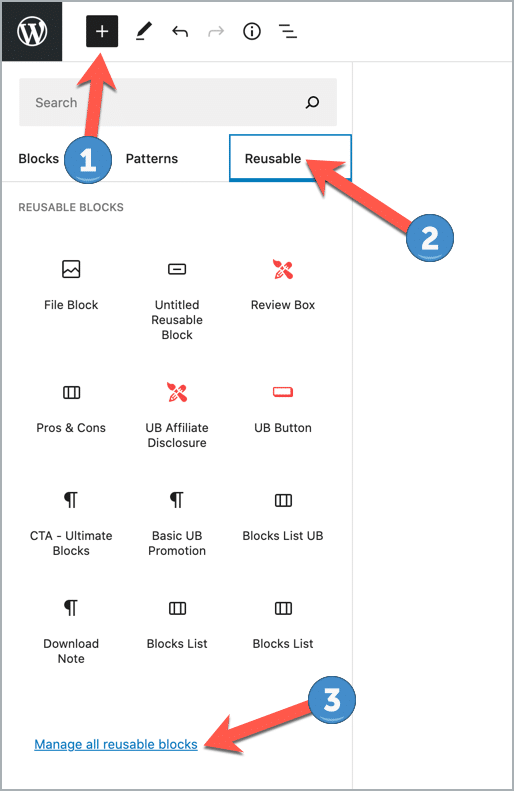
Click on the link and it will take you to a page where you’ll find all reusable blocks in one place.
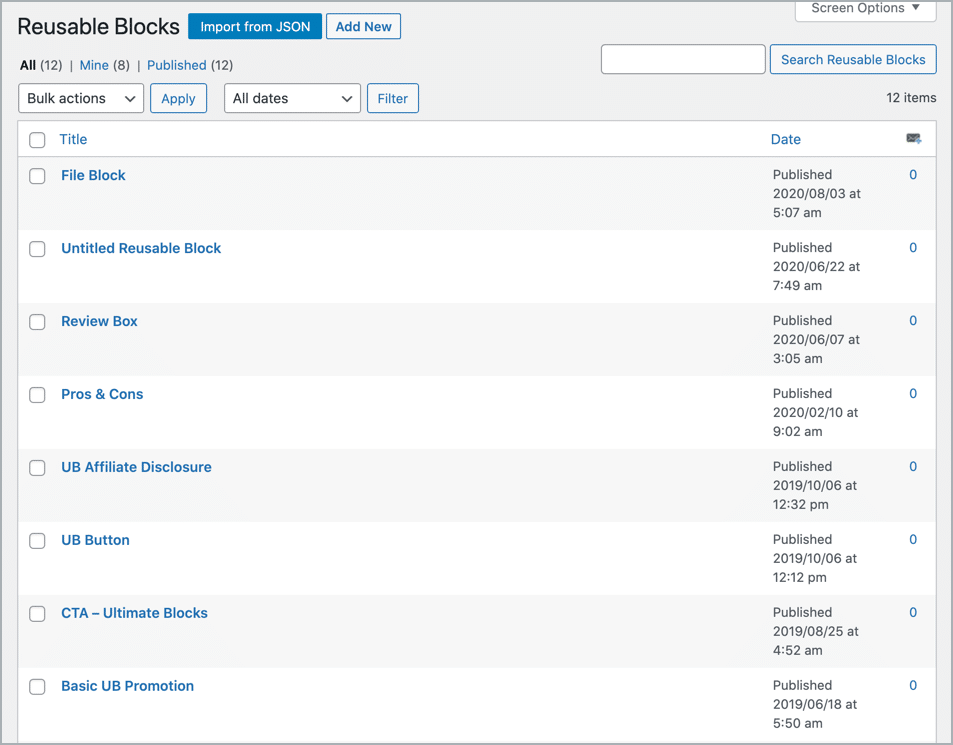
From this page, you can edit, delete, rename, import, and export all your reusable blocks.
How To Export/Import Reusable Blocks
The new WordPress block editor also allows you to export and import reusable blocks. This allows you to export your saved blocks for use on other websites or vice versa.
You can export/import saved blocks from the reusable blocks page. On this page, you can import a block by clicking on the ‘Import from JSON’ button.
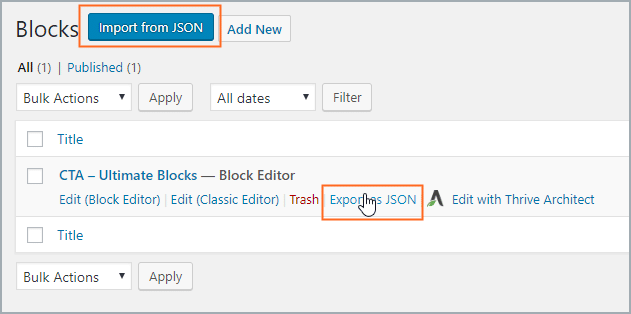
Similarly, to export a block, click on the ‘Export as JSON’ link below the respective block.
Conclusion
Using reusable blocks is very easy in Gutenberg and once you get used to it, you’ll make the most use of it.
I hope this article helped you learn more about reusable blocks and how to use it. If you have any questions or doubts regarding reusable blocks, feel free to ask them in the comments section below.


Leave a Reply