Imagine publishing a post while you’re on vacation, asleep, or tackling other priorities! WordPress’s built-in scheduling feature grants you this superpower. Your post will be published at the scheduled time.
This is one of the very useful features that most beginners don’t even notice. Using the scheduling feature is very easy. Whether you’re aiming for strategic content rollouts or simply seeking time management magic, this post equips you with the knowledge to schedule your WordPress posts like a pro.
Why Schedule WordPress Posts?
The best way to publish a post is to publish it now, but due to a busy schedule you may want to publish it later.
That’s why Schedule Post features come in handy. You can write up all your posts and then go ahead with the editorial calendar. Once you finished writing you can schedule posts to be published at a specific date and time.
Another reason for scheduling is traffic hours. There’s a certain time in a day when your website gets the peak of your users. By publishing at that time you can take benefit from extra traffic.
If you live in a different time zone that what would you do? Would you publish a post at night at 3 am? That looks insane. For this case, you can use this feature and have a sound sleep.
Now, let’s take a look at how to schedule posts in WordPress.
Schedule Posts in WordPress (Default Way)
Scheduling a post in WordPress is extremely easy. You can schedule posts in the default way, or you can do it by using a plugin. If you have a lot of posts, that need to be scheduled, then it is recommended to use a plugin. Otherwise, do it in the default way.
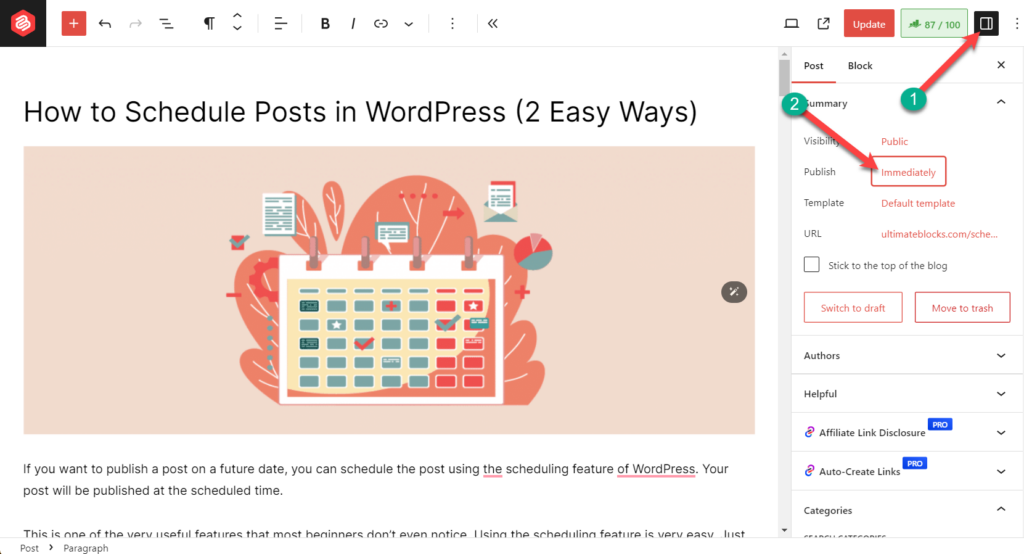
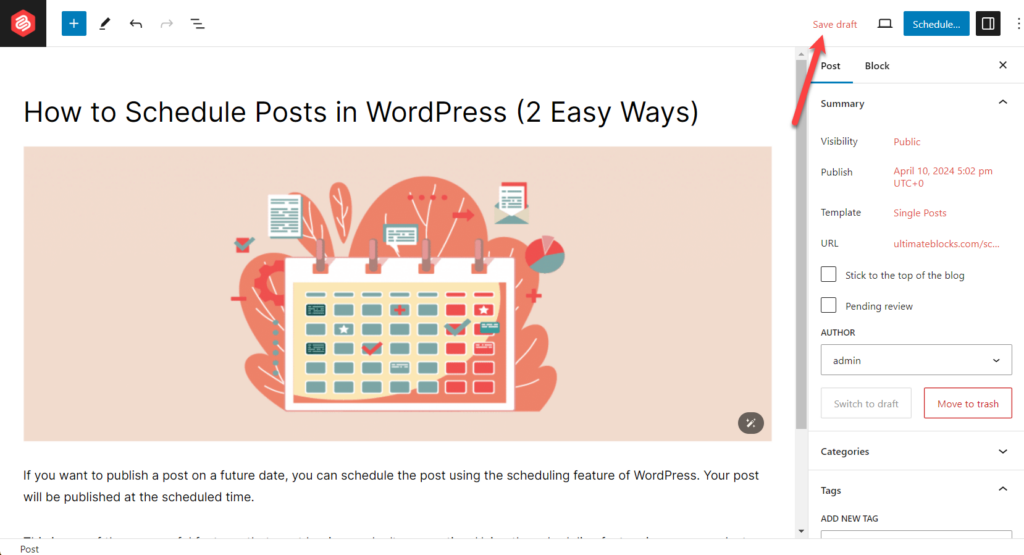
Step 1: Open Settings
Once you are done writing your post, click on the setting button. Under the Status & Visibility panel, click on the blue text written ‘Immediately’ (2).
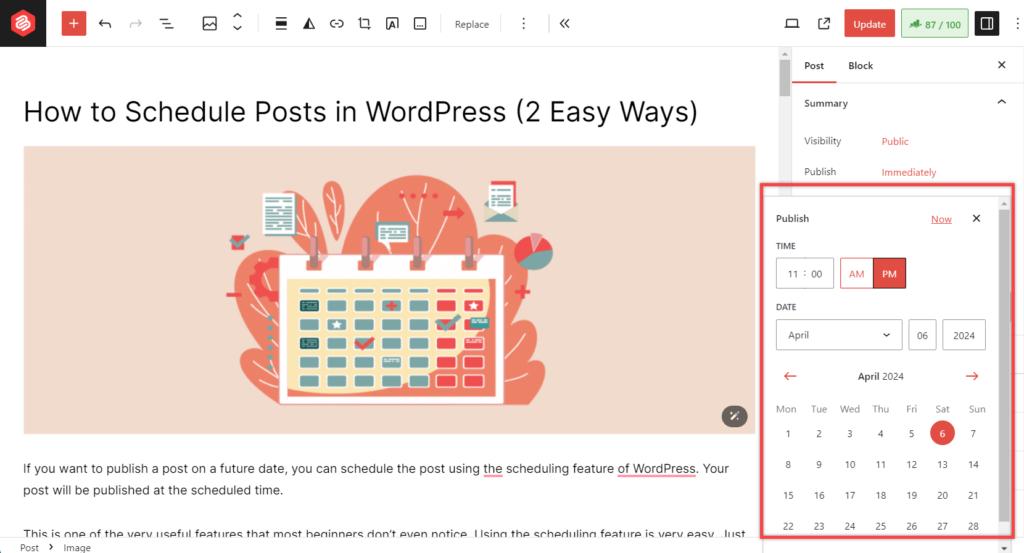
Step 2: Set The Date
This will open a panel where you will be able to pick up a date. From this date picker, pick a date and time for publishing your post.
Step 3: Schedule Post
You can select any future date you want. If you select any past date then your post will be published on that date. After selecting the future date, you will notice that the ‘Publish’ button has changed to the ‘Schedule’ button.
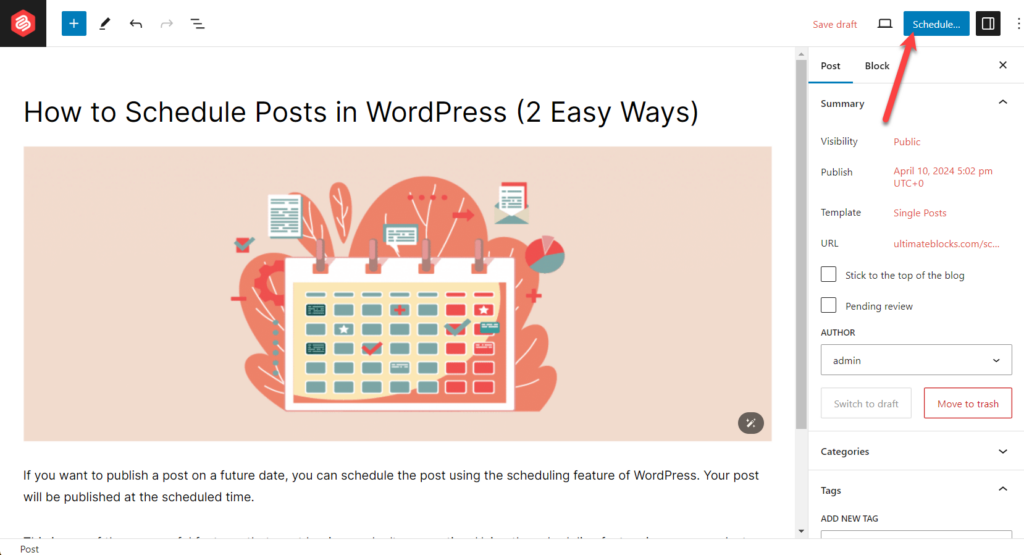
Click the Schedule button, and your post will be scheduled.
If an emergency arrives, you can also cancel the schedule. Just click on the switch to draft button. Later on, publish any time you want.
It is totally up to you, how you want to schedule posts on your website.
Schedule Posts Using a Plugin
If you like to bulk schedule post’s then using a plugin is the best way. To schedule posts using a plugin, I recommend using the SchedulePress plugin. This is one of the best post-scheduling plugins with many features and functionalities. Here are the steps:
Step 1: Install SchedulePress
First, navigate to Plugins -> Add New and search for the ‘SchedulePress’ plugin.
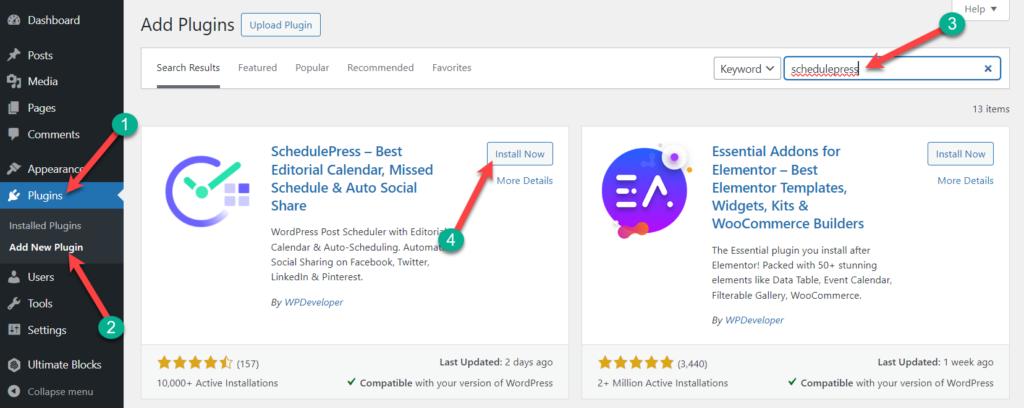
After the plugin is installed, don’t forget to activate it.
Step 2: Schedule Posts
To schedule posts, navigate to Dashboard -> SchedulePress -> Calendar. On the screen, you will see unscheduled posts on the left side and scheduled posts in the calendar.

Drag a post from the right side and move it to the date on which you want to schedule.
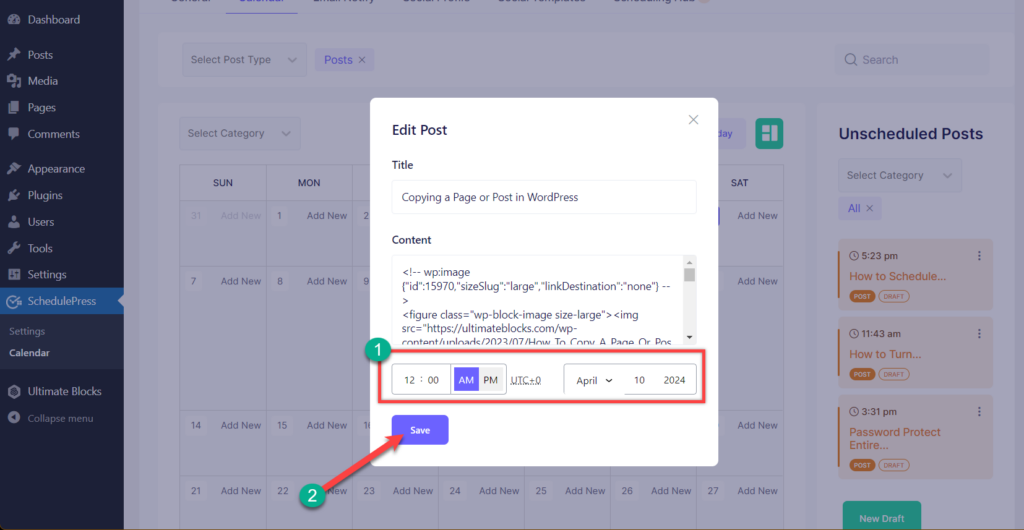
Afterward, hove cursor over a scheduled post and click on the three dot button. Select Quick Edit.
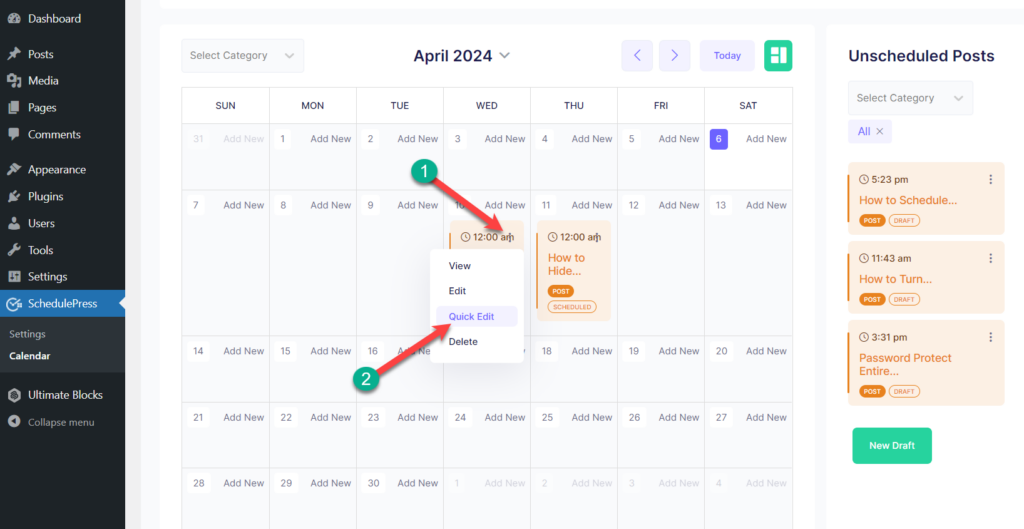
Then update the time as you want and hit the save button.
In this way, you can quickly schedule all the posts in an instant. If you wish, you can check the settings of the SchedulePress plugin and customize it as you like.
There is a pro version available that comes with an auto-scheduler, manual scheduler, missed schedule handler, and other features.
Also Read: 7 Best Editorial Calendar WordPress Plugins
Final Words
I hope now you have successfully learned how to schedule posts on WordPress. This will save you precious time. Now you can enjoy your holidays without worrying; just schedule posts, and those will be posted regularly as you set the time.
If you liked the post, please share it with your friends. Don’t forget to share your thoughts in the comment box below.


Leave a Reply