Want to give your social icons a splash of colors that match your brand better? WordPress makes this possible through multiple approaches, but we will discuss the easiest one you can follow regardless of your current skill level. All you need to do is follow the tutorial thoroughly.
Supercharge Your WordPress Block Editor!

How to Change Social Icons Color in WordPress?
Step 1: Insert Social Icon in the Editor
The first step is to get to your post where the Icons are already inserted or where you want to insert them.
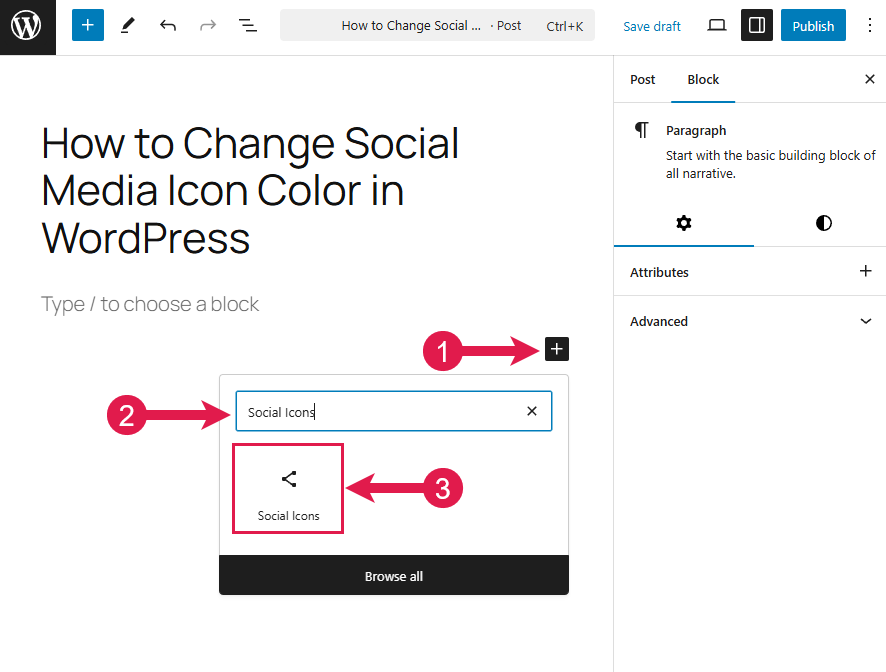
To insert the social icons into your post, click the “Add Block” icon (1), search for Social Icons (2) in the search bar, and click the block (3).
Click the “+” button to add the icons. You can add multiples if you like.

Step 2: Insert Links for your Icons
This is the crucial step for your icons. If you do not assign links to your icons, they will not be displayed in the preview. Therefore, you must assign links to every icon you add.

Step 3: Change Icon Color
To change the icon color, select the social icon block and go to styles.

Change the icon color and background color from the color menu.

After adding color, you must save or publish your post or page. So that’s how you change the color of the Social Icons block.
Final Thoughts!
I hope the tutorial has helped you change the color of your social icons in WordPress. Let me know your thoughts in the comment section below. Also, don’t forget to share this knowledge with your friends and folks.
Recommended Reading


Leave a Reply