
A comparison table always gives valuable information in an organized way. But to show the one, you have to create a comparison table first. If you don’t know how to create a comparison table, then this post is for you.
In this post, I will show you the process to add a comparison table to your WordPress posts/pages. You can do it using a plugin or without using a plugin. After reading the post, you will be able to create one all by yourself. Let’s begin now.
Create Beautiful Tables
With Block Editor

Creating a Comparison Table Without Using a Plugin
The default WordPress Block editor comes with a built-in Table block. By using the table block, you can create a simple comparison table in no time.
Step 1: Insert The Table Block
Just go to the post editor and click on the + sign to add a new block. Then, search for ‘Table’ and insert it by clicking on it.

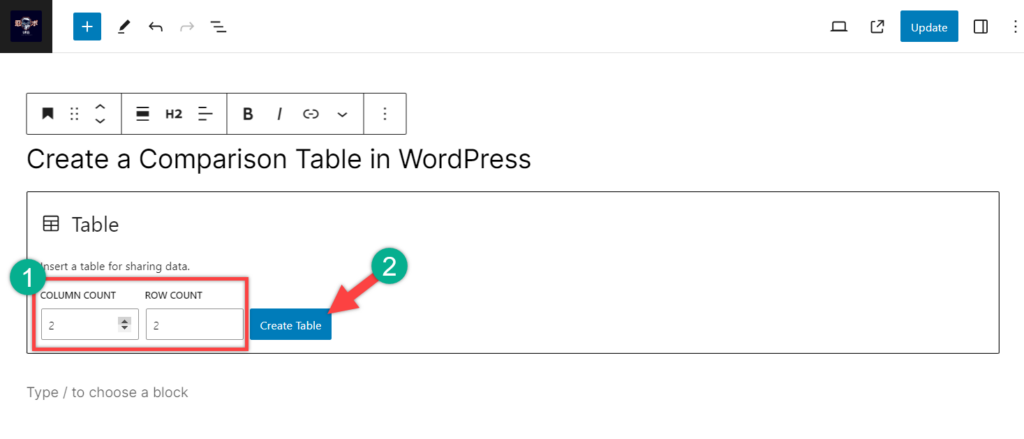
Step 2: Select the Number of Columns & Rows
Then you need to select the number of columns and rows of your comparison table. And click on the ‘Create Table’ button.
Step 3: Enter The Data and customize The Table
It will automatically generate a table for you. Now click on the table cells and enter your data.
There are also other customization options; use them as you need. You’ll find options in the right-hand side panel.
With the table block of WordPress, you can create a basic comparison table. If you want to create an advanced comparison table, you would need to use a table plugin.
Creating a Comparison Table Using a Plugin (Block Editor)
Now we will see how to create a comparison table using a Table Block plugin called Tableberg. It’s a free plugin comes with sub-blocks like image, lists, buttons.
Now let’s see how to use the Tableberg plugin to create a comparison table.
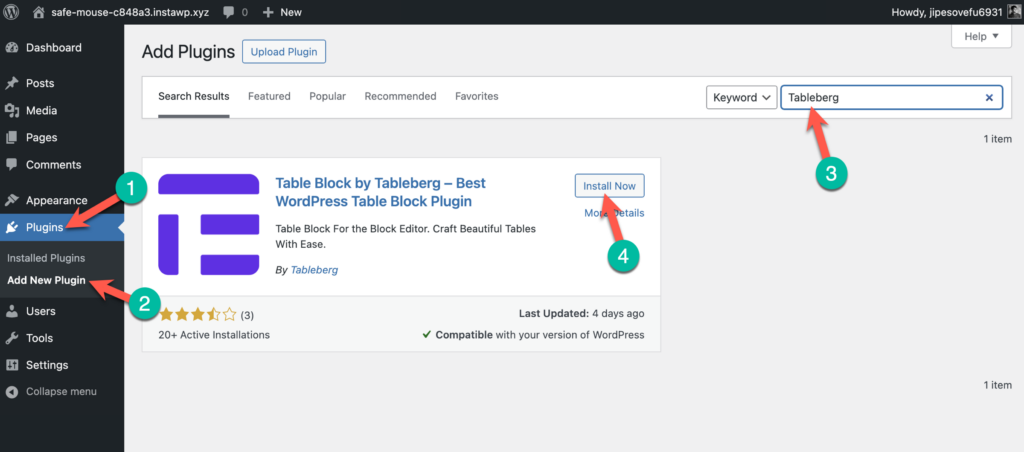
Step 1: Install the Tableberg Plugin
Go to your WordPress Dashboard and navigate to Plugins > Add New Plugin. Then search for ‘Tableberg’ and install & activate the plugin.
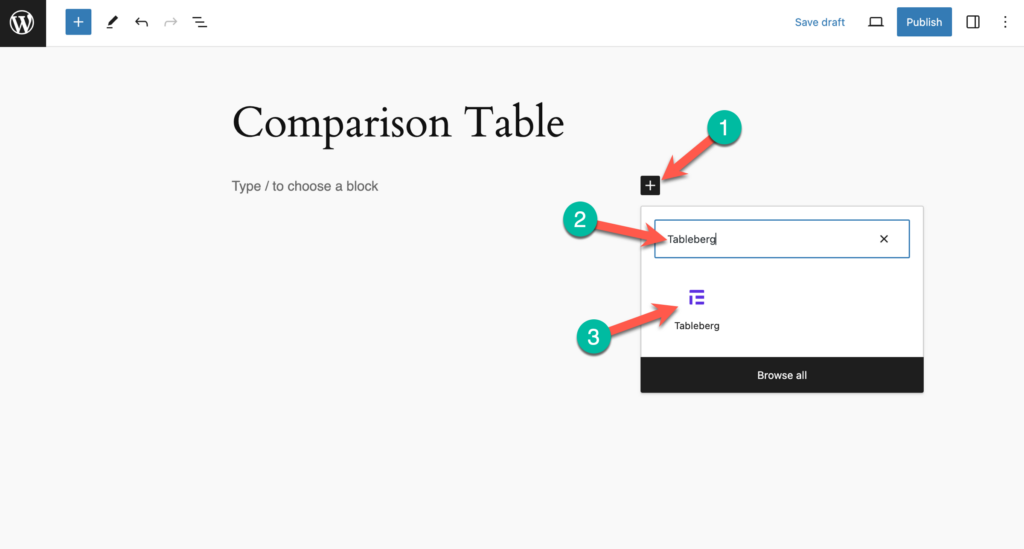
Step 2: Insert the Tableberg Block
Now go to the post/page where you want to add the comparison table. Once you’re in the Editor, click on the ‘+’ icon and search for ‘Tableberg’. Click on the block to insert it.
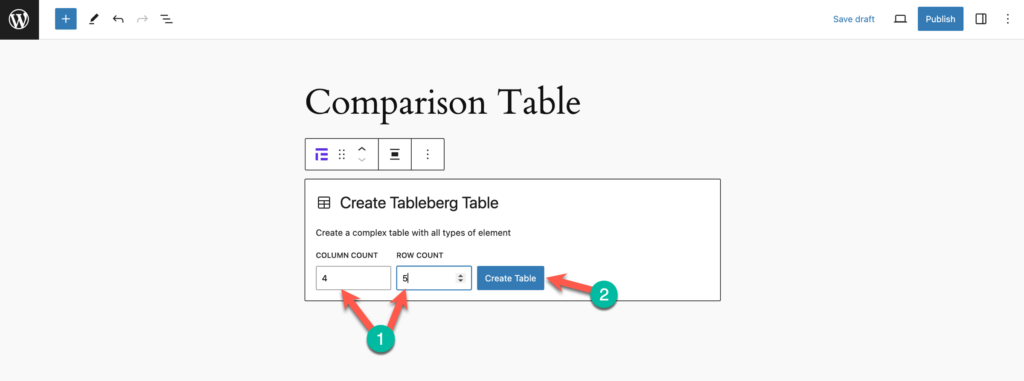
Step 3: Select the Number of Rows & Columns
Now select the number of rows and columns and click on the ‘Create Table’ button.
Step 4: Add Content to the Table
You can add text, image, list, and button to the table. Simply type / and select the block.
You can also make customizations from the right-hand side options panel.
Creating a Comparison Table Using a Plugin (Classic Editor)
There are a handful number of table plugins available in the WordPress arena. Among them, WP Table Builder WordPress comparison table plugin is the only plugin that comes with a true drag-and-drop interface. It lets you create beautiful and responsive tables in no time.
Let’s see how to create a comparison table using the WP Table Builder plugin.
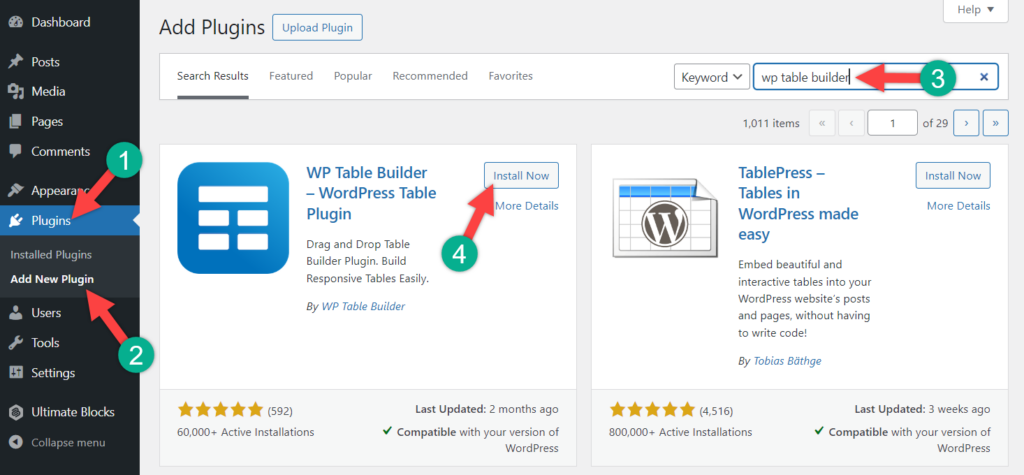
Step 1: Install and Activate The WP Table Builder Plugin
At first, you need to install and activate the plugin. Just go to your WordPress Dashboard and navigate to Plugins > Add New. Then search for ‘WP Table Builder’ and install & activate the plugin.
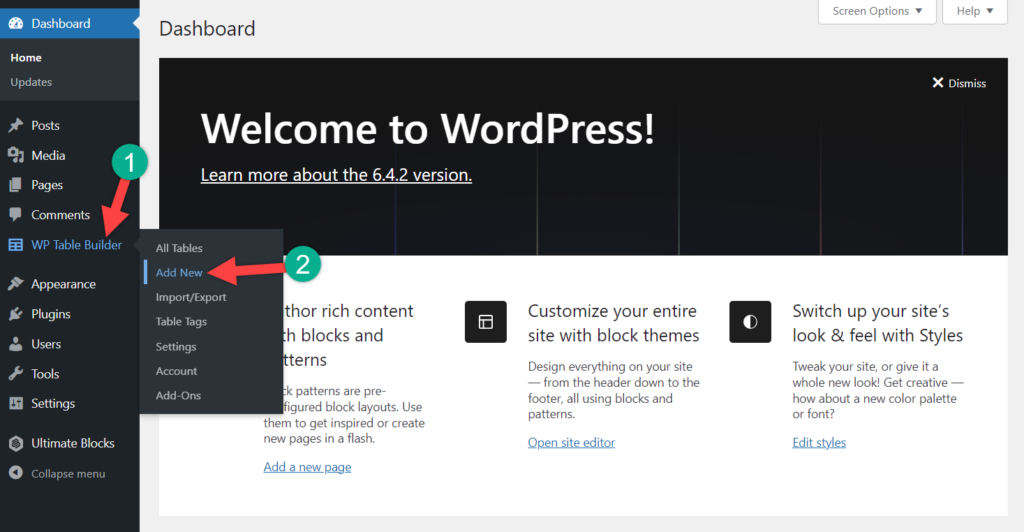
Step 2: Add a New Table
After activating the plugin, go to WordPress Dashboard > WP Table Builder > Add New.
Step 3: Select The Number of Rows & Columns
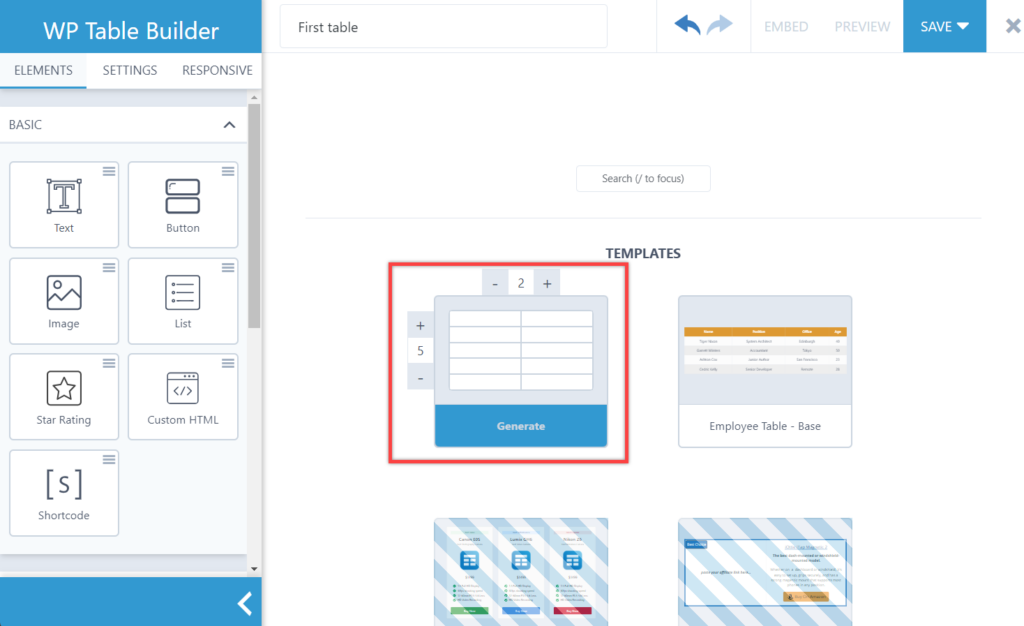
You’ll be landing on the table builder interface. Enter the table name and hit the ‘blank’ button.
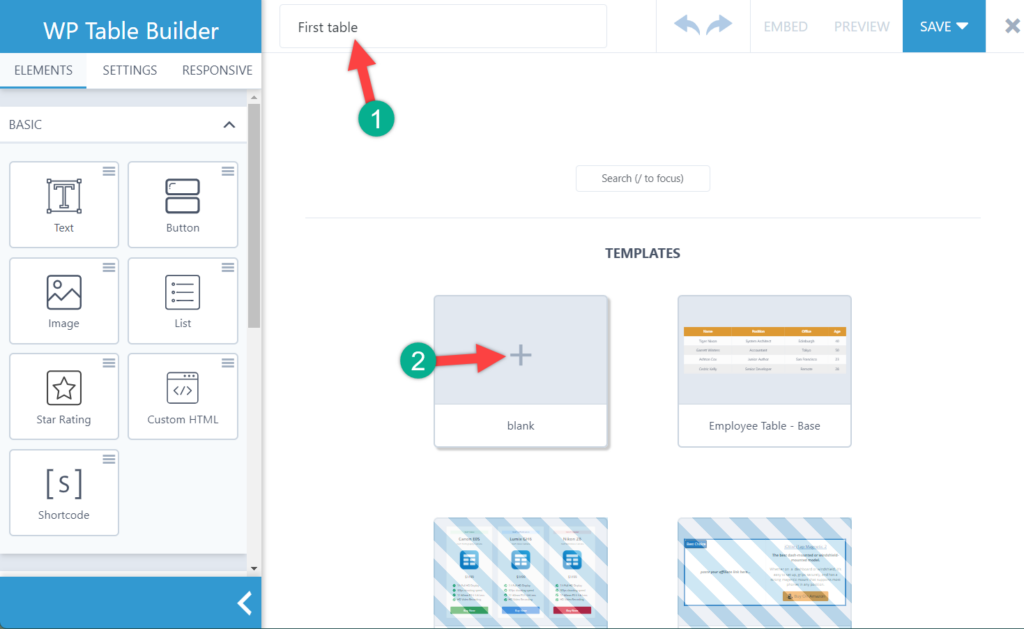
Now select the number of rows and columns of your table and click on ‘Generate’
Step 3: Enter The Data and customize The Table
The table will be generated. Now click on the table cells to add the table data.
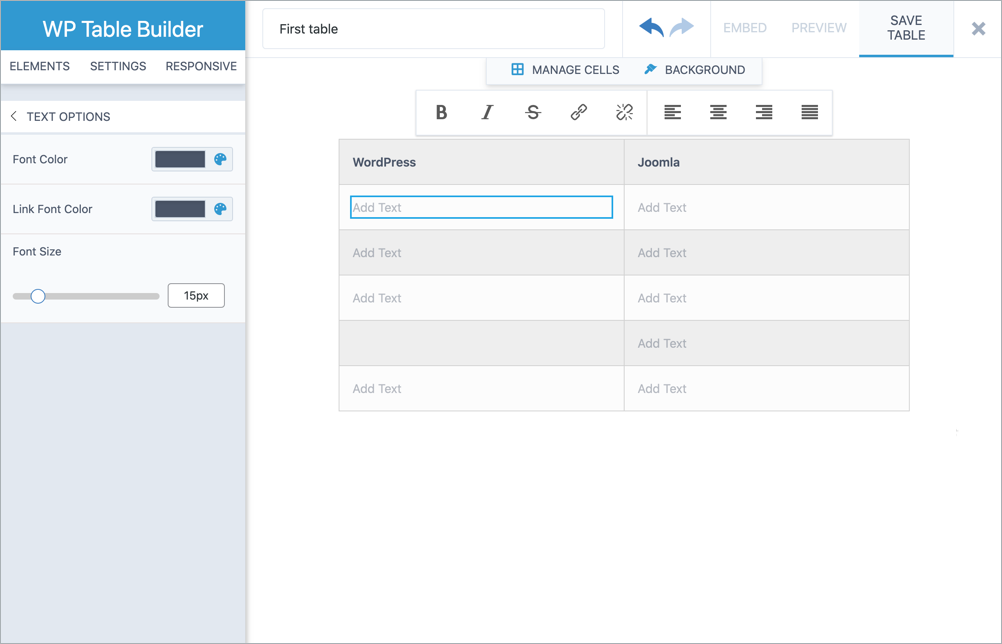
If you want to add other elements like a button or image, drag and drop it from the left-hand side.
Once you are done building the tables, click on the ‘Save Table’ button.
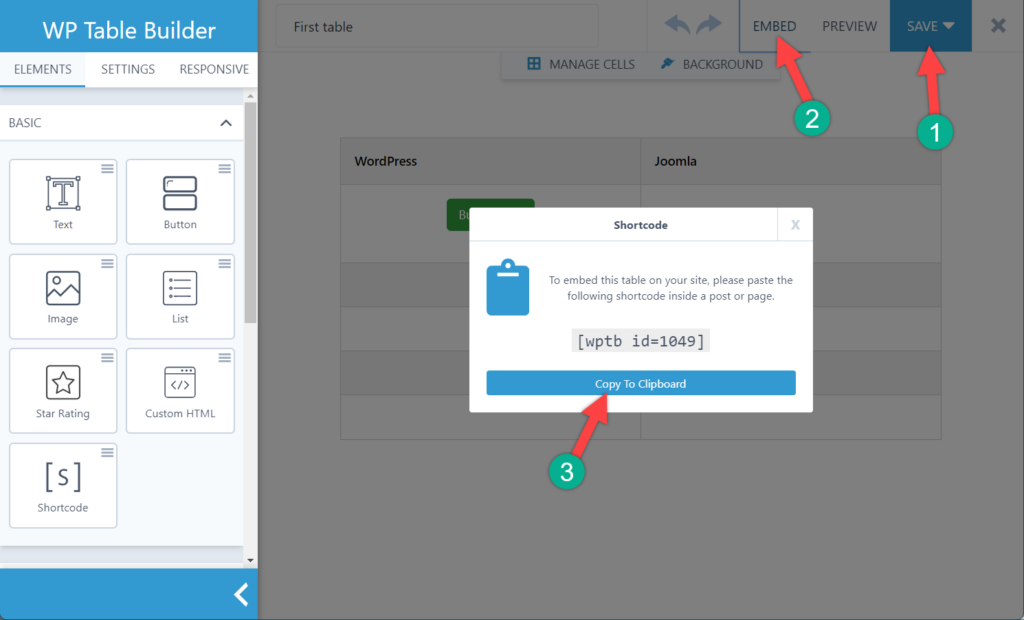
Step 4: Get Table Short Code
Now click on the ‘EMBED’ and copy the shortcode.
Step 5: Embed Table
Go to the post/page where you want to add the table. Click on the ‘Add new block’ button and search for ‘shortcode’ block.
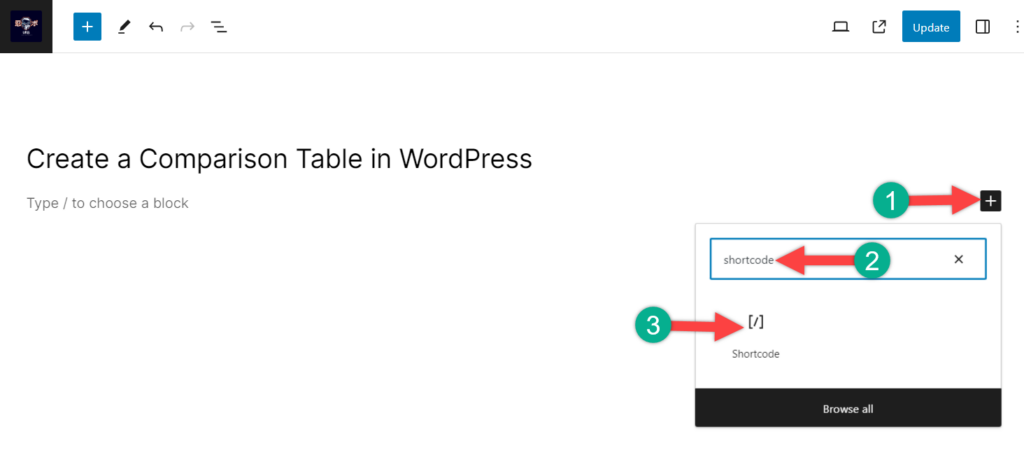
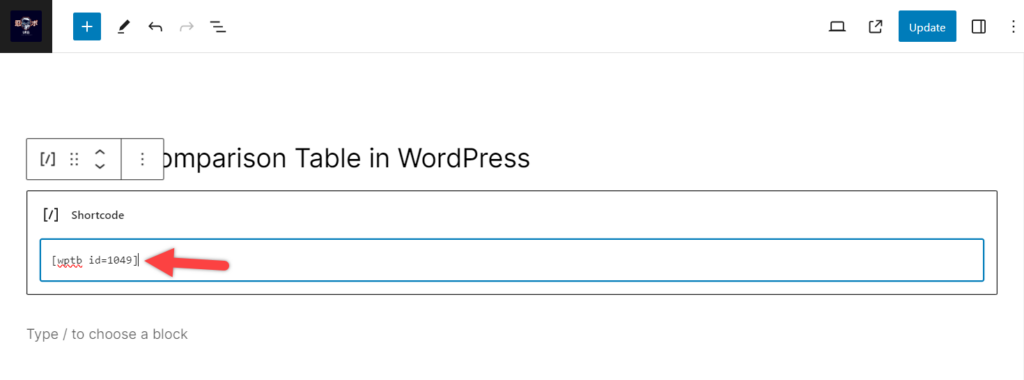
Insert the block by clicking on it. Paste the shortcode there, and your table will be added there.
Conclusion
Crafting compelling comparison tables in WordPress doesn’t have to be a daunting task. Whether you prefer the ease of plugins like WP Table Builder or embrace the flexibility of DIY coding, you can now present informative side-by-side comparisons that engage your audience and empower their decision-making. Remember, clarity, conciseness, and visual appeal are key to table triumph, so go forth and conquer the content jungle with your newfound table-building skills!
Hope this post helped you to create a comparison table in WordPress. If you have any questions regarding this, feel free to ask via comment. If you have liked the post, please consider sharing the post.
Also Read:


Leave a Reply