If you write review posts, chances are that you talk about the good and the bad side of the products/services. We call it the ‘Pros & Cons‘ of the product/service.
Having pros and cons in a review post makes it easier for visitors to understand the product/service better. And to make pros and cons list more visual, you can consider adding ‘Pros & Cons’ boxes to your WordPress posts.
The great news is that WordPress Block Editor makes it pretty easy to add side-by-side pros and cons boxes. You can use the Ultimate Blocks plugin to make it visually attractive.
Let’s get started.
Adding ‘Pros and Cons’ Box With Schema
Before diving to the tutorial, you need to know that pros and cons schema only works with the product review snippet. That means when you’re writing a review of a single product/service, you can use the pros and cons schema with the review snippet.
You can use the Review block by Ultimate Blocks plugin to add schema-enabled pros and cons box. Just follow these simple steps.
Step 1: Get Ultimate Blocks Pro
Note: Ultimate Blocks has a free version in the WordPress repository. But the ‘Pros & Cons’ Schema feature is only available in the pro version.
First, you need to install and activate the Ultimate Blocks Pro plugin. Just go to the pricing page and buy the plugin.
Once you buy the plugin, you’ll get a confirmation email with the download link and a license key. Just download the plugin and upload it to your WordPress site. Then activate the plugin and enter the license.
Learn: How to Install & Activate Ultimate Blocks Pro
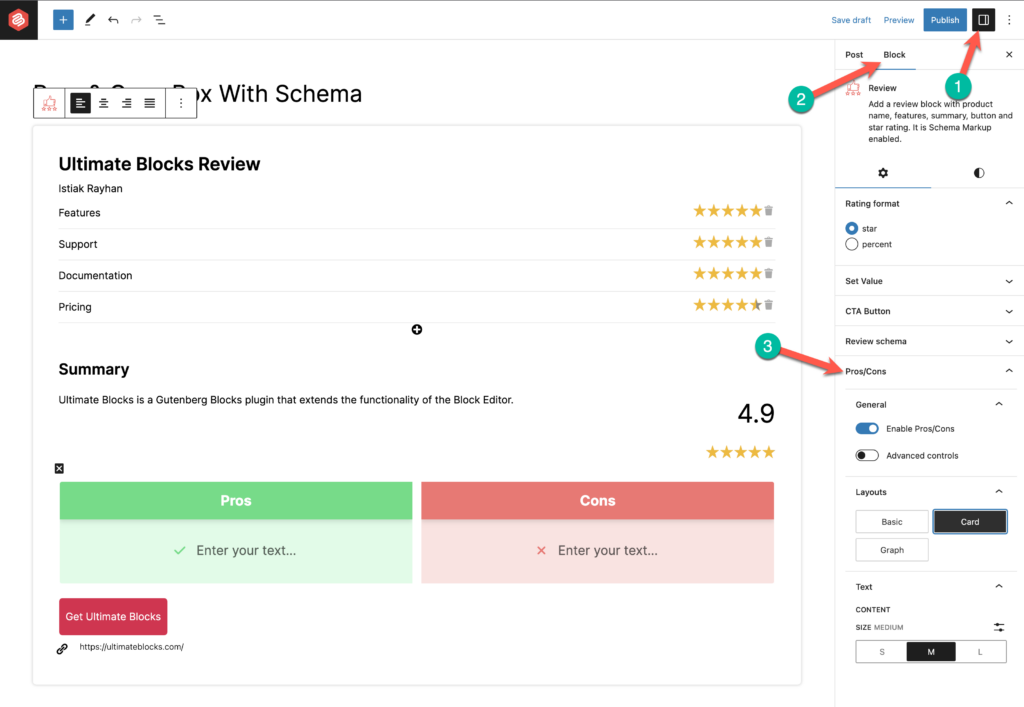
Step 2: Insert the ‘Review’ Block
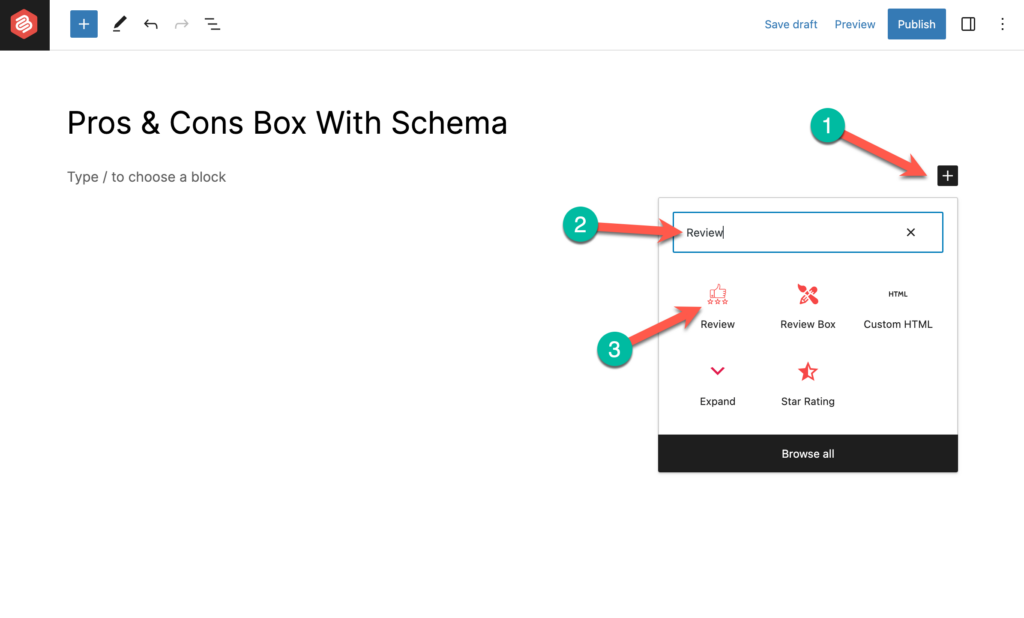
Once you have the Ultimate Blocks Pro, go to the post/page where you want to add the ‘Pros & Cons’ schema. Simply click on the + sign and search for ‘Review’ block and click to insert the block.
A review box will be added. Just enter the necessary information there.
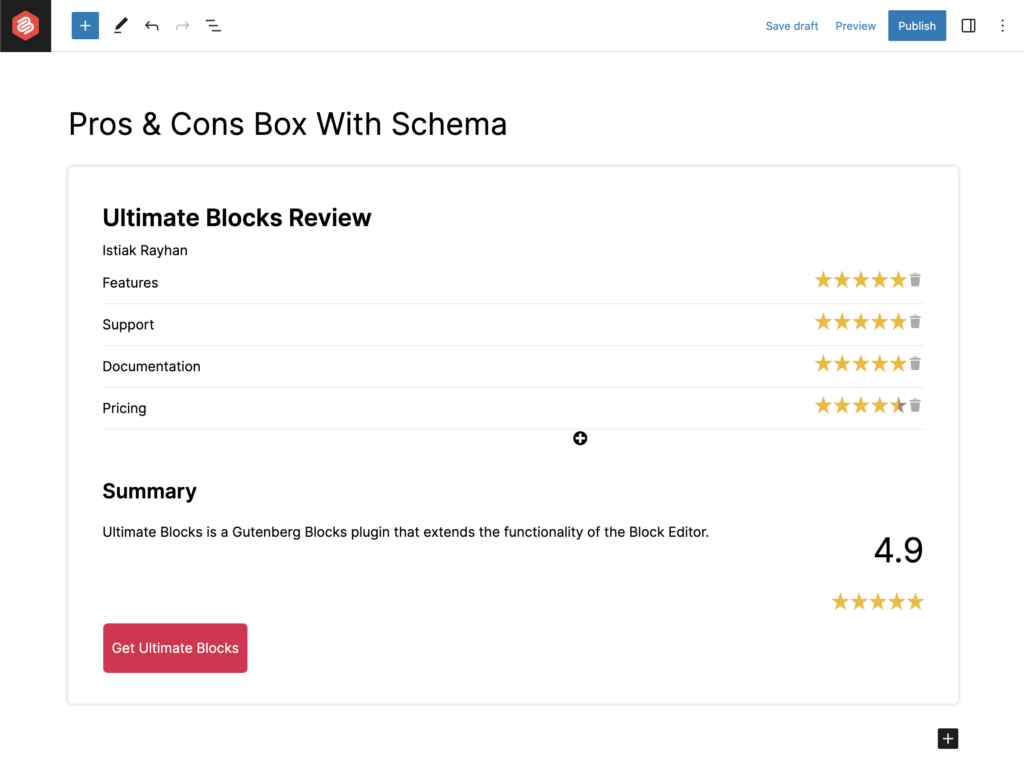
Step 3: Enable ‘Pros and Cons’
Then clicking on the settings icon and select the block. Just toggle on the ‘Enable Pros/Cons’ option and enter the pros and cons of the product/service.
Adding ‘Pros & Cons’ Box Without Schema
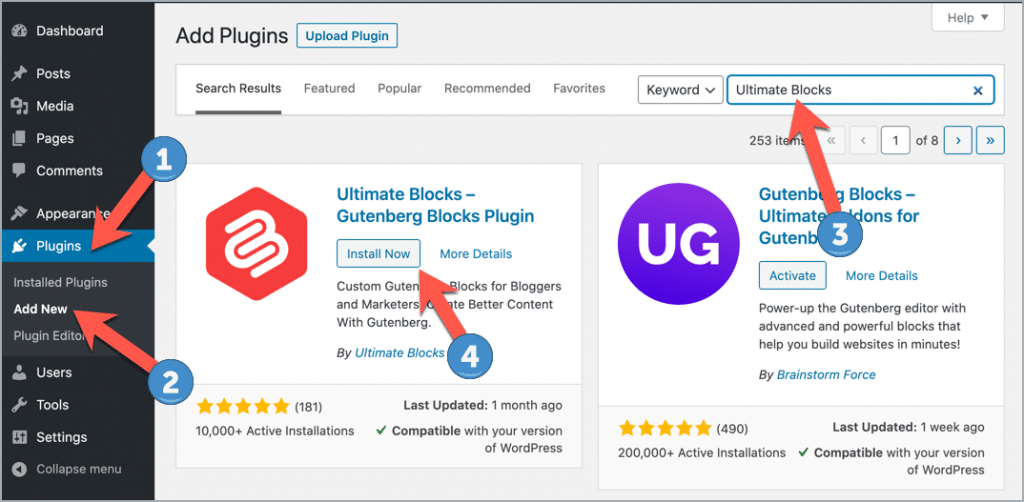
Now if you want to add pros and cons for several products/services on a single post/page, you can follow the following steps. It’s possible using the free version of Ultimate Blocks.
To install the plugin, go to your WordPress Dashboard > Plugins > Add New and search for ‘Ultimate Blocks’. Then click on ‘Install Now’ and activate the plugin.
Once you’ve activated the plugin, go to the post where you want to add the pros and cons box.
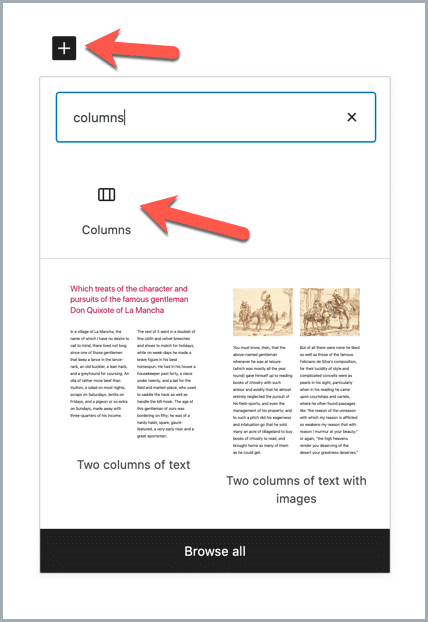
Now enter the ‘Column’ block. Just click on the (+) sign and search for the column. Then click on it.
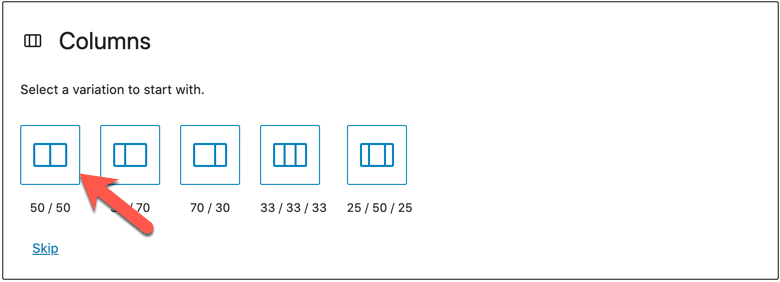
Now select two columns with a 50/50 variation.
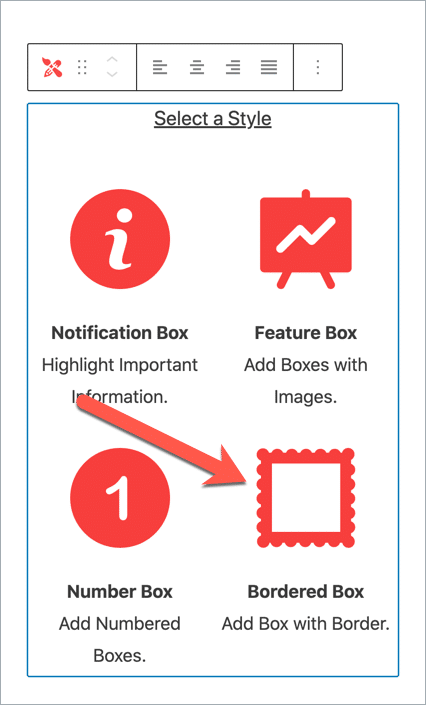
Now add the ‘Styled Box‘ block in the first column.

Then select the ‘Bordered Box’.
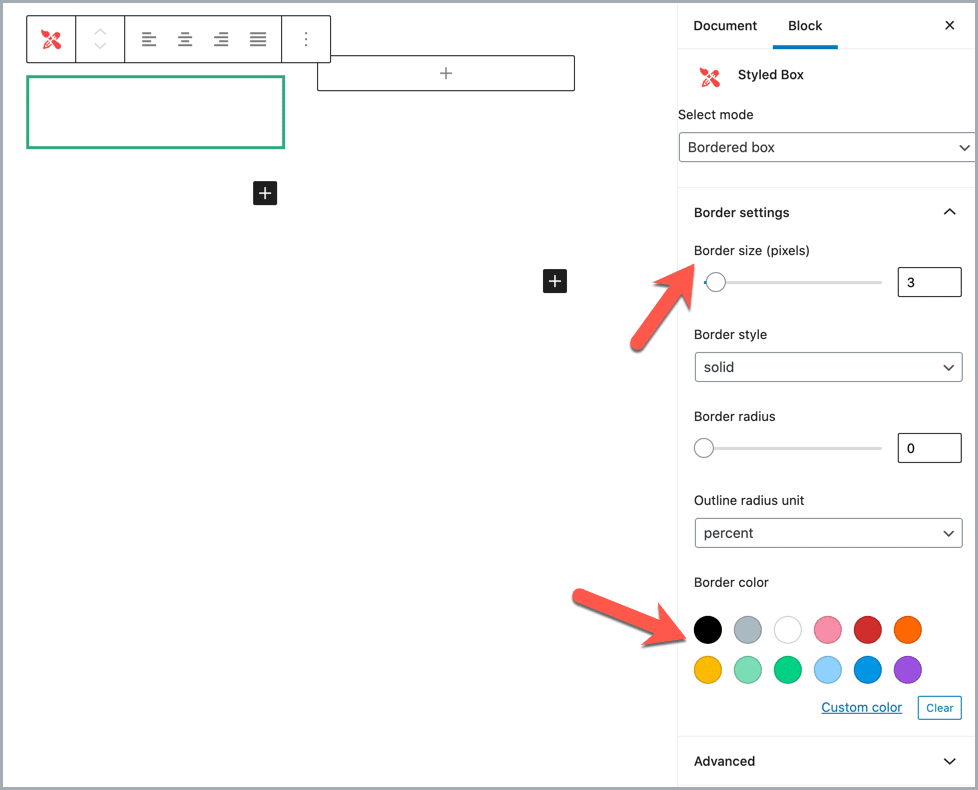
Then change the border size and color of the box.
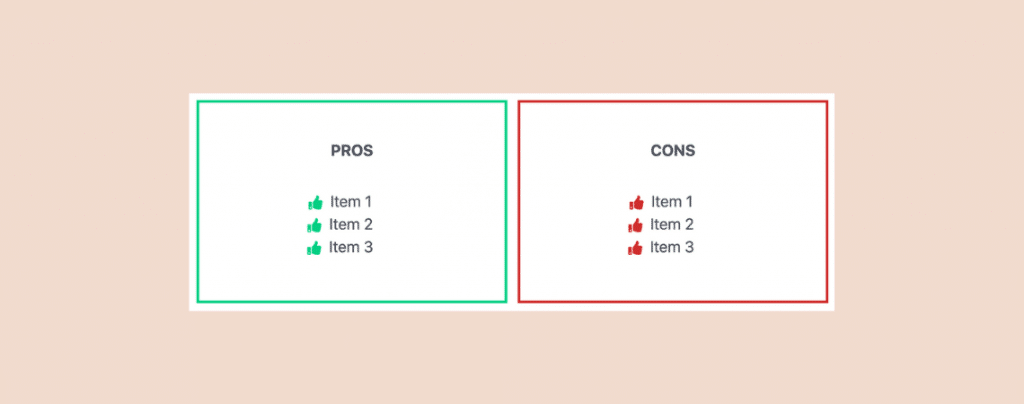
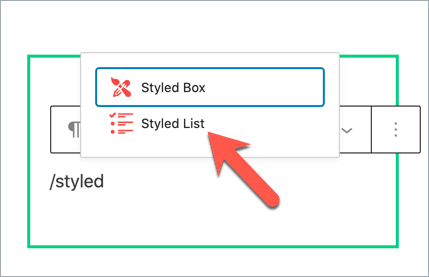
Then add the text ‘PROS’ inside the box. And then enter ‘/’ and start typing ‘Styled’. Select ‘Styled List’ block.
You can change the icon, icon color, size, and more from the right-hand options panel.
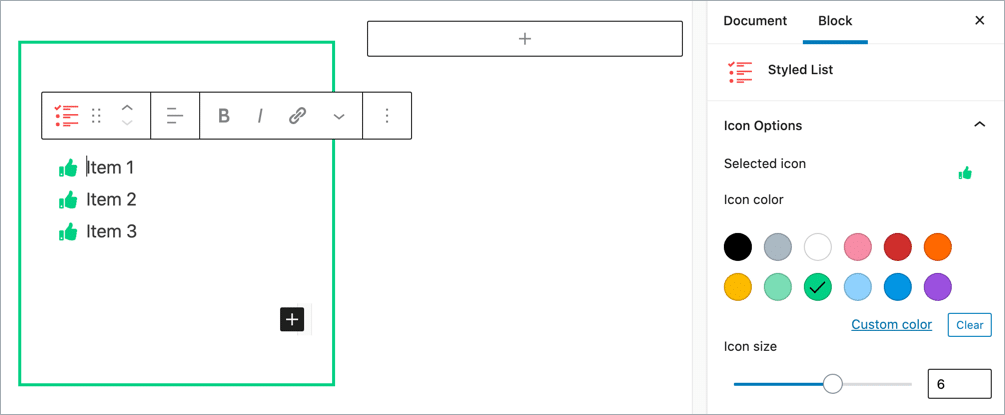
Then add pros to the list. And apply the same way to create the ‘CONS’ box on the right-hand side.
You’ll be able to create a ‘Pros & Cons’ box like this –
PROS
CONS
You can create different types of boxes by doing more customizations.
Video Tutorial
Conclusion
Hope this quick tutorial helped you to add the ‘pros and cons’ box to your WordPress posts and pages.
If you have any questions regarding this, feel free to ask us via comment. And if you’ve found the post useful, consider sharing it from your social accounts.
Also Check:


Leave a Reply