
Do you want to learn how to add a button over an image in WordPress? Well, you’ve come to the right place!
Placing buttons over images is very common and an excellent way to emphasize users to take action. You can use buttons over images as CTAs in your content.
In this article, I’ll show you how to add a button over an image in WordPress in a matter of minutes.
So, without wasting any time, let’s jump straight in.
Supercharge Your WordPress Block Editor!

Adding a Button Over an Image in WordPress
Here are the step-by-step instructions on how to add a button over an image in WordPress using the Block Editor.
Step 1: Insert the Cover Block
Go to the post or page where you want to add the button over an image. Then click on the + sign on the editor (1), search for the Cover block (2), and insert it (3).
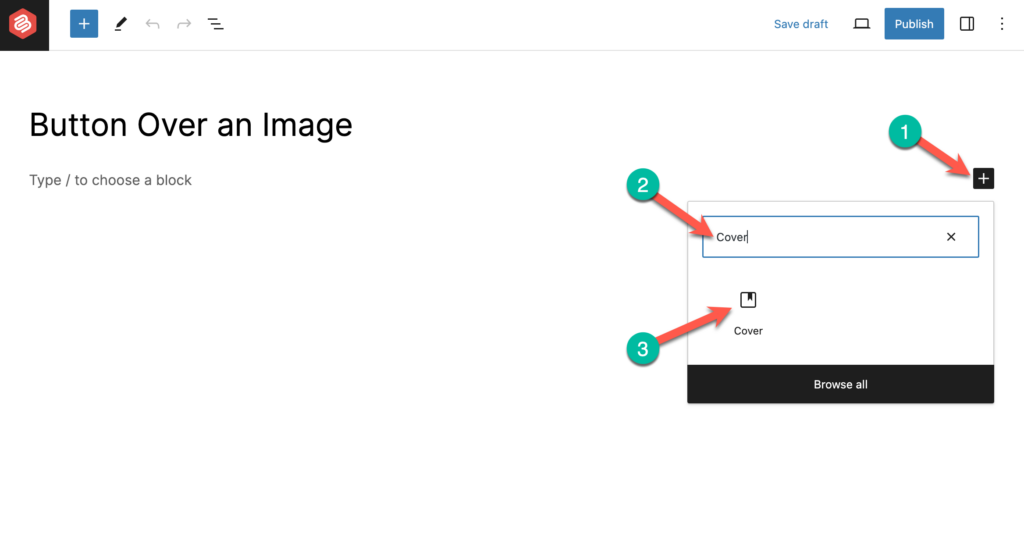
You can also add the cover block by typing ‘/cover’ and inserting the block or by clicking on the + sign at the top menu and adding the block from there. The Cover block can be found under the Media section in the blocks list.
Step 2: Upload or Add an Image from the Media Library
Once the cover block is added, you’ll now have to insert an image on the block which will act as the background image.
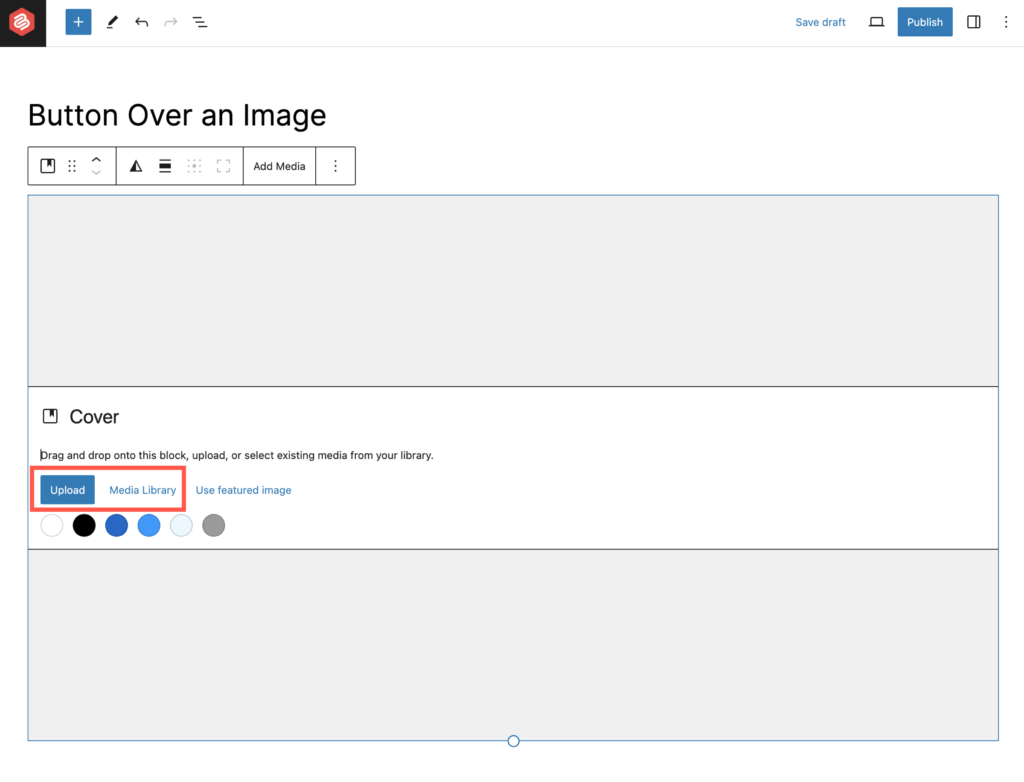
You can either upload an image or choose an image from the media library.
Step 3: Add a Title (Optional)
Now if you want you can add a title over the image. Simply start typing over the ‘Write title…’.
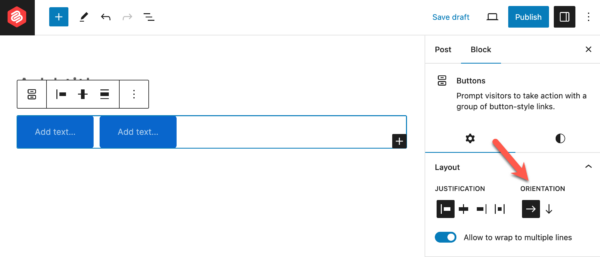
Step 4: Insert the Button Block
The final step is to add a button block on top of the cover block. Just select the Cover block and you’ll notice the + icon. Click on it and insert the button block. The button will be added on top of the image. Then align the button to center and add text & URL to the button.
Besides this, you can also edit the button shape, color, and size along with the cover image.
That’s how you can add a button over an image and make a beautiful call-to-action section that looks like this:

Supercharge Your WordPress Block Editor
Check this Video Tutorial:
Related Posts:
Conclusion
So, that’s how you can add a button over an image in WordPress in a matter of minutes. All you have to do is add a cover block and insert a button block on top of it. By doing this, you can build beautiful sections with different use cases.
If you have any questions or doubts regarding this tutorial, feel free to drop a comment below and ask your questions.
I’d be happy to help you out with any queries and doubts.


Leave a Reply