Are you looking for a simple yet effective way to enhance your WordPress posts and pages? Look no further! Buttons can be a game-changer for your website, adding a touch of visual appeal and significantly boosting your conversions.
If you’ve ever wondered how to add buttons in WordPress, you’re in the right place. In this post, I’ll walk you through the process of adding buttons to your WordPress website, giving you the flexibility to choose between two methods: using the button block or a plugin.
By the end of this post, you’ll not only master the art of effortlessly adding buttons but also have the skills to customize them to suit your website’s unique style and requirements.
So, let’s dive in and empower your WordPress site with captivating buttons that engage your visitors like never before!
Method 1: Without Using A Plugin
The default WordPress Block Editor comes with a Button block. The button block lets you add buttons to your WordPress posts/pages without using any plugins.
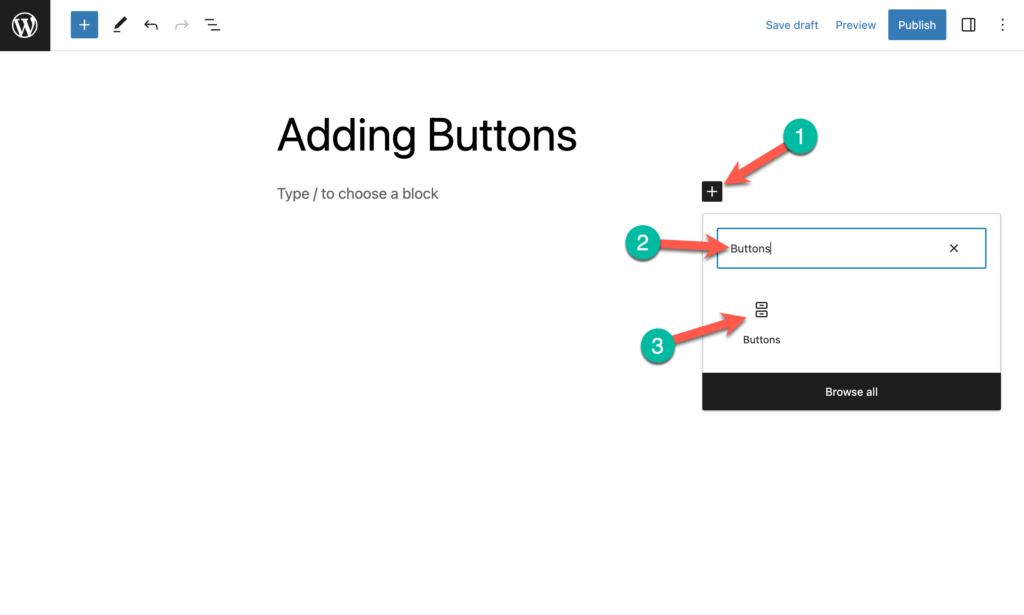
Just go to the WordPress Editor, click on the + sign (1) and search for button (2) and then click on ‘Buttons’ (3).
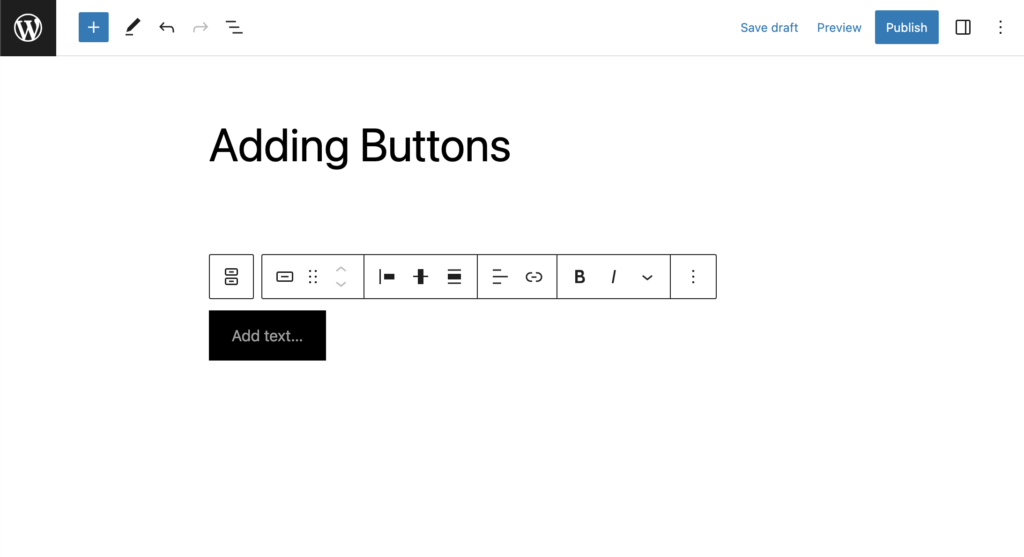
And you’ll get a button like this –
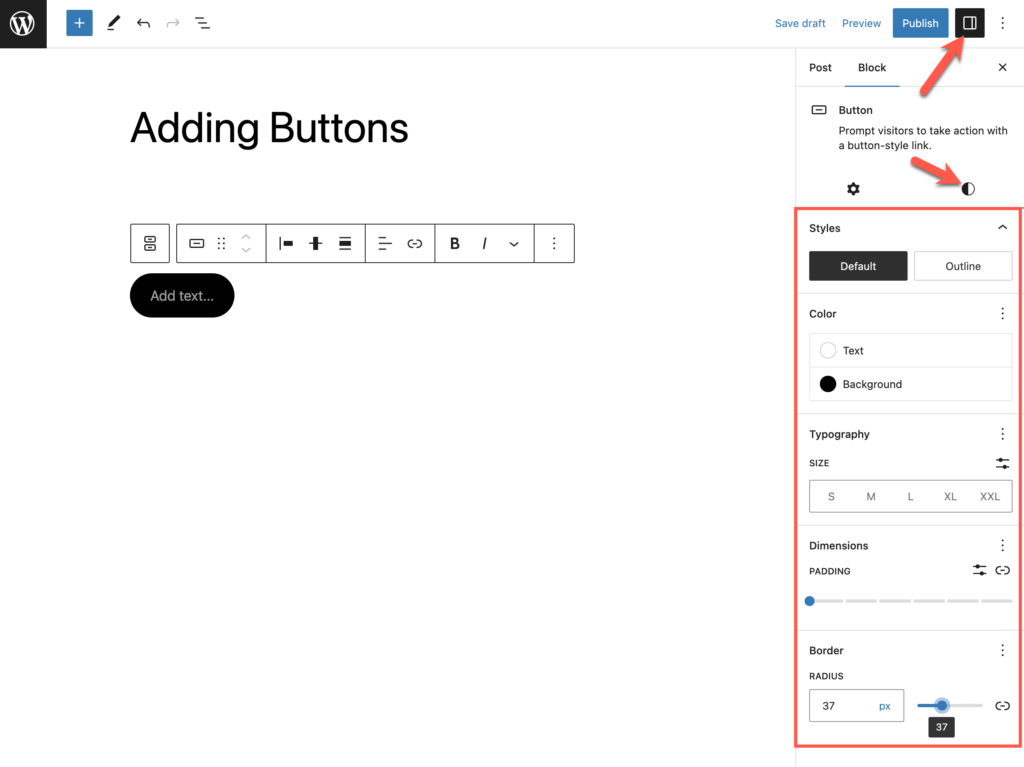
To customize the button, click on Settings (1) and select the ‘Styles’ tab (2). You can customize style, color, size, border radius, etc, from there.
To add text to the button, just click on the button and start typing your desired text.
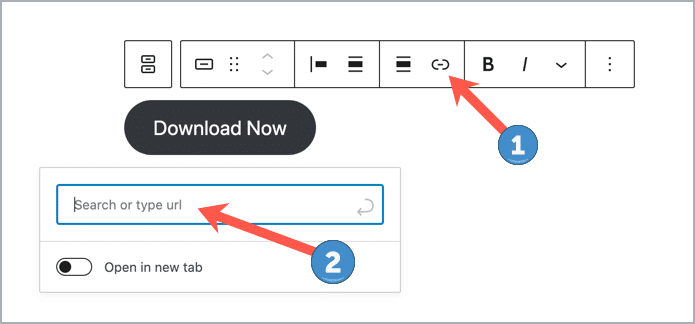
To add a link to the button, Click on the URL icon from the button toolbar (1) and enter the URL in the box (2). If you want the link to be opened in a new tab, enable ‘Open in new tab’.
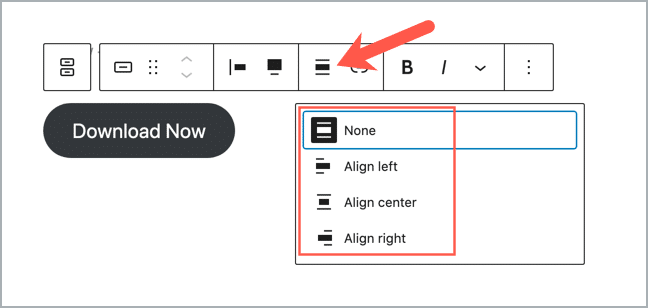
To change button alignment, Click on the Alignment icon from the toolbar and then select the alignment.
So this is how you can add a button without using a plugin.
Also Read:
Method 2: Using A Plugin
Now if you want to add more attractive buttons, you would need to use a button plugin. There are a handful number of button plugins available.
Here we will be using the Ultimate Blocks plugin. It’s a must-have plugin for the Block editor that comes with a dedicated Button (Improved) block.
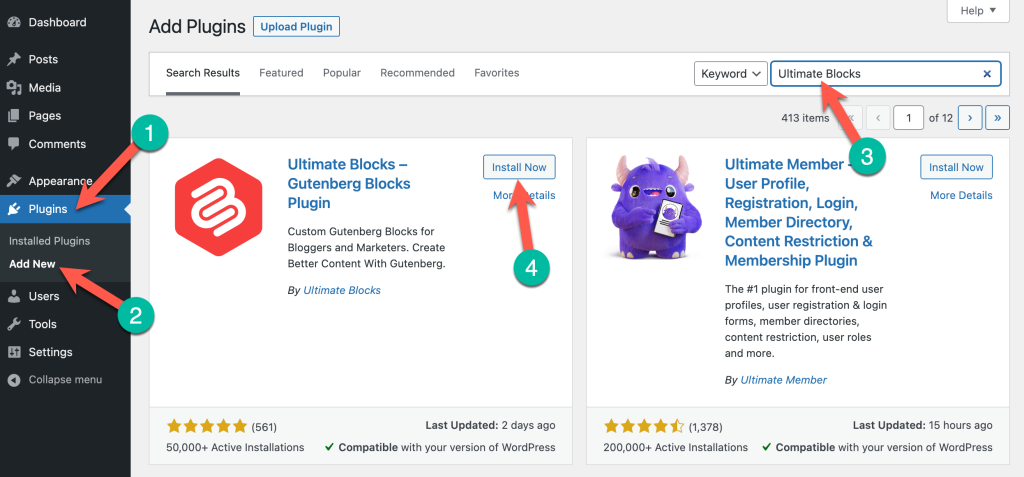
First, you need to install the plugin. Just go to WordPress Dashboard > Plugins > Add New and search for ‘Ultimate Blocks’. Click on the ‘Install Now’ button and activate the plugin.
Now go to the WordPress Editor and click on + sign to add a new block, and then search for the button and click on ‘Button (Improved) block.

Then you can configure the button from the right-hand side options panel.
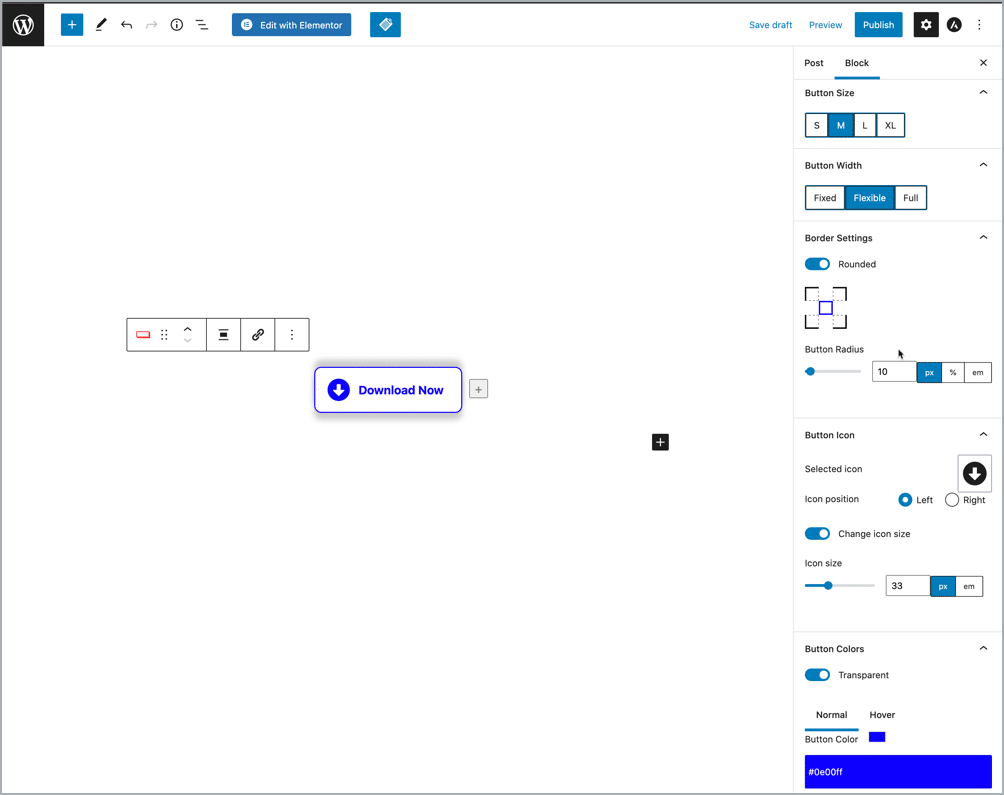
You can add more buttons by clicking on the + sign beside the button.
Related Posts on Buttons:
- How to Add Hover Effects to Buttons in WordPress
- How to Add a Download Button in WordPress
- How to Add a Click-to-Call Button in WordPress
- How to Add a ‘Buy On Amazon’ Button in WordPress
- How to Add YouTube Subscribe Button in WordPress
Conclusion
I hope you have understood both procedures and now you will be able to add your own button to your WordPress site.
If you have any questions, feel free to ask. I will be happy to answer your questions. If you liked this post, share it, and don’t forget to check more how-to guides.


Leave a Reply