
Make your post’s images full width by following our simple tutorial. Though making an image full width is simple, you might not know how to do it as a WordPress beginner.
So, we are writing an effective tutorial on how to make an image full width in WordPress easily below. Make sure to follow it thoroughly.
How to Make an Image Full Width in WordPress
To make an Image full width, you must head over to your post or page where you want to make your images full width.
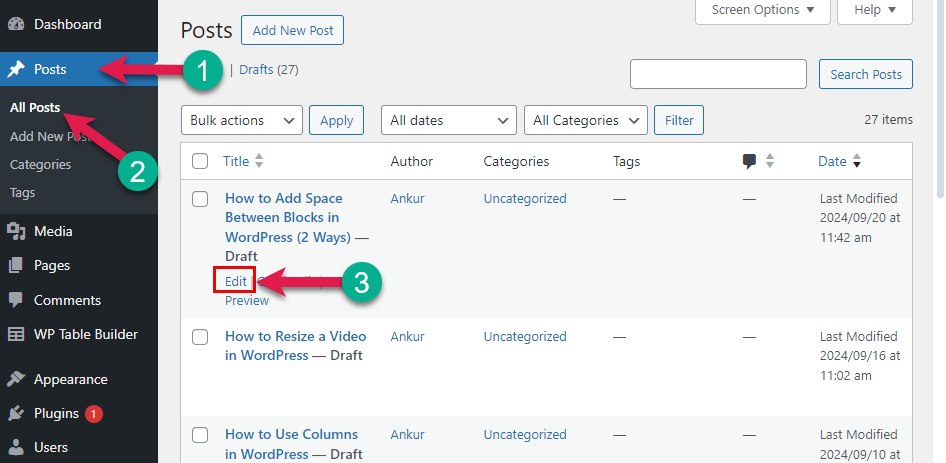
Step 1: Go To Your Post or Page
Go to your post or page where you want to make images of full width. For that, navigate to Posts/Pages(1) > All Posts (2), and edit that post or page (3).
Step 2: Select Your Image
Select the image that you want to make full width. Now select the image simply by clicking it in the editor.

Step 3: Make Your Image Full Width
Now change the “Align” to “Full width. ” And, that’s it, your image will be full width.

Here is the demo below.

Final Thoughts!
So, the above steps must be followed to make an image full-width in WordPress.
Hope you haven’t faced any difficulties following the tutorial. Share this amazing tutorial with your friends who are learning WordPress now.
You can learn more about WordPress if you follow our WordPress guidelines. We have a hooping collection of 800+ topics on WordPress tutorials. Keep following our blogs!
Related Posts


Leave a Reply