
Buttons are essential elements on any website. They are pivotal call-to-action tools, guiding visitors through your site’s journey. It’s hard to imagine a modern website without these crucial interactive elements.
But what makes a button not just functional but also visually compelling? The answer often lies in its color.
Choosing the right color for your buttons can significantly impact user engagement and website aesthetics. However, if you’re unsure how to change the button color on your WordPress site, fear not.
In this guide, I’ll walk you through the simple yet effective steps to customize your button’s color.
Supercharge Your WordPress Block Editor!

Changing the Default Button Color
In the default button of WordPress, you have the option to change the title color and background color. The color-changing process is described below.
Step 1: Access the Post or Page
Go to your WordPress dashboard, and either create a new post/page or edit an existing one where you want to change the button color.
Step 2: Add or Select the Buttons Block
If you haven’t already added a button, click on the ‘+’ icon to add a new block and search for the ‘Buttons‘ block. Insert the block by clicking on it.
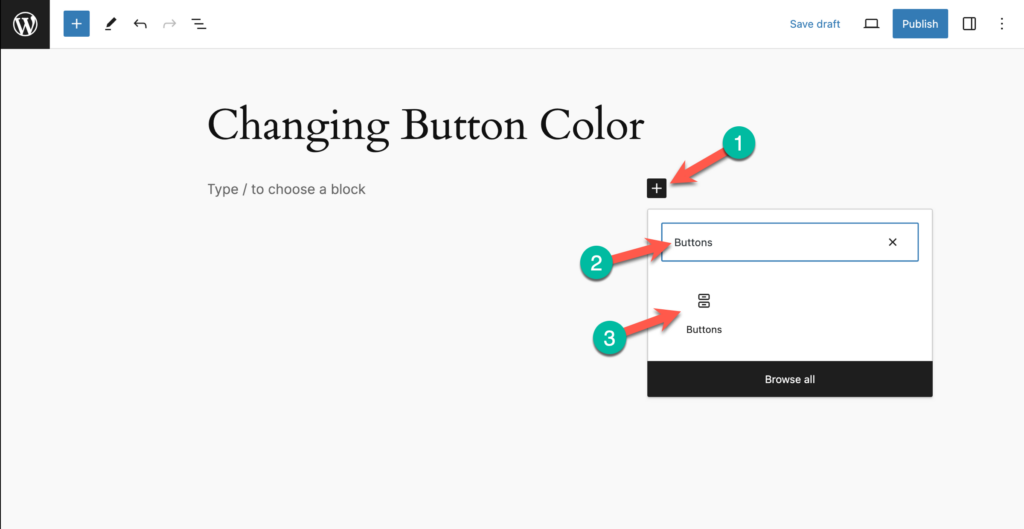
If there’s an existing button, simply click on it to select it.
Step 3: Change the Button Color
With the button block selected, click on the ‘Settings’ icon from the higher right-hand side and switch to Styles tab.
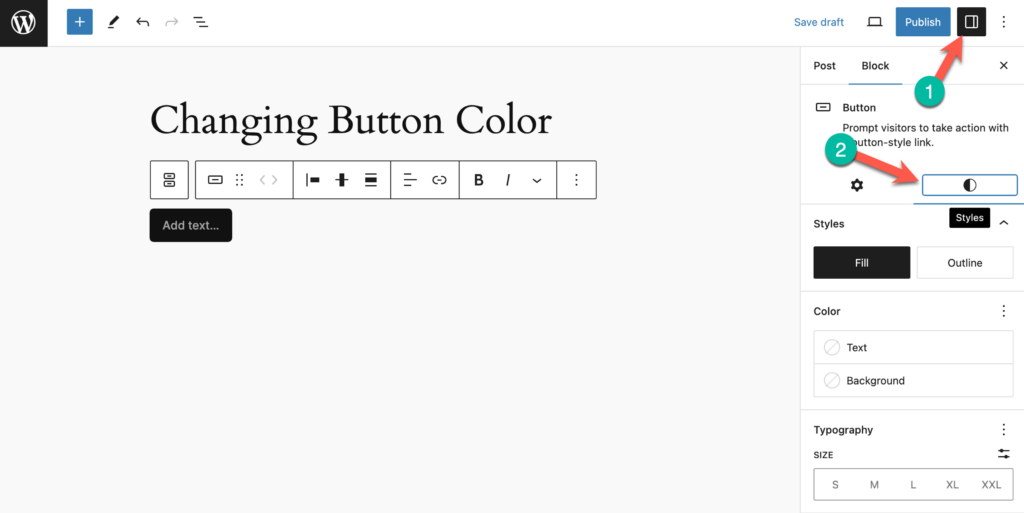
Here, you will see options to change the text color and background color of the button. Click on the color you want to apply. You can choose from predefined colors or use a custom color by clicking on the custom color link.
That’s it. This is how you can change the button color in WordPress.
Also Read:
- How to Change Button Size in WordPress
- How to Change Button Text in WordPress
- How to Add Icons to Buttons in WordPress
- How to Add Two Buttons Side by Side in WordPress
- How to Center a Button in WordPress
Changing the Color of Button (Improved) Block
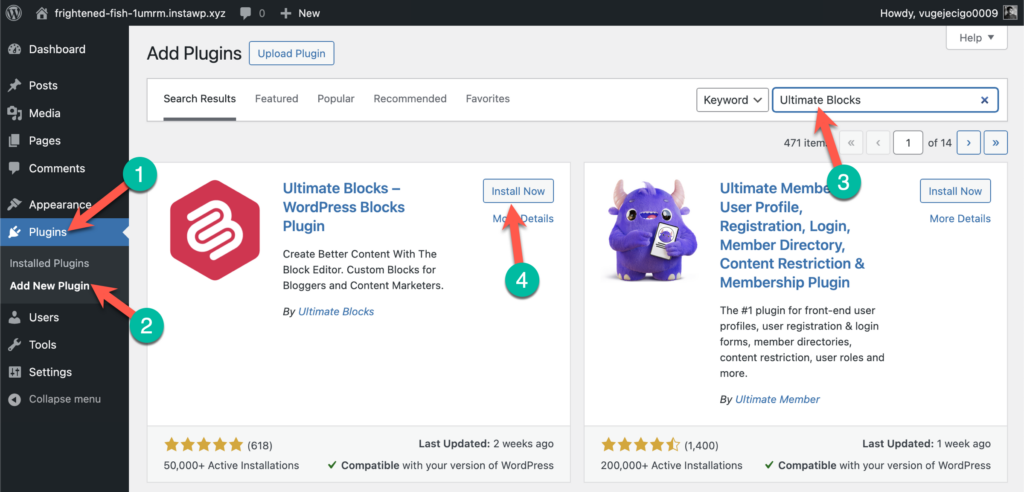
If you want more advanced options like hover color, icon, etc in your button, you can use the ‘Button (Improved)‘ block by Ultimate Blocks. It’s a free plugin. You can install it from your WordPress dashboard.
Just go to your WordPress Dashboard and navigate to Plugins > Add New and search for ‘Ultimate Blocks’. Then install and activate the plugin.
Now let’s see how to change the color of the ‘Button (Improved) block.
Step 1: Open the Post or Page Editor
Create a new post/page or edit an existing one where you want to change the button color.
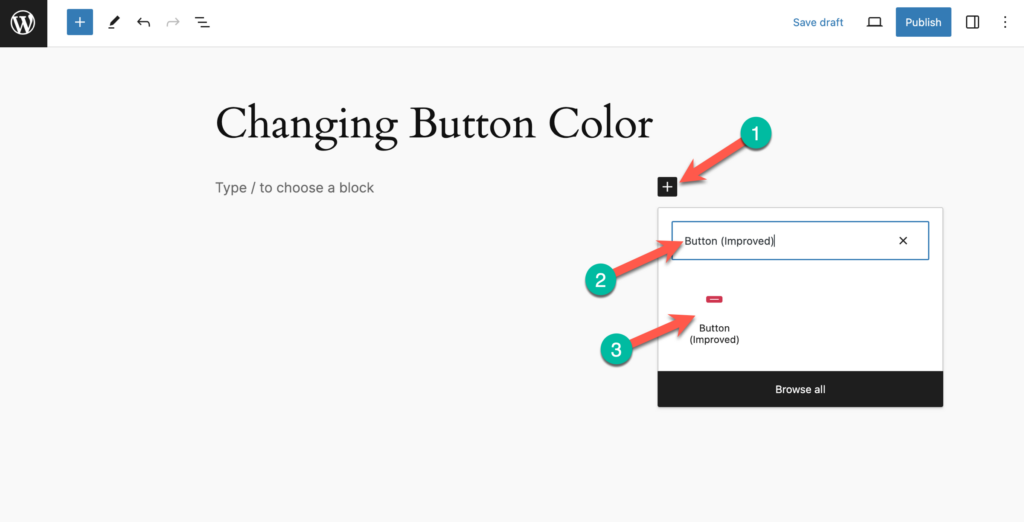
Step 2: Add the Button (Improved) Block
First, click on the ‘+’ icon to add a new block and search for ‘Button (Improved)’ and click on it.
Step 3: Change Button Color
With the ‘Button (Improved)’ block selected, click on the ‘Settings’ icon from higher right-hand side and switch to styles tab.
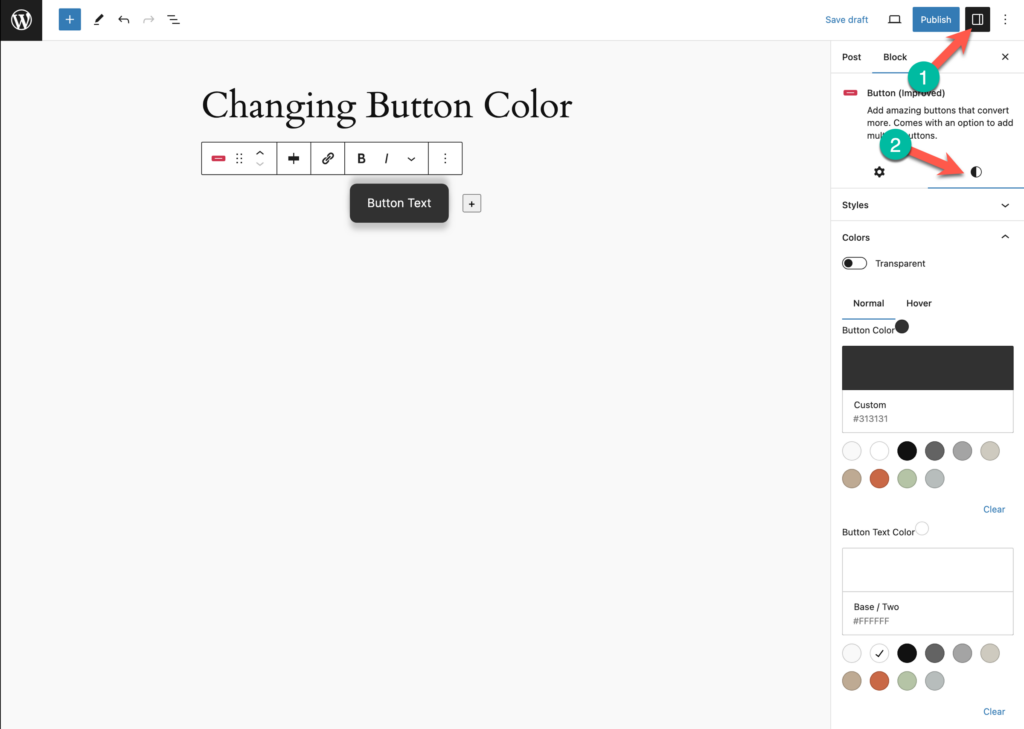
To change the color, scroll down to color and select your desired color for button and and button text.

Step 4: Change Button Hover Color (Optional)
To change the button hover color, click on the ‘Hover’ tab and select your desired hover color for button and button text.
Don’t forget to update your post/page after making the changes.
Video Tutorial
Also Read:
- How to Add Hover Effects to Buttons in WordPress
- How to Add a Button Over an Image in WordPress
- How to Add a Download Button in WordPress
- How to Add ‘Buy on Amazon’ Button in WordPress
- How to Add a Click-to-Call Button in WordPress
- How to Add YouTube Subscribe Button in WordPress
- Best Call-To-Action Button WordPress Plugins
Conclusion
With these steps in hand, changing the color of buttons on your WordPress site should now be a breeze. Remember, the right color can significantly enhance the look and feel of your website, making it more engaging for your visitors.
If you encounter any challenges or have additional questions, don’t hesitate to reach out in the comments. Moreover, if you found this guide helpful, please consider sharing it on your social account.


Leave a Reply